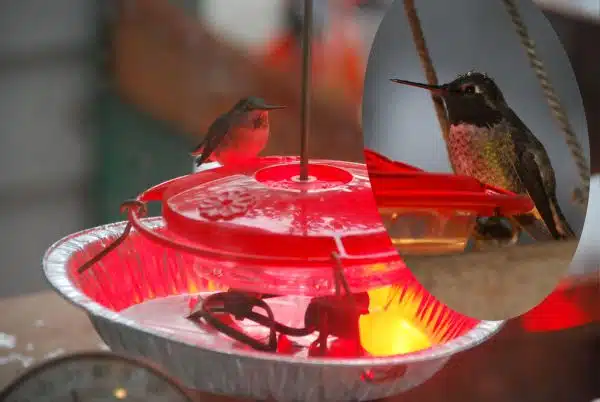
Hummingbirds are fascinating creatures that bring joy and beauty to any garden or outdoor space. As a DIY hummingbird feeder expert, I have found that making your own feeder is an excellent way to attract these delightful birds and provide them with the nourishment they need. Not only does it save money compared to buying a store-bought feeder, but it also allows for customization and creativity.
Creating a DIY hummingbird feeder may seem daunting at first, but with the right tools and materials, it can be a fun and rewarding project. In this article, I will guide you through the process of making your own hummingbird feeder step-by-step. From selecting the right materials to assembling the feeder, you will learn everything you need to know to create a beautiful and functional addition to your outdoor space that will attract hummingbirds and bring joy to all who see it.
Understanding The Benefits Of A Diy Hummingbird Feeder
A DIY hummingbird feeder is an excellent way to bring these delightful creatures into your yard. Not only do they add a touch of beauty and grace, but they also help with conservation efforts. Hummingbirds are important pollinators, and by attracting them to your garden, you’re helping to protect the wider environment.
One of the benefits of making your own hummingbird feeder is that it allows you to control the quality of materials used. By using eco-friendly options, such as glass or recycled plastic, you can reduce pollution and avoid harmful chemicals that may harm the birds. Plus, a DIY project can save you money compared to buying a pre-made feeder.
Additionally, creating your own hummingbird feeder gives you an opportunity to showcase your creativity and craft skills. You can customize the design according to your preferences and even create a unique feeder that stands out from store-bought models. Moreover, once you’ve mastered the basics of crafting a hummingbird feeder, you can make more for friends and family who share your passion for nature conservation.
To begin making your DIY hummingbird feeder project, there are several materials that are necessary for achieving success. These include items like glass jars or bottles, copper wire for hanging purposes, sugar water mixtures for nectar filling inside the jar/bottle (to attract birds), among others. Let’s delve into each of these materials in more detail in the next section!
Materials Needed For Your Hummingbird Feeder Project
Understanding the Benefits of a DIY Hummingbird Feeder is essential before starting your project. Not only does it save you money, but it also allows you to customize the feeder’s design according to your preferences. A DIY feeder decor can add a personal touch to your garden and attract hummingbirds with unique features.
Once you have decided to create your hummingbird feeder, it’s time to gather the necessary materials. Choosing the right materials is crucial in ensuring that your feeder is durable and safe for hummingbirds. Some alternative feeder materials include recycled glass bottles, mason jars, or even repurposed plastic containers. You can also use wire mesh instead of plastic or glass to make a sturdy base for the nectar.
To make sure that your feeder attracts hummingbirds effectively, choosing the right location is crucial. The ideal spot should be away from direct sunlight but still visible enough for birds to find easily. It would help if you also placed it near flowers or other food sources that hummingbirds love, such as fruit trees or flowering shrubs. Additionally, make sure that the feeder’s height is at least five feet above ground level and out of reach of predators like cats.
The key to creating an effective DIY hummingbird feeder is by using creativity while keeping in mind safety measures for both birds and humans. With these tips on DIY feeder decor and alternative materials plus proper location placement, you’re on track towards attracting numerous hummingbirds into your garden. In the next section, we will discuss how specific types of plants can help increase bird activity in your backyard without breaking the bank.
Choosing The Right Location For Your Feeder
Choosing the right location for your feeder is crucial to attracting hummingbirds. The ideal spot should be away from direct sunlight and wind, and near a source of water. Hummingbirds prefer shady areas where they can rest and feed without getting too hot. A sheltered spot near flowers or bushes is perfect since it creates a hummingbird friendly environment.
It’s important to place the feeder in an area that’s easily accessible for cleaning and refilling. It should be within reach so you can refill it regularly with fresh nectar. Placing the feeder close to a window allows you to observe these beautiful creatures up close without disturbing them, but make sure it’s not too close to avoid birds colliding with the glass.
Avoid placing your feeder near bird feeders as this attracts larger birds that may scare off hummingbirds. Also, keep in mind that hummingbirds need a clear flight path to access the feeder, so avoid placing it in areas with lots of obstacles or high traffic.
Transition into next section: Now that you’ve chosen the perfect location for your feeder, selecting the best design will further enhance your chances of attracting these amazing creatures.
Selecting The Best Design For Your Feeder
Now that you have chosen the perfect location for your hummingbird feeder, it’s time to move on to the next crucial step – selecting the best design for your feeder. The design of your feeder plays a vital role in attracting hummingbirds and providing them with a comfortable feeding experience. Therefore, you must choose a design that is best suited to their needs and preferences.
Design considerations are the first aspect to keep in mind when selecting a hummingbird feeder. A good design should be easy to use and clean while also being sturdy enough to withstand harsh weather conditions. Moreover, it should provide ample space for multiple birds to feed at once without overcrowding or causing injury to one another.
DIY modifications are also an excellent way of customizing your hummingbird feeder design according to your specific needs. For instance, you can add more feeding ports or perches if you want to attract multiple birds simultaneously. Similarly, you can modify the size and shape of your feeder based on the type of hummingbirds that frequent your area.
With these design considerations and DIY modifications in mind, you are now ready to start measuring and cutting your feeder pieces. This will help ensure that you have all the necessary materials before moving on to assembling the components of your hummingbird feeder. So let’s dive into this exciting process and create a beautiful and functional DIY hummingbird feeder!
Measuring And Cutting Your Feeder Pieces
Accurately measuring the pieces for a diy hummingbird feeder is an important first step. The materials of choice for construction of the feeder are wood and plastic, and each must be cut to specific lengths, widths and heights. A jigsaw, drill, saw, file and sandpaper are essential tools for the cutting process, while a marker, tape measure and protractor are required for measuring. With these tools and supplies, a successful hummingbird feeder can be built.
Measuring
As a diy hummingbird feeder expert, accurately measuring your feeder pieces is crucial to creating a functional and aesthetically pleasing final product. Using tools such as rulers, tape measures, and straight edges will ensure precision and consistency in your measurements.
Before beginning any cuts, double check your measurements for accuracy. Even the slightest discrepancy can result in ill-fitting pieces and a poorly constructed feeder. Take your time with this step to avoid frustration later on.
Remember that measuring is not a one-time task. As you progress through the construction process, continue to measure each piece against the others to ensure they fit together properly. With patience and attention to detail in your measurements, you’ll be well on your way to creating a beautiful diy hummingbird feeder for yourself or others to enjoy.
Cutting
Accurately measuring your feeder pieces is just the first step in creating a functional and beautiful diy hummingbird feeder. Once you have ensured that all measurements are precise, it’s time to move on to cutting your pieces. Cutting techniques are just as important as measuring and can make or break the success of your feeder construction project. Proper tools and safety precautions are essential to ensure that cuts are made cleanly and without injury.
First, gather the necessary tools for cutting your feeder pieces. This may include a saw, scissors, or a utility knife depending on the type of material you are working with. Always use sharp blades and replace them when they become dull to avoid uneven cuts or injury to yourself. Additionally, wear protective gloves and eyewear when using power tools or sharp objects.
Before making any cuts, double check your measurements for accuracy once again. It’s important to take your time during this step to avoid frustration later on should any discrepancies arise. When making cuts, follow a straight line and use a guide if necessary for precision. Take breaks often to prevent fatigue which can lead to mistakes in cutting technique. With these cutting techniques and safety precautions in mind, constructing a diy hummingbird feeder will be an enjoyable experience with impressive results.
Drilling Holes And Assembling The Feeder Base
Once you have your bottle and the copper wire, it’s time to drill holes in the feeder base. This is where the feeding ports will be attached later on. Using a power drill and a 1/16 inch drill bit, carefully make four evenly spaced holes around the base of the bottle. These holes should be about 1 inch from the bottom of the bottle and large enough to fit your feeding ports snugly.
Next, assemble the feeder base by threading one end of the copper wire through one of the drilled holes and bending it into a loop. Repeat this for each of the other three holes until you have four loops around the bottom of your bottle. These loops will hold up your feeding ports later on. Once you have all four loops in place, twist together any excess wire at the top to create a hanger for your feeder.
Decorating options for your DIY hummingbird feeder are endless! You can paint or wrap your bottle with colorful tape, add beads or charms to your wire hanger, or even use alternative materials such as mason jars or plastic bottles instead of glass. No matter what design you choose, just remember to keep it safe and functional for our feathered friends. Now that your base is assembled and decorated, it’s time to move onto adding the feeding ports!
Adding The Feeding Ports
Despite the numerous benefits of having a hummingbird feeder in your backyard, some people may feel hesitant to attract wildlife due to concerns about feeding them. However, by understanding hummingbird behavior and making DIY feeder modifications, you can ensure that you are providing a safe and healthy environment for these amazing creatures.
To create feeding ports on your DIY hummingbird feeder, start by drilling small holes into the sides of the container. These holes should be just large enough for a hummingbird’s beak to fit through. Once you have created the holes, use sandpaper or a file to smooth out any rough edges that could potentially harm the birds.
To further enhance the feeding experience for your feathered friends, consider adding perches or landing pads near the feeding ports. This will allow them to rest while they feed and also provide a vantage point for observing their behavior. By making these simple modifications, you can create a welcoming space for hummingbirds in your backyard and enjoy their beauty up close.
Transition: Now that you have added feeding ports to your DIY hummingbird feeder, it’s time to move onto creating the nectar solution.
Creating The Nectar Solution
Now that the feeding ports are in place, it’s time to move on to creating the nectar solution. This is a crucial step in making your own hummingbird feeder as it ensures that the birds have a nutritious and safe food source. One important tip to remember is to avoid using any food coloring or additives in the nectar solution as they can be harmful to hummingbirds.
To make the nectar solution, you will need granulated white sugar and water. The ratio of sugar to water should be 1:4, meaning for every cup of water, you’ll need ¼ cup of sugar. It’s important to use granulated sugar as opposed to honey or artificial sweeteners as they can cause harm to hummingbirds. Once you’ve mixed the sugar and water together, bring it to a boil and then let it cool before filling up your feeder.
There are also variations you can make with the nectar solution depending on what’s available in your area or personal preference. For example, instead of using regular white sugar, you can try using organic cane sugar or even raw sugar. Some people also add a small amount of vinegar (about 1/8 teaspoon per cup of nectar) to help prevent mold growth. Experimenting with different variations can be fun and may attract different types of hummingbirds to your feeder.
As an expert in diy hummingbird feeders, I highly recommend taking precautions when filling and hanging your feeder. Always ensure that the feeder is clean before refilling with fresh nectar solution. Additionally, choose an appropriate location for hanging your feeder; somewhere sheltered from wind and rain but still easily accessible for cleaning and refilling. Remember that while hummingbirds are beautiful creatures, they are also very delicate so handle them with care if necessary.
With these tips in mind, creating your own diy hummingbird feeder should be a fun and rewarding experience for both you and the birds who visit it. Experiment with different variations of the nectar solution and observe the different types of hummingbirds that come to feed. By providing a safe and nutritious food source, you’ll be doing your part in supporting these wonderful creatures. Now onto filling and hanging your feeder…
Filling And Hanging Your Feeder
Once you have constructed your hummingbird feeder, the next step is to fill it with nectar and hang it up in a suitable location. To start, mix together a simple nectar solution using four parts water to one part granulated sugar. Boil the mixture for two minutes, then let it cool before pouring it into your feeder. Be careful not to overfill your feeder as this can cause the nectar to leak and attract unwanted pests.
Once you have filled your feeder, choose a suitable location to hang it up. Hummingbirds prefer feeders that are placed in partial shade near trees or shrubs where they can rest between feedings. Make sure to secure your feeder with sturdy hangers or hooks that will support its weight when filled with nectar. Additionally, consider adding some decorative options such as colored ribbons or flowers around your feeder to make it more attractive to hummingbirds.
As with any birdfeeder, cleaning your hummingbird feeder is essential for keeping it safe and hygienic for birds. To clean your feeder, first empty out any leftover nectar and disassemble the parts of the feeder. Then wash each part thoroughly with hot soapy water and rinse well before reassembling and refilling with fresh nectar. Repeat this process every few days or whenever you notice mold or mildew growing inside your feeder.
Transition: Now that you know how to fill and hang your hummingbird feeder, let’s move on to some maintenance tips to keep it functioning properly for years to come.
Maintenance Tips For Your Feeder
Proper maintenance of your diy hummingbird feeder is key to ensuring that it remains a safe and inviting place for these magnificent creatures. Cleaning your feeder should be done regularly to prevent mold growth and other harmful contaminants from building up. Depending on the weather in your area, you may need to clean your feeder as often as every couple of days during the hot summer months.
Cleaning frequency is determined by a variety of factors including the type of feeder you have, how often it’s used, and the weather conditions in your area. Generally speaking, if you notice mold or any other signs of contamination in your feeder, it’s time to give it a thorough cleaning. It’s essential to use a cleaning solution that is safe for both the birds and the environment.
Preventing mold growth is essential when maintaining your hummingbird feeder. To avoid this problem, make sure that you rinse out all parts of the feeder with hot water before refilling it with fresh nectar. Also, try to place your feeder in an area where it receives some shade during the day to help reduce heat buildup which can lead to bacterial growth. By taking these simple steps, you’ll be able to keep your hummingbirds healthy and happy all season long!
As important as proper maintenance is for keeping hummingbirds healthy and happy, there are times when problems may occur with even the most well-maintained feeders. In our next section, we will discuss common issues that DIY hummingbird enthusiasts face when using their feeders and offer tips on how to troubleshoot these problems effectively.
Troubleshooting Common Feeder Problems
Clogged Feeders can be caused by debris, mold, or other foreign objects in the feeder. To help prevent this issue, it is important to clean the feeder on a regular basis and use fresh nectar. Ant Infestations can be a common problem for feeders, especially in warmer climates. To help prevent this issue, it is important to ensure that the feeder is suspended high above the ground and that a water-based ant moat is used for further protection.
Clogged Feeders
Preventing clogs in your hummingbird feeder is essential to ensure that the birds have a continuous source of food. The most common cause of clogs is the buildup of sugar crystals, mold, and debris. To prevent this from happening, it’s crucial to clean your feeder regularly. A good rule of thumb is to clean your feeder every three days during hot weather and every five days during cooler seasons.
Cleaning your feeder may seem like a daunting task at first, but it’s relatively easy once you get the hang of it. Start by disassembling the feeder and soaking all parts in warm soapy water for at least an hour. This will loosen any debris or sugar crystals that may have formed inside the feeding ports or on other parts of the feeder. After soaking, use a small brush or bottlebrush to scrub away any remaining residue before rinsing thoroughly with hot water.
If you’re still experiencing clogs despite regular cleaning, try using a solution of one part white vinegar to four parts water to soak your feeder overnight. The acidity of the vinegar will help dissolve any stubborn buildup that may be causing clogs. Rinse thoroughly with hot water before refilling with fresh nectar. By following these cleaning tips and preventing clogs, you’ll ensure that your hummingbird friends have access to a clean and reliable source of food all season long!
Ant Infestations
Preventing ant invasions is crucial when it comes to maintaining a clean and safe environment for hummingbirds. Ants are attracted to the sweet nectar in the feeder, and once they discover it, they can quickly become a nuisance and even contaminate the nectar. To avoid ant infestations, one effective method is to use an ant moat. An ant moat is a small plastic cup that hangs between the feeder and the hanger or hook. Fill it with water so that ants cannot cross over to reach the nectar.
In addition to using an ant moat, keeping your feeder clean is also essential in preventing ants from being attracted to the area. Regular cleaning of your feeder not only prevents clogs but also prevents any buildup of sugar that may attract ants. When cleaning your feeder, make sure you remove any spilled nectar around the feeder as well as on nearby surfaces.
If you still find ants climbing up your hanger or hook despite using an ant moat, try applying some petroleum jelly around them. This will create a barrier that ants cannot cross, ensuring that they stay away from your hummingbird feeder. By following these tips and tricks, you’ll be able to maintain a clean and safe environment for hummingbirds while preventing pesky ant infestations!
Attracting Hummingbirds To Your Feeder
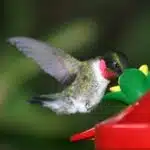
Imagine waking up one morning to the sound of hummingbird wings flapping outside your window. You quickly grab your binoculars and race to the window, only to see a magnificent Ruby-throated Hummingbird hovering at a nearby feeder. This beautiful bird is just one of many that can be attracted to your diy hummingbird feeder with a few simple tips.
One important factor in attracting hummingbirds is providing them with the right type of food. Nectar, which is essentially sugar water, is the main food source for these tiny birds. By using a mixture of four parts water to one part white granulated sugar, you can create a perfect nectar solution that mimics the natural nectar found in flowers. It’s important to avoid using honey or artificial sweeteners as they can be harmful to hummingbirds.
Another way to attract hummingbirds is by offering different types of food. While nectar should make up the majority of their diet, you can also provide protein-rich options such as fruit flies or mealworms. These options may not be necessary for all species, so it’s important to research which types of foods are appropriate for each specific species before offering them at your feeder.
By providing the right type and variety of food at your diy hummingbird feeder, you’ll be able to attract a wide range of different species. In the next section, we’ll take a closer look at some common hummingbird species and how to recognize them based on their physical characteristics and behaviors.
Recognizing Different Hummingbird Species
Identifying different species of hummingbirds is crucial for creating a suitable habitat and providing the right type of food for these tiny birds. There are over 300 species of hummingbirds, each with distinctive physical features and behaviors. The most common types found in North America include the Ruby-throated, Black-chinned, Anna’s, Rufous, Calliope, and Broad-tailed hummingbirds.
One way to identify hummingbird species is by their physical characteristics. For example, the Ruby-throated Hummingbird has a bright red throat patch on males while females have white throats. The Black-chinned Hummingbird has a purple throat patch on males while females have white throats. Additionally, each species has unique migration patterns that can help identify them during certain times of the year. For example, the Rufous Hummingbird migrates from Alaska to Mexico each year.
Understanding different species’ migration patterns can also help attract more hummingbirds to your feeder. By providing food sources at the right time in their migration cycle, you can increase your chances of attracting a variety of species to your yard. In addition to providing nectar-rich flowers and feeders filled with sugar water solution, having an understanding of what specific hummingbird species prefer can also improve your success rate.
Documenting your hummingbird sightings is an excellent way to keep track of which species visit your feeder throughout the year. By recording dates and noting any distinct physical features or behaviors observed in each bird, you can contribute valuable data to citizen science projects like eBird or Journey North. These projects help researchers better understand hummingbird populations and migration patterns while also providing resources for backyard bird enthusiasts looking to attract more visitors to their yard.
Documenting Your Hummingbird Sightings
As you sit outside observing these delicate creatures, it’s important to document your sightings. Creating a journal of your hummingbird sightings is not only a great way to track their behavior but also adds a personal touch to your bird watching experience. Imagine flipping through the pages of your journal, filled with colorful descriptions and photographs of these beautiful birds.
Capturing the perfect shot of a hummingbird can be quite challenging due to their quick movements. However, with some simple photography tips, you can increase your chances of getting that perfect shot. Firstly, use a fast shutter speed to freeze their movements. Secondly, position yourself at an angle where the sun hits the bird’s feathers for added vibrancy in your photos. Thirdly, use natural elements such as flowers or trees as a backdrop. Lastly, be patient and wait for the right moment to take the shot.
Incorporating these tips into documenting your hummingbird sightings will make for an engaging and memorable experience. With each new sighting and photograph captured, you’ll have something to look back on fondly for years to come. So grab your camera and journal and head outside for some hummingbird watching!
Sharing Your Diy Feeder Success Story
After documenting your hummingbird sightings, it’s time to share your DIY feeder success story. Sharing tips and strategies on how you made your feeder work can help others who are also interested in attracting hummingbirds to their backyard. You can do this by sharing pictures of your feeder set up, the type of nectar solution you used, and the location where you placed your feeder.
Favorite moments from watching hummingbirds at your DIY feeder can be a great conversation starter when sharing your success story. Share how excited you were when the first hummingbird came to visit or how often they now come back for a sip of nectar. Discussing unique feeder designs that worked well for you can also inspire others to try new things. You may have added a little splash of color to attract more birds or modified a traditional design with a twist.
Sharing your DIY hummingbird feeder success story is not only fulfilling but also helps other bird lovers achieve their dream of having them visit their garden too. So don’t hesitate to share and inspire! By sharing what worked for you, others will be encouraged to experiment with different designs and approaches until they find what works best in their unique situation. Keep enjoying those visits from our feathered friends!
Conclusion
In conclusion, creating a DIY hummingbird feeder is an incredibly rewarding project that provides numerous benefits. Not only does it allow you to witness the beauty of these amazing creatures up close, but it also helps sustain their population by providing them with a reliable food source. Just like building a birdhouse or planting a flower garden, constructing your own hummingbird feeder requires some basic materials and design considerations. However, with patience and dedication, anyone can create a successful and attractive feeder that will attract a variety of hummingbird species.
As an expert in DIY hummingbird feeders, I urge you to take on this project with enthusiasm and creativity. Think of your feeder as a work of art that not only serves its practical purpose but also enhances the beauty of your outdoor space. Just like the delicate wings of a hummingbird fluttering in midair, your homemade feeder can bring joy and wonder to those who observe it. So gather your tools and materials, follow the steps outlined in this guide, and let yourself be inspired by the magic of these tiny yet magnificent birds.
Image Credits
- “Hummingbird Feeder Heater” by skuarua (featured)

