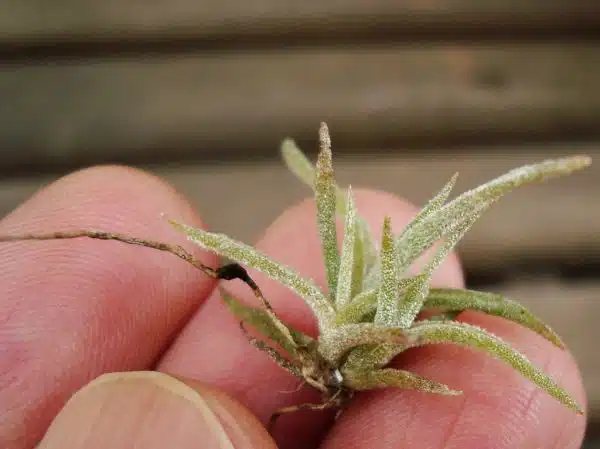
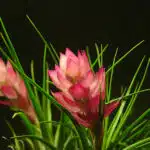
Tillandsia, commonly known as air plants, are fascinating and unique members of the Bromeliad family. These epiphytes, which grow without soil and obtain most of their nutrients from the air, have become increasingly popular among horticultural enthusiasts due to their ease of care and versatility in design. However, growing Tillandsia can be challenging for beginners as they require a specific set of environmental conditions to thrive.
To successfully cultivate Tillandsia, it is essential to understand their natural habitat, growth patterns, and nutrient requirements. This article aims to provide a comprehensive guide on how to grow Tillandsia by exploring the optimal growing conditions, watering techniques, fertilization practices and propagation methods. Whether you are an experienced gardener or just beginning your journey into the world of indoor gardening, this article will equip you with the knowledge necessary to cultivate healthy and thriving Tillandsia specimens.
Understanding Tillandsia And Their Unique Characteristics
Tillandsia, commonly known as air plants, are epiphytes that belong to the Bromeliaceae family. These unique plants are native to South America, Central America, and parts of Mexico. Tillandsia care is relatively easy compared to other houseplants. They require minimal watering and can thrive in various environments.
The anatomy of Tillandsia is also fascinating. Unlike traditional plants that grow roots in soil, air plants have specialized leaves called trichomes that absorb water and nutrients from the air. Tillandsia also has a unique way of reproducing; they produce offsets or pups around the base of the plant that can be removed and grown into new plants.
To ensure healthy growth for Tillandsia, it is crucial to choose the right environment for these air plants. Factors such as humidity levels, light exposure, and temperature play a vital role in their growth. In the next section, we will discuss how to create an ideal environment for your Tillandsia by providing optimal conditions that mimic their natural habitat.
Choosing The Right Environment For Your Air Plants
Despite their unique characteristics, tillandsias are relatively easy to care for and can thrive in a variety of environments. However, some may be hesitant to take on the task of caring for air plants due to concerns about their specific needs. Fear not, as with just a few considerations, you can create an optimal environment for your tillandsias to grow and flourish.
One key factor in providing the right environment for your air plants is humidity levels. Tillandsias come from humid tropical regions, so they require higher humidity than what is typically found inside most homes. Ideally, the relative humidity should be around 50-60%. To achieve this, consider using a humidifier or placing your air plants near a tray of water or damp pebbles. Misting your tillandsias regularly can also help increase humidity levels.
Another important consideration when it comes to growing tillandsias is lighting requirements. These plants prefer bright but indirect light, making them perfect for placement near windows with filtered sunlight or under artificial lights such as fluorescent bulbs. Be mindful not to place them in direct sunlight as this can scorch their delicate leaves. If you notice that your tillandsia’s leaves are turning brown or black at the tips, it may be receiving too much light.
To provide optimal growing conditions for your air plants, keep these factors in mind:
- Humidity levels should be around 50-60%
- Tillandsias prefer bright but indirect light
- Avoid placing them in direct sunlight
In conclusion, understanding and providing the right environment for your tillandsias doesn’t have to be complicated or intimidating. By ensuring proper humidity levels and lighting requirements are met, you will set your air plants up for success and optimal growth. In the subsequent section, we’ll explore watering techniques that will further support healthy tillandsia growth.
Watering Techniques For Optimal Growth
- Tillandsia (air plants) require frequent watering to ensure their optimal growth, with a recommended frequency of once per week.
- The amount of water used should be sufficient enough to saturate the plant’s foliage, but not so much that it puddles at the base of the plant.
- Generally, a light misting is sufficient, but soaking the plant in a shallow bowl of water for 5-15 minutes may be needed in more humid climates.
- Water quality is also an important factor to consider when watering tillandsia plants, as many municipalities use water that is high in salts, minerals, and other impurities.
- While rainwater is the ideal choice for watering, distilled and deionized water may be used as an alternative for those who do not have access to rainwater.
- Finally, it is important to note that water that has been treated with chlorine or other chemicals should be avoided as it can be detrimental to the health of the tillandsia.
Frequency Of Watering
Watering frequency is a crucial aspect of growing tillandsia plants successfully. The frequency of watering depends on various factors, such as the environment, humidity level, and air circulation. These plants absorb water through their leaves, which means that they don’t need to be planted in soil. However, overwatering can lead to root rot and other problems that can cause the plant’s death.
It is essential to understand the signs of overwatering before watering your air plants. Some common signs include brown or black tips on the leaves, mushy stems or roots, and a foul odor coming from the plant. If you notice any of these signs, it’s best to hold off on watering until the roots have dried out completely. On average, most species of tillandsia require watering once a week, but this can vary depending on the environment.
To determine when your tillandsia needs water, pay attention to its appearance and weight. If the leaves appear dull or wrinkled and feel lighter than usual, it’s time to water them. To water your air plant properly, fill a container with room-temperature water and soak the plant for 30 minutes. After soaking, gently shake off any excess water and place it in a well-ventilated area to dry completely before returning it to its display location. By following these watering techniques for optimal growth, you can ensure your tillandsia thrives for years to come without succumbing to overwatering issues.
Amount Of Water
Watering frequency is crucial for the optimal growth of tillandsia plants. However, it’s equally important to understand the amount of water required for these air plants. Overwatering can lead to root rot, while underwatering can cause dehydration and damage to the plant. Therefore, it’s essential to strike a balance between the two.
The amount of water required by tillandsia depends not only on environmental factors but also on the quality of water used for watering. The quality of water can affect the plant’s growth, as some minerals found in tap water can harm air plants. It’s recommended that you use filtered or distilled water when watering your tillandsia to avoid any potential issues.
To determine the amount of water required by your tillandsia, pay attention to its size and type. Larger species require more water than smaller ones, and those with thicker leaves may need less frequent watering than those with thinner leaves. Additionally, plants grown in warmer or drier environments may require more frequent watering compared to those grown in cooler or humid conditions. By understanding these factors and using high-quality filtered or distilled water, you can ensure your tillandsia receives the right amount of water for optimal growth and health.
Water Quality
Watering techniques play a vital role in the growth and development of tillandsia plants. However, one crucial aspect that is often overlooked is the quality of water used for watering these air plants. As a tillandsia horticulturalist, it’s essential to understand how water quality can impact the plant’s overall health and growth.
The pH levels of water can affect the absorption of nutrients by tillandsia plants. Some minerals found in tap water can also lead to mineral buildup, which can harm air plants over time. Therefore, it’s recommended that you use filtered or distilled water with a pH level between 5.5 and 6.5 when watering your tillandsia.
Preventing mineral buildup is another important factor to consider when using tap water for watering your air plants. To avoid this, you can soak your tillandsia in a mixture of filtered or distilled water and fertilizer every few weeks, which will help flush out excess minerals and ensure optimal growth. By paying attention to the quality of water used for watering your tillandsia and incorporating proper techniques like soaking in fertilizer solution, you can maintain healthy and robust air plants for years to come.
Fertilizing Your Tillandsia For Maximum Health
Fertilizing your Tillandsia is crucial for maximum health and growth. When it comes to choosing the right fertilizer, there are two main types: organic and synthetic. Organic fertilizers are derived from natural sources such as compost, animal waste, or bone meal, while synthetic fertilizers are chemically manufactured. Both can be effective, but it ultimately depends on your personal preference and the needs of your plant.
When deciding how often to fertilize your Tillandsia, it’s important to consider its natural habitat. In their native environments, air plants receive nutrients from debris that accumulates around them. Therefore, they don’t need to be fertilized as frequently as other plants. Generally, once a month is sufficient for most species. However, if you notice slow growth or discoloration in your plant’s foliage, then you may want to increase the frequency.
While fertilizing is essential for maintaining healthy Tillandsia plants, it’s important not to overdo it. Too much fertilizer can actually harm your plant by causing a buildup of salts in the soil or on the leaves. Always follow the instructions on the packaging carefully and dilute the fertilizer properly before applying it to your plant. With proper care and attention to fertilization needs, you’ll be rewarded with a thriving collection of beautiful air plants.
As mentioned earlier, one way to expand your collection of Tillandsia is through propagation methods. By using pups (baby air plants) that grow off the mother plant or dividing clumps of multiple plants into separate individuals, you can create new specimens without having to purchase additional ones. In the next section, we will explore different techniques for propagating Tillandsia and how to care for them during this process.
Propagation Methods For Expanding Your Collection
As a tillandsia (air plant) horticulturalist, it is imperative to know the propagation techniques for expanding your air plant collection. Propagation is essential for maintaining the health and vitality of your plants. There are three main methods of propagation: division, offsets, and seeds.
Division involves separating the mother plant into smaller sections, each with their own root system. This method is best used for larger species of tillandsias that have already formed a clump. Offsets are miniature versions of the parent plant that grow at the base of the mother plant. These can be removed when they are about 1/3 to 1/2 the size of the parent plant and have their own roots. Seeds can also be used to propagate air plants; however, it takes longer for them to mature into adult plants.
When considering air plant care in relation to propagation, it is important to keep in mind that each method has its own specific requirements. For example, division requires sharp, sterile tools and careful handling to avoid damaging both the mother and offspring plants. Offsets should be gently removed from the parent plant with a sharp blade or scissors while ensuring that they have adequate roots attached. Seeds require special attention to germination conditions such as light levels and moisture content.
In summary, mastering propagation techniques is an essential part of air plant care and will help you expand your collection with healthy and thriving plants. Whether you choose division, offsets or seeds as your preferred method, ensure that you follow proper procedures to give your tillandsias the best chance for success. In our next section, we will explore common mistakes to avoid when growing tillandsia so that you can continue on your journey towards becoming a successful air plant enthusiast.
Common Mistakes To Avoid When Growing Tillandsia
Overwatering can cause root rot and lead to nutrient deficiencies, so it is important to allow the soil to dry between waterings. Underwatering can cause the plant to become dry and shriveled, so it is important to water at least once a week. Poor lighting can prevent the plant from photosynthesizing properly, so it is important to provide adequate light. Lack of airflow can cause the plant to become susceptible to fungal and bacterial diseases, so it is important to ensure proper ventilation.
Overwatering
Overwatering is one of the most common mistakes made when growing Tillandsia. As a tillandsia horticulturalist, I have seen many people misinterpret our plant’s water needs, causing severe damage or death to their air plants. Signs of overwatering include yellow or brown leaves, root rot, and a mushy base. Prevention is key to avoid this problem.
To prevent overwatering, it is crucial to understand that air plants do not require soil to grow. They absorb moisture and nutrients through their leaves from the surrounding environment. Therefore, they need only light misting once or twice a week. If you live in an area with high humidity levels, you may need to water your air plants even less frequently than that. It is essential to let your plant dry out entirely between watering sessions.
Another common mistake people make when growing Tillandsia is not providing adequate airflow for their plants. Lack of proper ventilation can lead to stagnant air around the plant and cause fungal growth and pests infestation. By providing enough airflow around your Tillandsia, you can reduce the risk of overwatering and other associated problems significantly.
In conclusion, overwatering is a common mistake that can be detrimental to your Tillandsia’s health if left unchecked. Signs of overwatering include yellow or brown leaves, root rot, and a mushy base. To prevent this problem, make sure to let your plant dry out completely between watering sessions and provide adequate airflow around it. Remember that as an air plant horticulturalist, my goal is to help you serve your Tillandsia by giving it the care it deserves.
Underwatering
As a tillandsia horticulturalist, I have seen many people struggle with growing their air plants due to common mistakes. While overwatering is a significant problem that can harm your Tillandsia’s health, underwatering can be equally damaging. Signs of underwatering include curled and dry leaves, slow growth, and a wilted appearance.
To prevent underwatering, it is essential to understand that air plants still require water to thrive. However, they do not need as much water as other plants because they absorb moisture from the surrounding environment. Therefore, it is crucial to mist your Tillandsia regularly and ensure that it receives enough humidity levels. If you live in an area with low humidity levels, consider placing your plant near a humidifier or aquarium.
Underwatering can be just as detrimental to your Tillandsia’s health as overwatering if left unchecked. It can lead to dehydration and cause irreversible damage such as stunted growth or death. As an air plant horticulturalist, my goal is to help you avoid these common mistakes by giving your Tillandsia the care it deserves. Remember that serving your plant means providing it with adequate watering and humidity levels necessary for its survival.
Dealing With Pests And Diseases
Preventing infestations and treating infections are important aspects of tillandsia (air plant) care. Pests and diseases can cause significant damage if not addressed in a timely manner. To prevent infestations, it is essential to keep the plants clean and well-ventilated. Regularly inspecting the plants for signs of pests or disease is also crucial.
If infestations do occur, there are various treatment options available. For example, using insecticidal soap or neem oil can help control pests such as spider mites and mealybugs. Fungal infections can be treated with a copper-based fungicide spray. However, it is crucial to follow the instructions on the product label carefully to avoid damaging the plant or causing harm to yourself.
In addition to prevention and treatment, it is vital to maintain a healthy environment for your air plants by providing them with proper lighting, humidity levels, and air circulation. A healthy plant is less susceptible to pests and diseases. By following these guidelines, you can ensure that your tillandsias thrive for many years to come.
Transition: Now that you know how to prevent infestations and treat infections in your air plants, let’s explore some creative design ideas for displaying them in your home or office space.
Creative Design Ideas For Displaying Your Air Plants
Dealing with pests and diseases is crucial to ensure the health and survival of your tillandsia plants. However, once you have mastered the art of pest control, it’s time to get creative with the way you display your air plants. This section will focus on some unique ideas for displaying your air plants that will not only enhance their beauty but also help them thrive.
One popular way to showcase your tillandsia plants is through a vertical display. This can be achieved by attaching your air plants to walls or hanging them from ceilings using fishing line or wire. Vertical displays not only save space but also provide an interesting focal point in any room. You can use different types of materials such as driftwood, cork bark or seashells to create a beautiful and natural-looking display.
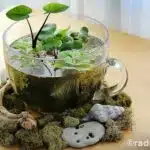
Another exciting option for displaying your tillandsia plants is through the use of Tillandsia terrariums. These miniature glass enclosures provide an ideal growing condition for air plants by creating a humid environment that mimics their native habitat. Terrariums come in different shapes and sizes, giving you endless possibilities for creative design ideas. They are perfect for small spaces and make great gifts too!
- Use unique containers such as teacups, seashells or vintage bulbs
- Incorporate other natural elements such as moss, rocks or sand
- Experiment with lighting to create a dramatic effect
In conclusion, there are many fun ways to display your tillandsia plants that will not only enhance their beauty but also provide optimal growing conditions. Whether it’s a vertical display or a Tillandsia terrarium, these unique ideas will surely impress any plant lover. In the next section, we will discuss advanced care tips for experienced gardeners looking to take their tillandsia cultivation skills to the next level.
Advanced Care Tips For Experienced Gardeners
Tillandsia (air plants) require specialized fertilization practices to promote optimal growth and health. This can be achieved through monthly applications of an orchid-specific fertilizer diluted to one quarter of the recommended strength.To maintain the ideal humidity levels for tillandsia, it is necessary to regularly mist the plants with distilled water or rainwater, or to place them in a high-humidity environment. Additionally, placing the plants in a shallow dish of water for a few hours each week can also help maintain the proper humidity. Finally, employing the use of a humidity monitor can help ensure that the humidity of the environment is not too high or too low for the plants.
Fertilization
As a tillandsia horticulturalist, I understand the importance of proper fertilization for air plants. Organic and synthetic fertilizers are both viable options for promoting growth, but there are some key differences to consider. Organic fertilizers, such as compost or fish emulsion, release nutrients slowly over time and can improve soil structure. Synthetic fertilizers, on the other hand, provide an immediate boost of nutrients but may have negative impacts on soil health over time.
When it comes to frequency of fertilization, it is important to strike a balance between providing enough nutrients without over-fertilizing. Too much fertilizer can lead to burned leaves or even damage to the plant’s root system. As a general rule of thumb, air plants should be fertilized once per month during their active growing season (usually spring and summer) and only every other month during their dormant period in fall and winter.
Overall, proper fertilization is essential for promoting healthy growth in tillandsias. By choosing the right type of fertilizer and using it in moderation according to the plant’s needs, you can help your air plants thrive and reach their full potential. Remember to always read product labels carefully and follow instructions closely to ensure the best results for your beloved air plants.
Humidity Control
As a tillandsia horticulturalist, I am constantly asked about the best way to care for air plants. While fertilization is essential for promoting healthy growth, it is just one aspect of advanced care. Another important factor to consider is humidity control. Air plants thrive in environments with high levels of moisture, but too much humidity can lead to issues such as rot or mold. Therefore, it is crucial to find the right balance when it comes to humidity.
One way to control humidity levels is through the use of dehumidifiers. These devices are designed to remove excess moisture from the air, which can be especially helpful in areas with high humidity. However, it is important to monitor humidity levels closely and adjust the dehumidifier settings accordingly. If the air becomes too dry, misting techniques may be necessary to provide additional moisture.
Misting involves spraying water directly onto the leaves of the air plant using a spray bottle or mister. This can help increase humidity levels and prevent dehydration during periods of low moisture in the environment. However, misting should be done sparingly and only when necessary, as too much water can also lead to issues such as rot or mold. By finding the right balance between dehumidification and misting techniques, you can help your air plants thrive in their environment and enjoy their unique beauty for years to come.
Troubleshooting Common Issues In Tillandsia Cultivation
Diagnosing discoloration in tillandsia plants is essential for their growth and maintenance. Discolorations may occur due to several reasons, including overwatering, underwatering, insufficient light exposure, or nutrient deficiency. Overwatering can cause the leaves to start turning brown or black from the base of the plant, while underwatering can lead to yellow or brown leaves that are crispy to the touch. Nutrient deficiency can cause a color change in the leaves, making them look pale.
Preventing root rot is crucial in maintaining healthy tillandsia plants. Root rot occurs when the roots are exposed to excess water and become waterlogged. This condition leads to fungal infections that decay the roots and ultimately kill the plant. To prevent root rot in tillandsia plants, avoid leaving them sitting in standing water and ensure they have adequate ventilation. Allow them to dry out completely before watering again, as this will help prevent any fungal growth.
In conclusion, diagnosing discoloration and preventing root rot are two critical aspects of cultivating healthy tillandsia plants. By monitoring your plants’ health regularly and ensuring you provide them with proper care, you can keep your air plants healthy and thriving for years to come. Remember always to check for signs of discoloration and prevent root rot by avoiding overwatering and ensuring they have adequate airflow around their roots.
Conclusion
Tillandsia, commonly known as air plants, are a unique and fascinating addition to any indoor garden. As a tillandsia horticulturalist, I have witnessed the benefits of incorporating these plants into home décor. Understanding their characteristics and providing the right environment is crucial for optimal growth. Proper watering techniques and fertilization methods can also enhance the health of your air plants.
Propagation is an exciting aspect of tillandsia cultivation that allows you to expand your collection. However, pests and diseases may pose a challenge to their growth. Creative design ideas can showcase the beauty of air plants while also providing a suitable habitat for them to thrive in. Advanced care tips are necessary for experienced gardeners looking to take their tillandsia cultivation to the next level.
Tillandsia are more than just decorative houseplants; they represent resilience and adaptability in challenging environments. They can survive without soil, absorbing nutrients and moisture from the air around them. This ability reminds us that we too can overcome adversity by finding innovative solutions to our problems. Just like tillandsia, we must adapt to our surroundings and embrace change if we want to thrive in life’s challenges.
Image Credits
- “Tillandsia schiedeana var. galabrior” by Ut1ma (featured)

