Pumpkins are a staple crop in the United States, often associated with the fall season and holiday celebrations. While pumpkins can be purchased at local markets and grocery stores, growing them from seed can be a rewarding experience for gardeners of all skill levels. In this article, we will explore the steps required to successfully grow pumpkins from seed, including site selection, soil preparation, planting techniques, and maintenance.
Pumpkin plants require specific conditions to thrive and produce healthy fruit. Understanding these requirements is essential to ensure a successful harvest. With careful planning and attention to detail, gardeners can enjoy a bountiful pumpkin harvest while also enhancing their gardening skills. Whether seeking to provide fresh produce for their family or community or simply enjoy the process of growing plants from seed, learning how to grow pumpkins is a valuable skill for any horticulturalist.
Choosing The Right Pumpkin Variety
Pumpkins are a beloved fall staple that can be easily grown from seed. The first step in growing pumpkins is selecting the right variety. Seed selection is crucial in determining the success of your pumpkin crop. There are many different varieties of pumpkins to choose from, each with its own unique characteristics.
When choosing a pumpkin variety, consider the growing conditions of your region. Some pumpkin varieties thrive in cooler temperatures while others prefer warmer climates. Soil type and moisture levels are also important factors to consider. It’s best to choose a variety that is well-suited for the conditions in your area to ensure optimal growth and yield.
As a horticulturalist, it’s important to note that certain pumpkin varieties may be better suited for specific purposes such as carving, cooking or decoration. When selecting a pumpkin variety, take into account what you plan on using them for. With proper seed selection and consideration of growing conditions, you can increase your chances of success in growing healthy and delicious pumpkins! Now onto preparing the planting site…
Preparing The Planting Site
Before planting pumpkins, it is important to prepare the site where they will be grown. Start by selecting a location that receives plenty of sunlight and has well-draining soil. It is also crucial to conduct a soil test to determine its pH level and nutrient content.
Soil testing can be done using a home testing kit or by sending a sample to a testing laboratory for analysis. Once you have determined the pH level of your soil, you can use composting techniques to improve its fertility. Composting involves adding organic matter such as leaves, grass clippings, and kitchen scraps to the soil. This process not only enriches the soil with essential nutrients but also improves its structure, making it easier for pumpkin roots to penetrate.
To prepare the planting site, clear any weeds or debris from the area and dig holes for each seedling. The holes should be large enough to accommodate the root ball of each seedling with some extra space around it. After placing the seedlings in their respective holes, cover them with soil and water thoroughly. With proper preparation of the planting site and adequate composting techniques, pumpkins can grow abundantly in your garden.
Improving your garden’s soil quality is an essential step towards ensuring healthy pumpkin growth. In the next section on testing and amending soil, we will discuss ways to determine if your soil needs further amendments before planting pumpkins.
Testing And Amending Soil
Testing soil pH levels is an important step when preparing to grow pumpkins from seed. The ideal pH range for pumpkin growth and development is between 6.0 and 7.5. When soil pH levels are lower than ideal, adding lime is a common and effective method to increase soil pH level. Adding nutrients to the soil is also necessary to ensure optimal growth of the pumpkin plants. Adding a balanced fertilizer that contains nitrogen, phosphorous, and potassium is recommended. Composting is a great way to add organic matter to the soil, which helps to improve the soil structure and increases nutrient availability. Composting can also help to increase the soil’s water-holding capacity and add beneficial microorganisms to the soil.
Testing Ph Levels
As a horticulturalist, one of the essential steps in growing pumpkins from seed is testing and amending the soil. Measuring acidity or pH levels is a crucial aspect of soil testing methods. It determines whether the soil is acidic, alkaline, or neutral. The ideal pH level for growing pumpkins is between 6.0 and 7.5.
To test the pH level of your soil, you can use a simple soil testing kit that can be found at any garden center or hardware store. These kits typically come with instructions on how to collect a sample and perform the test. Another option is to send a sample of your soil to a professional laboratory for analysis.
If your soil’s pH level falls outside the recommended range for growing pumpkins, it’s important to amend it accordingly. Adding lime will raise the pH level if your soil is too acidic, while sulfur will lower it if your soil is too alkaline. Testing and amending your soil before planting pumpkin seeds will provide them with a healthy environment in which to grow and thrive.
Adding Nutrients
After testing and amending the soil’s pH level, it is important to ensure that your pumpkin plants have the necessary nutrients for proper growth. One way to achieve this is by adding organic matter to the soil. Composting benefits pumpkins by providing them with essential nutrients, such as nitrogen, phosphorus, and potassium. These nutrients are crucial in promoting healthy root development, strong stems, and robust foliage.
In addition to composting, there are other organic alternatives available for adding nutrients to your soil. One of these options is using bone meal, which is a slow-release fertilizer that provides a high source of phosphorus. Another option is using blood meal, which is an excellent source of nitrogen. These organic alternatives not only provide the necessary nutrients for pumpkin plants but also improve the overall health of the soil.
It is important to note that while adding organic matter can benefit pumpkin plants’ growth, it should be done in moderation. Over-fertilization can lead to excessive vegetative growth and delay fruit production. Therefore, it is recommended to follow the instructions on the package or consult a horticulturalist before applying any fertilizers or amendments to your soil.
Composting
Testing and amending soil is a crucial step in ensuring that pumpkin plants grow healthy and robust. Once the pH level has been adjusted, it is essential to provide the necessary nutrients to support their growth. One of the most effective ways of doing this is through composting. Composting provides numerous benefits to pumpkin plants, including enriching the soil with essential nutrients such as nitrogen, phosphorus, and potassium.
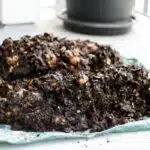
Composting is a technique used to convert organic waste into nutrient-rich soil amendments. This process involves piling organic materials such as leaves, grass clippings, and kitchen scraps together and allowing them to break down naturally over time. The result is a dark, crumbly substance known as compost that can be added back into the soil for improving its quality. Compost helps retain moisture in the soil while also improving its structure.
The benefits of composting go beyond providing essential nutrients to your pumpkin plants. Composting also helps reduce waste by diverting food scraps and yard trimmings from landfills. It also reduces greenhouse gas emissions by producing less methane than organic waste decomposing in landfills. Incorporating compost into your soil not only benefits your pumpkin plants but also promotes sustainability for our planet’s future generations.
Starting Seeds Indoors
After testing and amending the soil, it’s time to start growing pumpkins from seed indoors. Before getting started, make sure you have all the necessary seed starting equipment, such as trays or pots with drainage holes, sterile seed starting mix, and a heating mat if your indoor growing conditions are not ideal.
To begin, fill your trays or pots with the sterile seed starting mix and moisten it thoroughly. Place one to two pumpkin seeds in each pot about half an inch deep and cover them with more of the mix. Keep the soil moist but not waterlogged and place the trays in a warm location with plenty of light.
Ideal indoor growing conditions for pumpkin seeds include temperatures between 70-80°F (21-27°C) and 12-16 hours of bright light per day. If you don’t have access to natural light, use grow lights instead. As soon as they germinate, remove any weaker seedlings so that only one strong plant remains per pot. After a few weeks of growth, prepare to transplant your healthy pumpkin seedlings into their outdoor garden bed.
In preparation for transplanting seedlings outdoors, there are several steps you can take to ensure successful growth. First, harden off your pumpkin plants by gradually introducing them to outdoor conditions over a period of seven to ten days before planting them in the ground. This will help prevent shock from sudden changes in temperature or humidity levels. Additionally, choose a sunny location with well-draining soil that has been prepared ahead of time with compost or other organic matter. With proper care and attention throughout its growth cycle, your pumpkin plant will thrive and produce delicious fruit come harvest time!
Transplanting Seedlings
After the pumpkin seedlings have sprouted and grown their first set of true leaves, it is time to transplant them. Transplanting pumpkin seedlings is a delicate process because they are still fragile at this stage. Before planting them outside, it is important to harden off the seedlings by gradually exposing them to outdoor conditions. This process will allow the seedlings to adjust properly to the outdoor environment.
Hardening off the seedlings can be done by placing them outside for a few hours each day in a sheltered area. Gradually increase the amount of time they spend outdoors over several days until they are spending all day outside. This process will help toughen up the plants, making them more resistant to wind and temperature changes.
After hardening off, it’s time for outdoor acclimation. Choose a spot in your garden that receives full sun and has well-draining soil. Dig holes that are slightly larger than the root ball of each plant, then gently remove each seedling from its container and place it into its hole. Firmly pack soil around each plant base and water thoroughly.
To ensure successful growth of your pumpkins, proper watering techniques should be followed. In the next section we’ll discuss how much water pumpkins need and when you should water them. By following these steps, you’ll soon be on your way to growing healthy pumpkins in your own backyard!
Proper Watering Techniques
- The amount and frequency of water applied to pumpkin plants is a critical factor for successful growth and development.
- Applying too little water can cause the plant to become dehydrated and stunt growth, while too much water can lead to root rot and other issues.
- For optimal growth, pumpkin plants should be watered deeply, but infrequently, so that the soil can become moist but not soggy.
- Regularly monitor the soil moisture levels, as the amount of water required may be different in different climates and soil types.
Water Amount
One of the most important aspects of growing healthy pumpkin seedlings is proper watering techniques. Watering your pumpkin seedlings correctly will ensure that they grow strong and healthy, producing large and vibrant pumpkins. When it comes to water amount, there are a few key things to keep in mind.
Firstly, it’s important not to overwater your pumpkin seedlings. Overwatering can lead to root rot, which can be fatal for your plants. It’s best to establish a regular watering schedule for your pumpkin seedlings, rather than just giving them a quick drench whenever you remember. This will help prevent overwatering and allow the soil to dry out slightly between waterings.
On the other hand, it’s also important not to underwater your pumpkin seedlings. If you don’t give them enough water, they may become stunted or even die. To avoid this issue, make sure you’re checking the soil regularly and watering when needed. Aim for the soil to be consistently moist but not soaked through.
In summary, finding the right balance of water amount is crucial when it comes to growing healthy pumpkin seedlings. By establishing a regular watering schedule and being mindful of how much water you’re giving your plants, you can help ensure they grow strong and produce an abundance of delicious pumpkins come harvest time.
Frequency
Proper watering techniques are essential to growing healthy pumpkin seedlings. In addition to the amount of water, the frequency of watering is also crucial. The planting schedule and germination rate should be considered when determining how often to water your pumpkin seedlings.
When starting your pumpkin seeds, it’s important to keep the soil consistently moist until they germinate. This may require frequent watering, possibly up to once a day. Once your seedlings have sprouted, you can begin to adjust your watering schedule. As a general rule of thumb, it’s best to water your pumpkin seedlings deeply but less frequently than giving them frequent shallow waterings. This will encourage their roots to grow deeper into the soil in search of moisture.
However, there are always exceptions to this rule depending on factors such as climate and soil type. For example, in hot and dry climates, you may need to water your pumpkin seedlings more frequently than usual. Similarly, if you’re using soil that doesn’t retain moisture well, you may also need to increase the frequency of watering.
In conclusion, finding the right frequency of watering for your pumpkin seedlings requires careful observation and adjustment based on their individual needs. By considering factors such as planting schedule and germination rate and adjusting accordingly, you can help ensure that your pumpkin plants grow strong and healthy.
Fertilizing For Optimal Growth
As the old adage goes, “you reap what you sow.” This rings especially true when it comes to fertilizing your pumpkin plants for optimal growth. Fertilizers are essential in providing the necessary nutrients that your pumpkins need to thrive. Without them, your pumpkins may not grow as big or as healthy as they could be.
Composting is a popular and effective way of providing organic fertilizer for your pumpkin plants. Composting benefits not only your garden but also the environment by reducing waste and promoting sustainability. Compost contains essential nutrients such as nitrogen, phosphorus, and potassium that help improve soil health and fertility. Additionally, using compost as a fertilizer reduces the amount of synthetic chemicals needed in your garden.
If composting isn’t an option for you, there are several organic alternatives available on the market. These include fish emulsion, bone meal, and blood meal, among others. Organic fertilizers are made from natural materials and provide similar nutrients to synthetic fertilizers without harmful side effects to the environment or potentially contaminating food sources.
To ensure optimal growth, it’s important to follow manufacturer instructions when applying fertilizers. Over-fertilizing can be just as harmful as under-fertilizing and can lead to stunted growth or even plant death. By using organic alternatives or composting benefits to provide nutrients for your pumpkin plants, you can promote healthy growth while also being environmentally conscious.
Transition: Now that we’ve covered how to optimize pumpkin growth through fertilization methods let’s move on to managing pests and diseases that can harm your precious crops.
Managing Pests And Diseases
- Pumpkins are susceptible to a variety of pests and diseases, making prevention and early identification of problems important for successful yields.
- Cultural practices such as crop rotation, good sanitation and proper irrigation can help prevent pest infestations.
- Identifying diseases early is important in controlling them, as some diseases can be difficult to control once they are established.
- Symptoms of disease may include discoloration of the leaves, wilting, stunted growth, and the presence of powdery mildew or other fungal growths.
- If plants become infested with pests, a variety of methods can be used for treatment including the use of insecticides, biological control, or removal of affected parts of the plant.
- Finally, it is important to monitor plants regularly for signs of pests and diseases, and take appropriate action when necessary to maintain healthy plants.
Preventing Pests
As horticulturalists, we understand the importance of preventing pests and diseases in our pumpkin plants. Companion planting is a useful technique to repel pests while promoting plant growth. By planting companion plants such as marigolds, nasturtiums, and radishes around pumpkin plants, we can deter pests like aphids, squash bugs, and cucumber beetles. These plants emit natural chemicals that repel harmful insects while attracting beneficial ones like ladybugs and bees.
Another effective way to prevent pest infestations is by using natural repellents. One such repellent is neem oil which has insecticidal properties and can be diluted with water before being sprayed on the pumpkin leaves. Garlic spray is another natural repellent that can be made by blending garlic cloves with water and then straining the mixture into a spray bottle. This spray can be used to repel pests like spider mites and aphids.
In conclusion, preventing pests in pumpkin plants plays a crucial role in maintaining plant health and ensuring a good harvest. As horticulturalists, we have various techniques at our disposal including companion planting and natural repellents like neem oil and garlic spray. By implementing these methods effectively, we can successfully manage pest infestations without resorting to harmful chemicals or pesticides that could harm both the environment and our health.
Identifying Diseases
Identifying Diseases is another crucial aspect of managing pests and diseases in pumpkin plants. Detecting plant diseases early on can help prevent the spread of the disease and minimize damage to the plants. Common signs of a diseased pumpkin plant include wilting, yellowing or browning leaves, stunted growth, and unusual spots on leaves or stems.
Prevention techniques such as proper plant spacing, regular watering, and adequate soil drainage can help reduce the risk of disease occurrence. It is also important to avoid over-fertilizing plants and to keep garden tools clean to prevent cross-contamination between plants. However, if a disease does occur, treatment options such as using organic fungicides or removing diseased parts of the plant may be necessary.
To accurately identify a plant disease, it is recommended to consult with a horticultural expert or extension service for proper diagnosis. With timely detection and appropriate management methods in place, horticulturalists can effectively manage pest infestations and prevent the spread of diseases in their pumpkin plants.
Treating Infestations
After identifying the presence of pests and diseases in pumpkin plants, the next step is to treat them. Treating infestations can be done through natural remedies or chemical solutions, depending on the severity of the problem. Natural remedies such as neem oil, garlic spray, and insecticidal soap are effective in controlling pests without harming beneficial insects. These remedies work by disrupting the pest’s life cycle or by repelling them from the plant.
On the other hand, chemical solutions such as synthetic pesticides can also be used to manage pest infestations. However, caution should be taken when using these solutions since they may have harmful effects on non-target organisms and the environment. It is essential to follow proper application procedures and safety protocols when using chemical solutions.
In addition to treating infestations, it is equally important to take preventive measures to avoid future problems. Practices such as crop rotation, proper sanitation, and maintaining healthy soil conditions can help reduce the risk of pest and disease occurrence. By incorporating both treatment and prevention methods in managing pests and diseases in pumpkin plants, horticulturalists can ensure a healthy yield while promoting environmental sustainability.
Harvesting And Storing Pumpkins
Managing pests and diseases is an essential component of growing pumpkins from seed. As with any crop, pumpkins are susceptible to a range of pests and diseases that can impact growth, yield, and quality. To effectively manage these issues, it is important to identify the problem early and take swift action. Common pumpkin pests include aphids, squash bugs, and cucumber beetles. These can be managed through a combination of cultural practices such as crop rotation, sanitation, and the use of natural predators or insecticides.
Once you’ve successfully managed pests and diseases in your pumpkin patch, it’s time to focus on harvesting your pumpkins for carving or cooking. When it comes to pumpkin carving, it’s important to choose a pumpkin with a sturdy stem that won’t break off during the carving process. Look for pumpkins with smooth surfaces that will make carving easier. And don’t forget about the seeds! Roasted pumpkin seeds are a delicious snack that can be seasoned in a variety of ways.
For those interested in using their pumpkins for cooking, there are endless possibilities when it comes to pumpkin recipes. From savory soups and stews to sweet pies and breads, pumpkins add flavor and nutrition to any dish. When selecting pumpkins for cooking, look for varieties with dense flesh that will hold up well during cooking. Avoid pumpkins with soft spots or blemishes as these may indicate poor quality or spoilage.
In order to ensure success when growing pumpkins from seed, there are several tips you should keep in mind. First and foremost, choose a sunny location with well-draining soil. Be sure to water regularly but avoid overwatering as this can lead to disease issues. Additionally, consider using mulch around your plants to help retain moisture while suppressing weed growth. If you do encounter problems along the way such as poor germination or stunted growth, don’t hesitate to seek advice from a gardening expert or horticulturist. With a little patience and perseverance, you can enjoy a bountiful harvest of pumpkins to use for carving or cooking.
Tips For Success And Troubleshooting Common Issues
To ensure successful pumpkin growth from seed, there are a few tips to keep in mind. Seed germination is the first step in the process. It is important to plant seeds that are fresh and healthy, as older or weaker seeds may not germinate at all. Additionally, planting seeds too deeply or too shallowly can also result in poor germination rates.
Once your pumpkin seedlings have sprouted and grown their first true leaves, it is time to transplant them into larger containers or into your garden plot. However, transplant shock can be a common issue when moving seedlings from one location to another. To minimize this shock, make sure that the soil in the new location has been properly prepared and watered prior to transplanting. It is also recommended to transplant on an overcast day or in the early evening to reduce stress on the young plants.
While growing pumpkins from seed can be an exciting and rewarding experience, it does require patience and attention to detail. By following these tips for success and troubleshooting common issues like seed germination and transplant shock, you will be well on your way to growing healthy and vibrant pumpkin plants that will yield bountiful harvests come autumn.
Conclusion
Growing pumpkins from seed requires careful attention to detail and patience. Choosing the right variety of pumpkin is crucial, as each type has its own specific growing requirements. Preparing the planting site is also important, as pumpkins require plenty of space and well-draining soil. Testing and amending the soil is a key step in ensuring optimal growth, as it provides essential nutrients for the young plants.
Starting seeds indoors allows for better control over germination and provides a head start on the growing season. Transplanting seedlings should be done carefully to avoid damaging delicate roots, and fertilizing regularly will ensure healthy growth. Managing pests and diseases is an ongoing task that requires vigilance and proper preventative measures.
Harvesting pumpkins at the right time is crucial for their longevity in storage, but proper storage techniques are also important to prevent spoilage. Finally, troubleshooting common issues such as rot or lack of fruit set can help ensure a successful harvest.
In conclusion, growing pumpkins from seed requires careful planning and execution. However, with attention to detail and perseverance, anyone can enjoy a bountiful harvest of these delicious seasonal favorites. By following these guidelines and taking care to monitor growth throughout the season, gardeners can enjoy the satisfaction of growing their own pumpkin patch year after year.
Image Credits
- “Pumpkin Beers” by HorsePunchKid (featured)


