Quinoa, a high-protein grain native to the Andean region of South America, has gained immense popularity in recent years due to its numerous health benefits. Growing quinoa plants at home has become a desirable option for many individuals who wish to have access to their own fresh and organic harvest. Quinoa is an easy-to-grow crop that requires minimal maintenance, making it an ideal choice for novice gardeners and experienced cultivators alike.
In this article, we will discuss the necessary steps for successfully growing quinoa plants at home. We will delve into the ideal conditions required for germination, planting techniques, soil requirements, watering needs, and pest management strategies. With our expert guidance, you can start cultivating your own quinoa plants and reap the rewards of this nutrient-rich superfood right in your backyard.
Importance Of Quinoa As A Superfood
Quinoa, an ancient grain that originated in the Andean region of South America, has been gaining popularity as a superfood in recent years. Its reputation as a nutritional powerhouse is well-deserved. Quinoa is rich in essential amino acids, vitamins, minerals and antioxidants. It is also gluten-free and low in fat, making it an ideal food for those who follow a plant-based or low-fat diet.
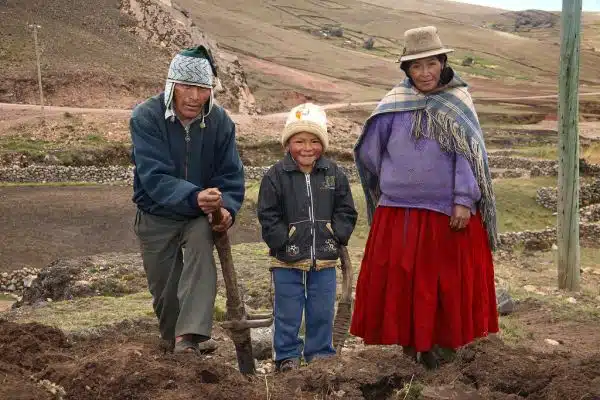
Quinoa farming techniques have evolved over centuries. In traditional Andean agriculture, quinoa was grown on small plots of land using organic methods without irrigation. Today, modern farmers grow quinoa using both conventional and organic methods with irrigation systems to increase yield and quality. The global demand for quinoa has led to increased research on cultivation techniques that can help farmers produce high-quality crops while preserving soil fertility and biodiversity.
The nutritional value of quinoa is impressive. It contains all nine essential amino acids that the human body cannot produce on its own. Quinoa is also an excellent source of fiber, iron, magnesium, potassium and calcium. These nutrients are important for maintaining healthy blood pressure levels, strong bones, muscles and overall health. Incorporating quinoa into your diet can provide a range of health benefits that make it deserving of the title “superfood.”
As we delve into the process of growing quinoa at home, it is vital to choose the right seeds to ensure a bountiful harvest.
Choosing The Right Quinoa Seeds
Seed selection is a crucial aspect of growing healthy quinoa plants at home. It’s important to choose seeds that are perfect for your climate and soil conditions. Not all quinoa varieties are suitable for growing in every location, so it’s essential to do some research before purchasing seeds.
The first step in selecting the right quinoa seeds is to determine which variety is best suited for your region. Some varieties thrive in cool climates, while others prefer hot and dry conditions. You should also consider whether you’ll be planting your quinoa in pots or directly in the ground. Certain varieties do better in containers than others.
When it comes to sourcing options, there are several avenues you can explore. You can purchase quinoa seeds from a local nursery or garden center, order them online from seed companies, or even collect them from mature plants if you have access to them. Regardless of where you obtain your seeds, make sure they’re high quality and free from disease or pests. With the right seeds and proper care, you’ll be well on your way to growing a bountiful crop of nutritious quinoa at home.
With the appropriate quinoa seeds selected, it’s time to prepare the soil for planting. This is an essential step as healthy soil will promote strong plant growth and ensure a successful harvest. In the next section, we’ll discuss how to prepare your soil properly so that your quinoa plants have everything they need to grow into thriving specimens that provide abundant yields come harvest time.
Preparing The Soil For Planting
- When preparing the soil for planting quinoa, it is important to consider the type of soil that will be used.
- The soil should be well-draining and rich in organic matter to ensure that the plant receives the necessary nutrients.
- It is also important to ensure that the pH of the soil is suitable for the quinoa plants, which generally prefer soil with a pH of 5.5-7.5.
- To test the soil pH, a soil testing kit can be used to measure the acidity of the soil before planting.
Choosing The Right Soil
When it comes to growing quinoa plants, preparing the soil is crucial for ensuring a bountiful harvest. One of the most important aspects of soil preparation is choosing the right soil. Quinoa plants thrive in well-draining, nutrient-rich soil that has a pH level between 6 and 7.5. Before planting, it’s essential to test your soil to determine its pH level and make any necessary adjustments.
Soil preparation involves adding amendments to improve soil quality. Organic matter such as compost, manure or leaf mold can increase the fertility of the soil and provide essential nutrients for plant growth. Soil amendments can also help regulate moisture levels and improve drainage – an important factor when growing quinoa plants that are sensitive to waterlogged soils. Additionally, adding perlite or vermiculite can help create air pockets in the soil, which will promote healthy root development.
To ensure optimal growth conditions for quinoa plants, it’s important to choose high-quality soil and amend it appropriately before planting. By doing so, you’ll be providing your plants with the nutrients they need while improving their overall health and vitality. With proper soil preparation techniques in place, you’ll be well on your way to harvesting a successful crop of delicious quinoa!
Testing Soil Ph
As a horticulture expert, preparing the soil is an essential task for ensuring a successful harvest of any crop. Soil preparation involves adding amendments to improve soil quality, which includes testing the soil pH level. Testing the soil pH level is crucial for determining the acidity or alkalinity of the soil, and it helps to determine whether adjustments are necessary to optimize plant growth conditions.
Soil testing usually involves taking samples of your garden soil and sending them to a laboratory for analysis. The results will indicate how acidic or alkaline your soil is on a scale from 0 to 14, with 7 being neutral. Ideally, quinoa plants thrive in well-draining, nutrient-rich soils that have a pH level between 6 and 7.5. Therefore, if your test results show that your soil has a pH level outside this range, you need to adjust it accordingly.
To adjust the pH level of your soil, you can add organic matter such as compost or aged manure that will help in raising acid levels in too alkaline soils or reducing acid levels in too acidic soils. Lime is also an excellent amendment that raises low pH levels while sulfur helps lower high pH levels. However, it’s important to note that adjusting your soil’s pH level doesn’t happen overnight but takes several months before seeing changes in the acidity levels.
In conclusion, testing and adjusting the soil’s pH level are crucial steps when preparing for planting quinoa plants. By doing so, you’ll be providing optimal growing conditions for your crops by ensuring they have access to all essential nutrients required for their healthy growth and development. Overall, taking these measures will result in a bountiful harvest of nutritious quinoa grains!
Understanding Germination Requirements
In order to successfully grow quinoa plants at home, it is important to understand the germination requirements of the seeds. Germination temperature plays a crucial role in the process of seed germination. Quinoa seeds require temperatures between 65°F and 75°F for successful germination. Any deviation from this range could lead to poor germination rates or even failure altogether.
Before planting quinoa seeds, they must first be soaked in water. Seed soaking techniques are important because they help soften the outer layer of the seed coat, which makes it easier for the embryo to emerge during germination. A common method for soaking quinoa seeds is to place them in a jar filled with water and let them soak for six to eight hours before draining off excess water. This process not only helps with softening the seed coat but also initiates the germination process by awakening dormant enzymes within the seed.
In order to ensure successful germination, it is important that these requirements are met before proceeding with planting techniques for quinoa seeds. Understanding these aspects will help you achieve better results when growing your own quinoa plants at home. In the next section, we will discuss some proven planting techniques that can help you make sure your quinoa seeds have what they need to grow into healthy plants.
Planting Techniques For Quinoa Seeds
Seed selection is an essential step in growing quinoa plants at home. It’s crucial to purchase high-quality seeds from reputable sources to ensure healthy plant growth. Look for seeds that are free from damage, disease, and cracks. Quinoa seeds come in different colors such as white, red, or black, so choose the variety that appeals to you.
Soil preparation is another critical factor in growing quinoa successfully. Quinoa plants require well-draining soil with a pH range of 6-8.5. You can amend the soil by adding compost or organic matter to improve its texture and nutrient content. Ensure that the soil is loose and fertile to facilitate root growth.
Watering techniques and germination requirements are also vital factors for successful quinoa cultivation. Quinoa seeds need moisture to sprout, but they don’t like wet feet or soggy soil. Therefore, watering should be done carefully to prevent waterlogging. Soak the seeds in water for a few hours before planting them about 1/2 inch deep into the soil. Keep the soil moist until germination occurs, which usually takes about one week.
Transition: Now that you have learned about seed selection and soil preparation for growing quinoa plants at home let’s discuss watering needs and irrigation methods that will help your quinoa thrive!
Watering Needs And Irrigation Methods
After planting your quinoa seeds with precision and care, it’s now time to ensure you provide the appropriate watering needs. As a horticulture expert, I have seen many gardeners overlook this crucial aspect of plant growth. Don’t let your Quinoa plants suffer because of neglect in watering.
Drip irrigation is one of the most efficient ways to water your Quinoa plants. It saves water and ensures that the roots get enough moisture without overwatering the soil or leaves. You can set up a drip irrigation system using PVC pipes or hoses with emitters or drippers that release water slowly, drop by drop, directly onto the soil around the base of each plant. This method helps to avoid wetting the leaves, which could lead to diseases or rot.
The frequency of watering your quinoa plants varies depending on climate and soil type. At a minimum, you should aim for two inches of water per week. However, don’t stick to a strict schedule; let the weather and soil dictate when you irrigate. If there has been plenty of rain in your area recently, hold off on additional watering until necessary. Be sure to check regularly for signs of under or over-watering such as wilted leaves or yellowing foliage respectively. By providing sufficient moisture through proper irrigation methods like drip irrigation and monitoring how often you do so, your quinoa plants will thrive in no time!
As we move forward with growing our Quinoa plants at home successfully, we need not forget about fertilization and nutrient requirements for these crops’ optimal growth conditions. To ensure that our Quinoa plants develop adequately and produce high-quality seeds rich in essential nutrients like protein fiber and minerals, we must pay close attention to their fertilizer needs as well as other nutrients required for healthy growth.
Fertilization And Nutrient Requirements
Quinoa is a hardy plant that does not require much fertilization, but it still needs some nutrients to grow properly. Organic fertilizers such as compost, aged manure, and bone meal can provide the necessary nutrients for the quinoa plant to grow well. These organic fertilizers release nutrients slowly, which is beneficial as it ensures that the plants are not over-fertilized.
Hydroponic cultivation of quinoa is an innovative method to grow this crop using water-based nutrient solutions instead of soil. This technique allows for precise control of nutrient levels in the growing medium, ensuring that the plants receive all the necessary nutrients for optimum growth. Hydroponic cultivation also reduces the risk of soil-borne diseases and pests, making it a viable alternative to traditional soil-based farming.
In summary, quinoa requires minimal fertilization but still needs adequate nutrients to grow properly. Organic fertilizers such as compost and aged manure are excellent options for providing these nutrients, while hydroponic cultivation offers an innovative approach to growing quinoa with precise nutrient control. With proper fertilization techniques and nutrient management, you can enjoy a bountiful harvest of this nutritious crop from your own backyard or indoor garden.
Transition:
Now that we have discussed how to provide adequate nutrition for your quinoa plants let’s move on to managing pests and diseases which can threaten their growth and survival.
Managing Pests And Diseases
As we move forward in the process of cultivating quinoa plants, it is essential to address the potential challenges that may arise. One such challenge is managing pests and diseases that could harm our plants. It is crucial to approach this issue with a holistic perspective and adopt an integrated pest management strategy that emphasizes prevention rather than reactive measures.
Integrated pest management involves utilizing a combination of techniques to manage pests and diseases, including cultural practices, biological control methods, and natural remedies. Cultural practices include maintaining proper sanitation, crop rotation, and selecting disease-resistant varieties. Biological control methods involve introducing natural predators or parasites that feed on pests or compete for resources with them. Lastly, natural remedies include using organic solutions like neem oil, garlic spray, or soap sprays.
It is important to keep in mind that not all pests are harmful; some are beneficial for the plant’s growth and health. Hence it’s essential to identify beneficial insects like ladybugs or lacewings while addressing the harmful ones. Adopting these strategies can help us manage pests efficiently while minimizing environmental impacts.
Moving forward from managing pests and diseases in quinoa plants, harvesting plays a crucial role in determining the quality of our yield. Therefore, it’s vital to understand when and how to harvest quinoa plants correctly.
Harvesting Quinoa Plants
The time to harvest quinoa plants is when the seeds have dried and changed color from green to yellow or red. This usually occurs about 90-120 days after planting, depending on the climate and growing conditions. Some signs that indicate quinoa plant maturity include the leaves turning yellow or brown and the flowers falling off.
Before harvesting, it is important to check the spacing of your quinoa plants. The ideal quinoa plant spacing is approximately 8-12 inches apart in rows that are 18-24 inches apart. This allows for optimal airflow and sunlight exposure, which promotes healthy growth and seed development. Once you have confirmed proper spacing, you can begin harvesting by cutting off the entire plant at ground level or by removing individual seed heads.
After harvesting, it is crucial to properly dry and store your quinoa seeds to prevent spoilage and mold growth. In the next section, we will discuss how to effectively dry and store your quinoa seeds so that you can enjoy their delicious flavor and nutritional benefits for months to come.
Drying And Storing Quinoa Seeds
- Quinoa seeds must be dried before storing in order to prevent molding or germination.
- Thoroughly drying quinoa seeds can be achieved by spreading them in a single layer on a baking sheet, leaving them in a warm place for several days.
- Quinoa seeds can be stored in an airtight container and placed in a cool, dry environment.
- To preserve germination rates, it is recommended to store quinoa seeds in a refrigerator or freezer.
- Germination rate can be tested by placing a few seeds on a moist paper towel and monitoring them for germination over the course of a few days.
- Different quinoa varieties may have varying germination rates, so it is important to monitor the germination rate prior to planting.
Drying Seeds
After harvesting quinoa seeds, drying them is a crucial step for long-term storage. A dehydrator can be used to dry the seeds quickly, but air drying is also an effective method. When using a dehydrator, spread the seeds out evenly on the trays and set the temperature to 125°F. The drying process usually takes anywhere from 2-4 hours, depending on humidity levels. Once dried, store the quinoa seeds in an airtight container in a cool and dry place.
Alternatively, air drying can be done by spreading the seeds out in a single layer on a clean cloth or screen. Place them in an area with good ventilation, away from direct sunlight, and stir them occasionally until fully dried. This process can take several days up to a week or more depending on humidity levels. When fully dried, store the quinoa seeds in an airtight container and keep them in a cool and dry place for future use.
Properly dried quinoa seeds can be stored for up to one year without losing their quality or nutritional value. It’s important to check for any moisture buildup during storage, as this could lead to spoilage or mold growth. By using either a dehydrator or air-drying method and storing them correctly afterwards, home gardeners can enjoy their own fresh supply of quinoa throughout the year.
Storing Seeds
After properly drying quinoa seeds, storing them in optimal conditions is essential to maintain their seed viability and nutritional quality. Proper storage can extend the shelf life of quinoa seeds for up to one year without losing their freshness or nutritional value. As a horticulture specialist, it is important to understand the best practices for storing these seeds to ensure they remain viable for future use.
To store quinoa seeds, it is recommended to place them in an airtight container that is stored in a cool and dry place. The ideal temperature range for storing these seeds is between 32-41°F with a relative humidity level between 40-50%. It is important to keep the container away from any sources of moisture or direct sunlight as this can promote mold growth and spoilage. Additionally, checking the container periodically for any signs of moisture buildup or pests can help prevent spoilage and maintain seed viability.
In summary, proper storage conditions are crucial for maintaining the nutritional quality and seed viability of quinoa seeds. By storing them in an airtight container at optimal temperatures and humidity levels, home gardeners can enjoy their own fresh supply of quinoa throughout the year. As a horticulture expert, understanding these best practices for storing seeds can help ensure successful cultivation and harvesting in future growing seasons.
Germination Rate
Properly drying and storing quinoa seeds are crucial for maintaining their nutritional quality and seed viability. However, these efforts may be in vain if the germination rate of the seeds is low. The germination rate refers to the percentage of seeds that successfully sprout when planted. As a horticulture specialist, it is essential to understand how to improve the germination rate of quinoa seeds and troubleshoot any issues.
Several factors can affect the germination rate of quinoa seeds. One critical factor is temperature. Quinoa seeds require a warm soil temperature between 60-70°F for optimal germination. Seeds planted in colder soil will have a lower germination rate and take longer to sprout. Another factor that affects the germination rate is moisture level. Quinoa seeds need adequate moisture, but not too much as this can cause rotting or mold growth. Overwatering or underwatering can both result in poor germination rates.
To improve the germination rate of quinoa seeds, several steps can be taken during planting and care. Pre-soaking quinoa seeds for several hours can help soften their outer coating, making it easier for them to sprout. Additionally, adding compost or other organic matter to the soil before planting can improve soil structure and nutrient levels, which can encourage healthy seedling growth. When troubleshooting issues with low germination rates, checking for proper soil temperature and moisture levels should be a priority.
In summary, while drying and storing quinoa seeds are essential steps in maintaining their freshness and viability, improving their germination rate is equally important for successful cultivation. By understanding the factors that affect germination rates and taking steps to optimize planting conditions and care practices, home gardeners can enjoy higher yields of healthy quinoa plants from their own harvests.
Preparing Quinoa For Consumption
Once you have harvested your quinoa, it is important to prepare it properly before consumption. Quinoa can be cooked much like rice, by boiling it in water until the grains become tender and translucent. One important tip when cooking quinoa is to rinse it thoroughly before cooking, as this helps remove any bitter taste that may be present due to the natural saponin coating on the seeds.
Quinoa offers a range of nutritional benefits that make it a great addition to any diet. This small seed is packed with protein, fiber, vitamins, and minerals such as iron and magnesium. Additionally, quinoa is gluten-free and low glycemic index, making it a great option for those with celiac disease or diabetes. When combined with other healthy foods such as vegetables or legumes, quinoa can help provide a complete and balanced meal.
To fully enjoy the nutritional value of quinoa, there are a few cooking tips to keep in mind. It’s important not to overcook the seeds as this can result in a mushy texture that may not be enjoyable for some people. Additionally, adding flavorful spices or herbs while cooking can enhance the overall taste of the dish while providing additional health benefits. Overall, incorporating quinoa into your regular diet can provide an array of health benefits while also adding variety and flavor to your meals.
As we have seen, quinoa offers numerous nutritional benefits that make it a great choice for anyone looking to eat healthier. In addition to being high in protein and fiber while also low in glycemic index and gluten-free, quinoa is versatile in its preparation methods and can be enjoyed with a variety of other foods. In the next section, we will explore some of these health benefits in more detail and how they can positively impact your overall wellbeing.
Health Benefits Of Quinoa
After preparing quinoa for consumption, it is time to learn about the health benefits of this superfood. Quinoa is loaded with essential nutrients that can help improve overall health and well-being. It is a great source of protein, fiber, magnesium, iron, and antioxidants. These nutrients work together to support healthy digestion, boost energy levels, lower blood sugar levels, and reduce inflammation in the body.
One of the best things about quinoa is its versatility in the kitchen. You can use it as a substitute for rice or pasta in many dishes. It also works well as a base for salads or as a side dish. There are countless quinoa recipes available online that cater to different dietary needs and preferences. Whether you are looking for vegan options or gluten-free meals, there is a recipe out there for everyone.
When it comes to nutrition facts, one cup (185 grams) of cooked quinoa contains 222 calories, 4 grams of fat, 39 grams of carbs (including 5 grams of fiber), and 8 grams of protein. It also contains small amounts of vitamin B6, thiamin, riboflavin, folate, potassium, calcium, phosphorus, zinc and copper. With all these nutrients packed into one tiny seed-like grain it’s no wonder why quinoa has become so popular among health enthusiasts around the world.
Transitioning into the subsequent section: Now that we have covered the basics on how to grow quinoa plants at home and learned about the health benefits and nutrition facts associated with this superfood let’s explore some delicious ways to enjoy it in your kitchen! Get ready to discover exciting new recipes and ideas that will make you fall in love with this versatile grain all over again!
Quinoa In The Kitchen: Recipes And Ideas
Quinoa is a versatile and nutritious grain that has become increasingly popular in recent years. It’s not only an excellent source of protein, but it’s also gluten-free and easy to cook. Many people enjoy using quinoa as a substitute for rice or pasta, but it can also be used in a variety of other dishes.
One popular way to use quinoa is in desserts. Quinoa-based desserts are often gluten-free and can be made into cookies, bars, cakes, and more. By substituting quinoa flour for wheat flour, you can create delicious treats that are lower in carbs and higher in protein. Additionally, quinoa flakes make an excellent addition to granolas and other breakfast foods.
Quinoa is also a popular ingredient in vegan cooking. Because it’s high in protein, it’s an excellent substitute for meat in many recipes. Quinoa can be used to make veggie burgers, tacos, stir-fries, salads, and more. It’s also a great addition to soups and stews as it helps thicken them up while adding extra nutrition. Whether you’re a vegan or simply looking to add more plant-based meals to your diet, quinoa is a versatile ingredient that can help you create delicious and healthy dishes.
Transition: Now that we’ve explored some creative ways to use quinoa in the kitchen let’s take a look at some common issues that may arise when growing this crop at home.
Troubleshooting Common Issues
From the kitchen to the garden, quinoa has become a popular staple for health enthusiasts. Growing quinoa plants at home can be a rewarding experience and provide a fresh supply of this nutrient-rich seed. However, like any plant, there are common issues that can arise during cultivation.
One common issue is overcrowding. Quinoa plants need space to grow and develop properly. Overcrowding can lead to stunted growth and lower yields. Preventive measures include spacing out seeds or seedlings appropriately, providing adequate sunlight and nutrients, and regular pruning.
Another issue is pests such as aphids or mites. These insects can cause damage to the leaves, reducing photosynthesis and overall plant health. Common solutions include using natural insecticides such as neem oil or introducing beneficial insects like ladybugs to the garden. It is important to monitor plants regularly for signs of pest activity and take action immediately if detected.
Successfully growing quinoa plants at home requires attention to detail and proactive measures against potential issues. By implementing these preventive measures and common solutions, gardeners can ensure healthy and thriving quinoa crops in their own backyard gardens. Stay tuned for tips on successful quinoa cultivation at home in our next section.
Tips For Successful Quinoa Cultivation At Home
Growing quinoa at home can be an exciting and rewarding experience. To ensure a successful harvest, it is essential to follow specific tips for cultivation. Container gardening is a viable option for growing quinoa plants in small spaces. Choose a container that is deep enough to accommodate the root system and has adequate drainage holes. Fill it with nutrient-rich soil that is well-draining, and plant the seeds one inch deep. Water the plant regularly but avoid overwatering as it may lead to root rot.
Climate considerations play a vital role when cultivating quinoa at home. This crop prefers cool temperatures ranging from 60-75°F during the day and 40-50°F at night. In regions with hot summers, it is best to grow quinoa in partial shade or during cooler months. Ensure adequate sunlight exposure of at least six hours daily for optimal growth and yield. Quinoa also requires well-draining soil, so if you live in an area with heavy rainfall, consider planting on raised beds or adding gravel to improve drainage.
In addition to proper container gardening techniques and climate considerations, consistent maintenance practices such as fertilization, pruning, and pest control are essential for successful quinoa cultivation at home. Use a balanced fertilizer every four weeks throughout the growing season to provide your plants with necessary nutrients. Check regularly for pests such as aphids, spider mites, or whiteflies and use appropriate control measures if needed. Prune off any yellow or dead leaves to prevent disease from spreading throughout your crop.
In summary, container gardening and climate considerations are crucial factors when growing quinoa plants successfully at home. Consistent maintenance practices such as fertilization, pruning, and pest control will also help you achieve a bountiful harvest of nutritious quinoa grains. With these tips in mind, you can enjoy the satisfaction of growing this superfood crop right in your backyard!
Frequently Asked Questions
How Long Does It Take For Quinoa Plants To Grow And Mature?
According to the latest research, it takes approximately 90-120 days for quinoa plants to grow and mature. It is essential to note that quinoa requires specific weather conditions, soil type, and adequate sunlight for optimal growth. The benefits of quinoa are tremendous, as it is a gluten-free whole grain that is high in protein and fiber. Quinoa cultivation can help in improving soil quality and preventing erosion. The best time to harvest quinoa is when the leaves begin to turn yellow and fall off, indicating that the plant has reached maturity. As a horticulture expert/specialist, it is crucial to understand the various stages of growth and maturation of quinoa plants for maximum yield. By understanding these processes, individuals can cultivate this highly nutritious crop successfully.
Can Quinoa Be Grown In Containers Or Does It Need To Be Planted Directly In The Ground?
Quinoa plants can be grown in containers as long as the soil requirements are met. Container gardening is a viable option for those who have limited space or prefer to plant indoors. The container size should be at least 12 inches deep and wide enough to accommodate the roots. The soil must be well-draining, nutrient-rich, and have a pH level of 6.0-7.5. A mix of compost, peat moss, and perlite or vermiculite is recommended for quinoa plants grown in containers. It is important to keep the soil moist but not waterlogged and provide adequate sunlight for the plants to thrive. With proper care, quinoa plants can be successfully grown in containers at home.
Is It Necessary To Use Special Soil Or Fertilizers For Growing Quinoa?
To provide the best growing conditions for quinoa, it is recommended to use well-draining, nutrient-rich soil with a pH range of 6.0-7.5. Organic fertilizers such as compost, aged manure or worm castings can be used to supplement the soil and provide necessary nutrients throughout the growing season. Avoid using chemical fertilizers or pesticides as they can harm beneficial microorganisms and disrupt the natural balance of the soil ecosystem. Additionally, regular watering and adequate sunlight are crucial for healthy growth and development of quinoa plants. With proper care and attention, home gardeners can successfully cultivate their own quinoa crop with high yields of nutritious grain.
Can Quinoa Be Grown In All Types Of Climates Or Is It Only Suitable For Certain Regions?
Quinoa is a versatile crop that can be grown in diverse agro-ecologies, ranging from tropical to temperate zones. However, growing challenges may arise due to the plant’s temperature requirements. Quinoa is generally considered a cool-season crop that prefers daytime temperatures between 60 to 75°F and nighttime temperatures between 35 to 50°F. Therefore, growing quinoa in hot climates or during summer months may be challenging unless adequate measures are taken to regulate the temperature and provide shade. In contrast, in colder regions or high altitudes, quinoa may require longer growing seasons and frost protection measures. Overall, while quinoa can adapt to various climates, it is essential for growers to understand its specific temperature needs and take appropriate actions to ensure successful cultivation.
Are There Any Specific Pruning Or Trimming Techniques Required For Maintaining Healthy Quinoa Plants?
Pruning techniques and soil requirements are crucial factors in maintaining healthy quinoa plants. During the growing season, it is essential to regularly trim the plant’s excess growth to promote healthy foliage and prevent overcrowding. Pruning also encourages branching, which can lead to more significant yields. In terms of soil requirements, quinoa thrives in well-draining soil that is rich in organic matter. The ideal pH range for quinoa cultivation is between 6.0 and 7.5. It is also recommended to add compost or aged manure to the soil before planting to provide additional nutrients for the plants. By implementing proper pruning techniques and ensuring adequate soil conditions, homeowners can successfully grow healthy quinoa plants at home.
Conclusion
Quinoa is a highly nutritious grain that is not only delicious but also easy to grow at home. The plant typically takes between three to six months to mature, and can be grown in containers or directly in the ground. While it doesn’t require any special soil, adding a bit of compost or fertilizer can help boost growth.
Quinoa is well-suited for different climates and regions, although it prefers cooler temperatures and well-draining soil. Pruning and trimming are not necessary for maintaining healthy plants, but removing the flower heads before they go to seed can encourage more foliage growth. Overall, growing quinoa at home can be a rewarding experience that provides you with fresh, healthy food straight from your own garden. So why not give it a try? With some patience and care, you’ll soon be enjoying the fruits of your labor in a bountiful harvest that’s sure to impress.
Image Credits
- “Bolivian quinoa farmers prepare the soil for planting” by Bioversity International (featured)

