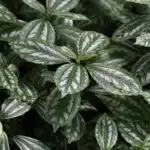
Mint is an incredibly versatile herb that can be used for cooking, making tea, and adding flavor to any dish. Its unique taste and smell make it a favorite among chefs and home cooks alike. If you’re looking for an easy way to add some extra zing to your dishes, look no further than mint! In this article, we’ll discuss how to grow and care for mint.
The process of growing mint is relatively simple and requires minimal effort from the gardener. Mint loves full sun and well-drained soil—and with just a little bit of TLC, it will thrive in almost any environment. We’ll explain the best ways to plant and care for your mint so that you can enjoy its delicious leaves all season long.
Last but not least, we’ll touch on various uses for fresh mint leaves including teas, marinades, desserts, salads, cocktails—the list goes on! No matter what type of dish you’re making, adding a few sprigs of fresh mint can take it up a notch with its bright flavor and aroma. So if you’re ready to learn more about how to grow and care for your own mint plants at home, let’s get started!
Choose The Right Mint Plant
Making the right choice when it comes to selecting a mint plant can be an exciting experience. Having the right variety of mint is essential if you want to get the most out of your gardening endeavors. There’s a wide variety of mints to choose from, each with its own unique characteristics and uses.
When selecting your mint plant, make sure to take into account the size and type of space you have available for planting. Some varieties of mint are more compact than others and may not require as much room for growth. Consider also how much maintenance you’re willing to do in order to keep your mint healthy – some varieties may require more attention than others.
Also think about what you plan on using the plant for; there are many different types of mint that offer various flavors and aromas, so consider which ones would best suit your needs. With so many options available, there’s no need to settle for anything less than perfect! Take your time exploring all the possibilities and find the one that works best for you.
Making an informed decision when it comes to selecting a mint plant is key – it’ll ensure that you get off on the right foot with your mint-growing journey!
Select A Suitable Planting Site
Selecting the right planting site for your mint plant is essential for ensuring it receives all the necessary nutrients and water to thrive. Take, for example, Mary who wanted to grow mint in her garden but didn’t consider how much sun her location gets. She ended up with a patchy and weak-looking mint that hardly produced any leaves.
To ensure your mint grows strong and healthy, here are five key considerations when selecting a planting site:
- Soil Type: Look for well-draining soil that isn’t too heavy or clay-like as this will make it difficult for the roots to spread out.
- Sunlight: Mint prefers full sun so look for a planting site with at least 6 hours of direct sunlight each day.
- Water Supply: Have access to consistently moist soil by selecting an area near your water source like a hose or sprinkler system.
- Wind Protection: Make sure the spot you choose is sheltered from strong winds as this can cause damage to the delicate leaves.
- Space: Leave enough room between plants so they have enough space to spread out without overcrowding other plants nearby.
Once you find an ideal spot that meets all these criteria, prepare the soil before planting by loosening it up with a rake or shovel and adding some compost or fertilizer. This will help your mint plant get off to a great start!
Prepare The Soil For Planting
When it comes to preparing the soil for planting, many people feel intimidated. Yet, with a few simple tips, it is easy to prepare your soil for mint and ensure that your plant will have the best chance of thriving.
One of the most important steps in preparing your soil is to make sure that it is well-drained. If you have clay soils or areas with poor drainage, consider adding compost or other organic material to help aerate it and improve drainage. Additionally, if you are dealing with acidic soils, try adding some limestone or lime dust to increase pH levels.
You should also make sure that the soil has enough nutrients for your plants by mixing in compost or fertilizer before planting. Not only will this give them an added boost of nutrients, but it will also help to keep them healthy and promote growth over time. Additionally, if you are growing mint in containers, be sure to use potting mix specifically designed for container gardening so that your plants won’t become overly saturated with water.
By following these steps when preparing the soil for planting mint, you can rest assured that your plants will have all they need to thrive and grow successfully. With this foundation in place, you can now move on to planting your mint seeds or transplants!
Plant Mint Seeds Or Transplants
Have you ever wondered if planting mint seeds or transplants is the best way to grow and care for mint? To answer this question, let’s first explore the theory that planting seedlings is better than planting seeds. This theory suggests that when it comes to growing mint, it’s more time-efficient to start with established plants because they are already adapted to their environment and will, therefore, have a higher chance of success.
Now that we’ve investigated the truth of this theory, let’s look at how best to plant mint seeds or transplants. The key here is to make sure you provide the right kind of soil conditions for optimal growth. To do this, you’ll need loose, well-draining soil with a pH level between 6 and 7. You’ll also want to add some compost or aged manure before sowing your seeds or transplanting your seedlings.
When it comes down to it, whether you choose to plant from seed or from a transplant really depends on your own preferences and resources. If you don’t mind taking the extra time and effort to sow your own seeds and tend them carefully until they sprout, then growing from seed may be the way for you. However, if you’re looking for a quicker solution with less fuss, then purchasing transplants may be the best option. Regardless of which route you take, however, providing optimal sun exposure is essential for ensuring healthy mint growth.
Provide Optimal Sun Exposure
Providing optimal sun exposure is an important step in growing and caring for mint. Consider the case of Jane, a passionate home gardener who was determined to have a thriving mint patch in her backyard. She knew that providing the right amount of sunlight was essential to ensure her plants would flourish.
When it comes to mint, the best location is one that receives six hours or more of direct sunlight each day. Jane made sure to choose a spot with plenty of sun and not too much shade. She also kept her plants away from any other large trees or structures that might cast shadows over them.
To provide further protection, Jane added mulch around her plants and ensured they had plenty of air circulation. This helped keep the soil moist and prevented the leaves from getting too hot in the summer months. By taking all these steps, she was able to create an environment that allowed her mint plants to thrive for many years to come.
By providing optimal sun exposure, gardening enthusiasts like Jane can give their mint plants the best chance at success so they can enjoy its delightful flavor and aroma for years to come.
Water Mint Plants Regularly
Mint is a delightful herb to grow in the garden. For example, consider Tom, who was eager to get his own mint plants going. To ensure success, he knew that regular watering was key for keeping his mint plants healthy.
Watering is important for keeping the soil moist but not soggy. To do this, Tom made sure he watered his mint plants two or three times per week. He also tested the soil by pushing a finger about an inch deep into it; if it came out dry, it was time to water again.
Tom also avoided over-watering and let the top two inches of soil dry out before re-watering. This helped him keep the roots from becoming too saturated and rotting away.
By following these simple watering tips, Tom’s mint plants have grown strong and fragrant with plenty of leaves to add flavor to dishes. With regular watering and care, other gardeners can achieve similar results with their own mint plants.
Fertilize Mint Plants
Fertilizing mint plants is just as important as watering them. With the right fertilizer, you can give your mint plants the nutrients they need to grow and thrive. But when it comes to fertilizing, there are a few things to keep in mind.
To start, you’ll need to choose the right fertilizer for your particular type of mint plant. Not all fertilizers will work for every type of mint—so make sure you’re using one that’s specifically designed for the variety of mint you have. Additionally, be sure to follow the instructions on the packaging for use and application—over-fertilizing can cause more harm than good.
Finally, it’s important to apply the fertilizer at least once or twice a season. This will help ensure that your mint plants get all the nutrition they need while they’re growing. With this simple step, you can easily ensure your mint plants stay healthy throughout their life cycle. Now let’s move onto how you should pinch or prune your mint leaves…
Pinch Or Prune Mint Leaves
Whereas fertilizing mint plants requires careful consideration and attention to detail, pruning or pinching off the leaves is a much simpler process. It is an essential part of growing and caring for mint to ensure that it remains healthy and strong. Pruning mint leaves has many advantages and can help keep the plant from becoming overly large or spindly.
Pruning or pinching off the leaves ensures that the plant has enough energy to produce new growth, instead of directing all its resources towards supporting existing foliage. This encourages a bushier and more attractive appearance, as well as providing more leaves for harvesting. Additionally, removing any dead or damaged leaves helps prevent diseases from spreading throughout the plant.
With just a few simple steps, you can easily prune your mint plants to keep them looking their best. Take scissors or garden shears and snip off any dead or diseased leaves first, then remove any stems that have grown too long or are overcrowded. Finally, you can use your fingers to pinch off individual leaves along the stem if necessary. Doing this regularly will help control the size of your mint plants without compromising their health.
By following these simple steps for pruning your mint leaves, you can help ensure that your plants remain healthy and look great in your garden! Furthermore, taking care to control weeds and pests will also be beneficial in keeping your mint in top condition.
Control Weeds And Pests
A stitch in time saves nine.” This age-old adage applies to weed and pest control in your mint garden. Controlling weeds and pests is an essential step for the growth and care of mint. Taking action now will save you from potential future issues, so let’s explore what must be done.
First, inspect the area for any weeds that may have sprouted up. Hand-pull unwanted weeds if present, as this is the most effective way of controlling them. You can also use herbicides that are specifically designed for weed control. Be sure to read the directions before applying any chemical, as you want to make sure it won’t harm your mint plants or other surrounding vegetation.
Next, maintaining proper hygiene of your mint garden is key in preventing insect infestations. Make sure all debris such as fallen leaves are removed regularly, especially during periods when there is high insect activity such as summertime or wet weather conditions. Additionally, consider using an insecticide specifically formulated for controlling pests on herbaceous plants like mint if needed.
By following these steps on how to control weeds and pests in your mint garden, you’ll be able to enjoy a healthy harvest of beautiful leaves! Now let’s look at mulch for weed suppression and moisture retention—a crucial step for growing and caring for mint.
Mulch For Weed Suppression And Moisture Retention
Mulching for moisture and weed suppression is a must for mint-lovers who want their plants to thrive. Taking the time to properly mulch around mint plants helps keep weeds at bay, conserve soil moisture and provide an extra layer of insulation. Not only does this make caring for your mint easier, but it also helps ensure that your plants remain healthy and vigorous.
When selecting a type of mulch for your mint, look for one that’s lightweight, such as straw or grass clippings. It’s important not to use too much mulch; aim for a depth of up to two inches, which will be enough to get the job done without smothering your plants. Once you’ve spread the mulch around evenly, water it in well so that it can settle into place.
Finally, don’t forget to monitor the soil moisture level regularly and add more mulch as needed; this will help keep weeds away while ensuring that your mint gets all the nutrients it needs to stay strong and healthy. With a bit of effort, you’ll soon have an abundant crop of fragrant leaves!
Harvest Mint Leaves
Harvesting mint leaves is a crucial step in the process of growing and caring for your mint plant. You want to make sure you are harvesting them at the right time, otherwise they may not be as flavorful or fragrant. Here’s how to properly harvest mint:
Timing is important – Make sure you pick your mint when it’s most fragrant and flavorful. This is typically just before it flowers, early in the morning or late in the evening.
Use sharp scissors – Picking with your hands can damage the plant and cause it to droop; use sharp scissors instead so that you don’t hurt the plant any more than necessary.
Cut the stem above a leaf node – Cutting at a leaf node will ensure that two new stems will grow back in its place, rather than just one.
Don’t take too much – Try not to take more than a third of each stem–any more could harm your plant’s growth and health.
Be careful with pruning – When pruning, try to leave some stems on each branch for extra support for the leaves and flowers to come later on in the season!
Harvesting too often can lead to a decrease in flavor, so make sure you only pick what you need for immediate use or freezing/drying for future use. Doing this will guarantee that your mint stays healthy and continues producing delicious leaves throughout the season! With these tips, you’ll have no trouble harvesting your mint correctly every time – now let’s move onto storing and preserving those freshly cut leaves!
Store And Preserve Mint Leaves
Storing and preserving those delicious mint leaves is the final step in enjoying your homegrown mint. You can store them for a few days in the refrigerator, wrapped in a damp paper towel. This will keep them crisp and flavorful. For longer storage, you can dry the leaves to preserve their flavor.
Lay the mint leaves out on a paper towel and let them air dry for several days. Once they are completely dried, you can crumble them into small pieces and store them in an airtight container or jar. The dried leaves make a great addition to sauces and salads, as well as many other recipes that call for fresh herbs.
Once your mint plants are established, you can easily propagate them by taking cuttings of the stems or dividing up the crowns once they get too big. With just a little bit of effort, you’ll have plenty of fresh mint all season long!
Propagate Mint Plants
Propagating mint plants is a great way to ensure that you always have a fresh supply of this versatile herb. You can propagate mint from cuttings, division, or seed. Cuttings can be taken in spring and fall when the plant is actively growing. Take a 4-inch tip cutting, remove the leaves from the bottom two inches and place in moist soil or water. Once it takes root, transplant into its own pot.
Division is another way to propagate mint and involves taking an established plant, cutting or gently pulling it apart into several pieces, and replanting each one separately. This method works best in mid to late spring when the mint has grown enough to divide easily but isn’t so large that it’s difficult to separate and manage.
If you choose to grow your mint from seed instead of propagating with cuttings or division, wait until late winter or early spring when temperatures begin to warm up before sowing seeds in seed trays filled with seed starting mix. Cover lightly with soil and keep moist until sprouts appear – usually within 1-3 weeks depending on temperatures. When 4-5 leaves have formed on each plant, transplant them into their own pots filled with damp soil mix.
TIP: For best results be sure to use sterilized scissors or pruning shears when taking cuttings for propagation as this prevents spreading any infections or diseases between plants.
Divide And Replant Established Mint Plants
Dividing and replanting established mint plants is like a precious ritual, one that signals the start of a new season of growth. The process is simple but requires careful attention to detail in order to ensure healthy new growth.
First, identify an existing healthy mint plant with a good root system. Using a shovel or spade, carefully dig up the clump being sure not to disturb the roots too much. Separate the individual shoots from the main root ball and re-plant them in well-draining soil in an area with plenty of sunlight. Water regularly and monitor for pests or diseases.
With proper care, these newly planted mint plants will have all they need to thrive and begin producing lush, fragrant leaves in no time. Taking the necessary steps to replant your established mint plants is key for ensuring their success for years to come. Now you’re ready to move on to what comes next: overwintering your mint plants!
Overwintering Mint Plants
If you want to continue enjoying the benefits of growing mint year-round, you’ll need to consider how to overwinter your plants. Though it may seem daunting at first, with a few simple steps, you can make sure your mint plants survive the winter and thrive in the spring.
The most important part of overwintering mint is selecting an appropriate spot. Mint prefers cooler temperatures and some shade during the winter season, so try to find an area where both of these conditions are met. A north-facing wall or fence can provide good protection against cold winds and direct sun exposure. Once you’ve found an optimal location for your mint plants, add a layer of mulch around them for additional insulation during colder months.
When preparing for winter weather, don’t forget about watering. Mint needs moist soil during colder months, but not wet soil – too much water can damage the plant’s roots and lead to disease or rot. Make sure you check on your plants regularly and give them enough water when needed.
With these tips in mind, you’ll be able to keep your mint plants healthy and strong throughout the winter season. Your efforts will pay off in the springtime when they’re ready to produce beautiful foliage again!
Frequently Asked Questions
How Often Should I Fertilize My Mint Plants?
Irony is an interesting technique to represent ideas, and so it is when it comes to caring for mint plants. You would think that mint should require a lot of care and attention to keep it healthy, yet in reality the opposite is true. Fertilization is one of the least important aspects of growing and caring for mint.
In fact, fertilizing your mint plants too often can have adverse effects on their health. Mint prefers soil with a slightly acidic pH level and excessive fertilization can lead to an increase in the pH level, making the soil unsuitable for your plants. The best way to ensure that your mint plants remain happy and healthy is simply by not overdoing it when it comes to fertilizer.
So how often should you be fertilizing your mint? A good rule of thumb is once every six weeks during the growing season – spring through late summer – using a balanced liquid fertilizer diluted at half strength. Any more than this may damage your plants, while any less could result in slower growth or poor-quality leaves or flowers. Balance is key!
What Type Of Soil Is Best For Planting Mint?
Ah, the fresh scent of mint! It’s a great addition to any garden, but to get the best results you need to know what type of soil is best for planting it. Fortunately, we have all the information you need right here.
Let’s start with the basics. Mint loves well-drained soil that is rich in organic matter and has a slightly acidic pH level. It can grow in many different types of soil, from sandy loam to clay, but the ideal mixture will be a combination of these two. You should also make sure your soil has plenty of nutrients; adding compost or manure will do wonders for your mint plants!
Now that you know your soil type, it’s time to get down to business. Planting mint requires some attention and care but don’t worry – it’s worth it! Make sure you sow your seeds or transplant your young plants at least 6 inches apart so they have plenty of room to grow. Water regularly and keep them out of direct sunlight during the hottest part of the day. With some love and patience, you’ll soon have lush green mint plants ready for harvesting!
So there you have it – all the tips you need for growing and caring for mint successfully. Get ready for an abundance of freshness in your garden this summer!
How Can I Prevent Weeds From Growing Near My Mint Plants?
When it comes to growing mint, there’s a delicate balance that needs to be found between the beauty of the plant and its surrounding environment. Just like the mythical Medusa, who could turn anyone who looked at her into stone, mint can quickly take over an entire garden if not properly controlled. To ensure the success of your mint plants, here are four tips for preventing weeds from taking over:
Firstly, use mulch to create a barrier between your mint plants and any unwanted weeds. This helps create an inhospitable environment for weed growth while providing essential nutrients and insulation for your mint plants. Secondly, keep an eye out for any emerging weeds before they have a chance to grow. Pulling them up as soon as you see them will help minimize their effect on your garden. Thirdly, avoid using chemical herbicides in order to prevent any damage to nearby plants or wildlife. Finally, make sure you’re planting your mint in well-draining soil that won’t leave it susceptible to waterlogging or poor aeration.
These simple tips can go a long way towards keeping weeds away from your beloved mint plants and allowing them to thrive without competition from other vegetation. By taking proactive steps in controlling the spread of weeds and by providing nourishing soil and mulch barriers you’ll be able to enjoy all the benefits of having fresh and abundant mint all year round!
How Do I Know When It’S Time To Harvest My Mint Leaves?
The fragrant aroma of mint leaves is like a beacon of light for many gardeners, symbolizing freshness and flavor. Reaping the rewards of a successful harvest is deeply gratifying, but it’s important to know when it’s time to pick those mint leaves. It’s an art that takes some practice to master, but there are a few tips and tricks that can help you get it right.
First, choose leaves that are slightly larger than your thumb and have rich green colors. If the stems look dry or wilted, they’re past their prime. Also, try to pick in the morning when the flavors are at their strongest. As you become more familiar with the plant, you’ll start to notice differences in taste between different regions of the same plant and recognize how much time each leaf has left before it loses its potency.
Finally, timing is everything when harvesting mint leaves: too soon and you won’t get peak flavor; too late and you risk losing out on all those delicious notes altogether. Pay attention to subtle cues such as changing colors or textures on the stem or leaf surface for clues about when best to harvest your crop — these can provide insight into how ripe the leaves are. With a bit of patience and careful observation, you’ll be able to enjoy mint from your garden all season long!
Is There An Easy Way To Store And Preserve My Mint Leaves?
Preserving your mint leaves is a great way to enjoy their freshness for longer. After all, the last thing you want is for your harvested mint leaves to go to waste. Fortunately, storing and preserving them is easy and there are several ways to do it.
The first option is to store them in an airtight container or jar after drying them out. To dry the leaves, spread them out on a baking tray lined with parchment paper and bake in the oven at the lowest setting possible until they’re completely dry. Once they’re ready, place them in a container or jar and store in a cool, dark place – this will help keep their flavor and texture intact for up to 6 months!
Another great way to preserve your mint leaves is by freezing them. Simply rinse off any dirt from the leaves and pat dry before placing them into ice cube trays filled with water or a neutral-flavored oil like sunflower oil. Once frozen, transfer the cubes into an airtight container or freezer bag – this will ensure that they stay fresh for much longer than if stored in the refrigerator!
Storing and preserving your mint leaves doesn’t have to be complicated – with just a few simple steps you can make sure they stay flavorful and delicious for months on end! So don’t let those delicious leaves go to waste – take some time today to store or freeze them so you can enjoy their delightful taste whenever you want!
Conclusion
Mint is one of the easiest plants to grow and care for, making it a great addition to any garden. With proper fertilization, soil choice, and weed prevention, you can have a vibrant mint plant that provides you with fresh leaves for years to come. Knowing when to harvest your mint leaves is key to maintaining its flavor and texture; too early or too late can ruin the experience. Storing and preserving your mint leaves should be done quickly after harvesting as well, so that you can enjoy them for weeks or even months after harvesting.
Growing and caring for a mint plant is like watching a flower bloom in slow motion. Each step of the process has its own unique beauty; from the first sprout of green peeking out from the soil to the full-bodied aroma of freshly picked leaves. It’s an incredibly rewarding experience that will leave you with a wealth of knowledge about how to create lush gardens in your backyard.
Once you’ve mastered growing and caring for this wonderful herb, you’ll never look back. You’ll be able to enjoy freshly harvested mint whenever you need it and revel in its delightful scent. There’s nothing quite like knowing how to bring life into your garden with just some simple steps!


