Growing agave indoors can be a rewarding and challenging experience for any indoor plant enthusiast. These plants are known for their striking appearance and unique growth patterns, making them a popular choice for those seeking to add some tropical flair to their homes. However, successfully growing agave indoors requires careful attention to detail, as these plants have specific needs that must be met in order to thrive.
In this article, we will provide an in-depth guide on how to grow agave indoors, from selecting the right soil and container to providing the proper amount of light and water. Whether you’re a seasoned indoor gardener or just starting out, our expert tips and advice will help you cultivate healthy and vibrant agave plants that will bring joy and beauty to your home for years to come. So sit back, grab your gardening gloves, and get ready to learn everything you need to know about growing agave indoors!
Understanding Agave Plants
Agave is a genus of succulent plants, native to the arid regions of Mexico and the southern United States. These plants are renowned for their fleshy leaves, which can grow up to six feet long, and their striking flower stalks that can reach up to thirty feet in height. Agave plants are known for their slow growth, with some species taking up to ten years to mature.
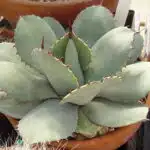
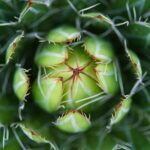
Understanding agave plant anatomy is crucial for successful indoor growth. The leaves are thick and waxy, designed to store water in times of drought. The plant’s roots are shallow and spread out widely, allowing them to absorb water from large areas of soil. Agave plants also have a distinctive rosette-shaped structure, with all leaves emanating from a central point.
Agave plant growth stages begin with germination from seeds or the planting of offsets (baby plants) produced by mature plants. The first stage is the juvenile stage, where the plant grows its first few leaves and establishes its root system. The next stage is the vegetative stage, where the plant produces more leaves and grows rapidly. Finally comes the reproductive stage when it produces a tall spike-like inflorescence that bears flowers and seeds before dying off altogether.
A better understanding of agave anatomy and growth stages will help you make informed choices when it comes to caring for your indoor agave plant(s). In the next section, we’ll cover some benefits of growing agave indoors that may convince you to give it a try!
Benefits Of Growing Agave Indoors
Indoor agave care is relatively easy and straightforward, making it an excellent option for those who are new to plant care. Agave plants thrive in bright light conditions and require very little water, making them ideal for growing indoors. They are also low-maintenance plants that can tolerate a wide range of temperatures, making them perfect for busy homeowners or those who travel frequently.
One of the most significant benefits of growing agave indoors is its ability to purify the air. Like many other plants, agave removes harmful toxins from the air, creating a healthier living space. This makes indoor agave growing an excellent choice for those who suffer from allergies or respiratory issues.
Another benefit of indoor agave growing is their striking appearance. With their unique shapes and vibrant colors, these plants make excellent decorative pieces that can add a touch of elegance to any room. What’s more, they are incredibly versatile and can be grown in various containers that suit different interior designs.
Moving forward into choosing the right agave species, it’s essential to consider your level of experience with plant care and your specific needs when selecting the perfect species for your home. Each type has unique characteristics that require different levels of maintenance and care. In the next section, we will explore some of the most popular agave species available on the market today and provide tips on how to choose one that suits your particular requirements.
Choosing The Right Agave Species
Agave plants are a popular choice for indoor gardening enthusiasts. These plants are known for their unique characteristics such as their fleshy leaves, sharp spines, and impressive size. There are over 200 species of agave that vary in size, color, texture, and growth habit. As an indoor agave growing expert, it is important to choose the right species of agave that will thrive in the best growing conditions for agave indoors.
The best growing conditions for agave indoors include bright light, well-draining soil, and infrequent watering. Agaves are sun-loving plants that require at least six hours of direct sunlight per day. They can tolerate some shade but may become leggy and weak if they do not receive enough light. Additionally, agaves prefer soil that is sandy or gravelly with good drainage. Overwatering can lead to root rot which can be fatal to the plant.
When selecting the right species of agave for indoor growing, it is important to consider the size of the plant and its growth habit. Some species such as Agave americana can grow up to six feet tall and wide while others like Agave victoriae-reginae stay relatively small. It is also important to consider the color and texture of the leaves as this will add interest and beauty to your indoor garden. With careful consideration of agave plant characteristics and best growing conditions for agave indoors, you can select a species that will thrive in your home environment.
As you move on to selecting the right soil for your indoor agave plant, remember that providing optimal growing conditions is key to successful cultivation. By choosing a species of agave suited for indoor environments and providing adequate light exposure along with well-draining soil, you set your plant up for continued growth success.
Selecting The Right Soil
When it comes to growing agave indoors, selecting the right soil composition is essential. Agaves thrive in well-draining soils that are low in organic matter. This means using a soil mix that contains coarse sand, perlite or pumice, and gritty materials like gravel or crushed rock. These ingredients allow excess water to drain quickly, preventing root rot and other diseases.
Pot drainage is another critical factor when growing agave indoors. Choosing a pot with adequate drainage holes is crucial to prevent water from accumulating at the bottom of the container. Without proper drainage, excess moisture can lead to root rot and other fungal diseases that can kill your plant. To ensure good drainage, place a layer of gravel or rocks at the bottom of the pot before adding soil.
In summary, selecting the right soil composition and ensuring proper pot drainage are two essential steps when growing agave indoors. By providing your plant with a well-draining soil mix and a pot with adequate drainage, you will help prevent common problems like root rot and fungal diseases. In the next section, we’ll discuss how to pick the perfect container for your indoor agave plant without compromising on style or functionality.
Picking The Perfect Container
When it comes to growing agave indoors, selecting the perfect container is crucial for its growth and overall health. The size of the container is an important factor to consider as it can affect the root development and ultimately, the plant’s well-being. Agaves have a deep root system, so choosing a deep container that is at least 12 inches in diameter would be ideal. This will allow enough space for the roots to spread out and help prevent them from becoming overcrowded.
Aside from container sizes, decorative choices must also be taken into account. While there are various containers on the market that come in different shapes and colors, it’s important to choose one that can provide good drainage. A container with drainage holes at the bottom allows excess water to escape, preventing root rot from occurring. Additionally, make sure that the material of your chosen pot isn’t porous or absorbent as this may cause moisture retention problems.
In choosing a container for your indoor agave, you can opt for clay pots, plastic containers or even repurpose old items such as buckets or wooden crates. Ultimately, what’s important is that you choose one that can promote healthy growth and suit your aesthetic preferences. With proper selection and care of your agave’s container, you’ll be able to successfully cultivate an attractive and thriving indoor garden.
When choosing a container for your indoor agave plant, keep in mind that bigger is always better. Having ample space for roots to grow promotes healthy and vigorous development of foliage. In addition to this rule of thumb, don’t forget to consider whether your chosen pot provides adequate drainage as well as complements your interior design preferences. Once you’ve found the perfect container for your agave plant, it’s time to move on to the next step: watering!
Watering Your Agave Plant
After choosing the perfect container for your indoor agave plant, it is important to understand how to properly water it. Overwatering is a common mistake that can lead to root rot and ultimately kill the plant. According to a study by the University of Florida, over 90% of indoor plant deaths are due to improper watering. Therefore, it is crucial to pay attention to watering frequency and soil moisture.
The frequency of watering your agave plant depends on several factors such as humidity levels, temperature, and soil type. It is recommended that you allow the soil to dry out completely between waterings. This ensures that you are not overwatering your plant which can cause damage. Additionally, it is important to avoid getting water on the leaves or in the rosette where excess moisture can accumulate.
Monitoring soil moisture is another important aspect of proper watering for indoor agave plants. Using a moisture meter or simply sticking your finger into the soil up to about an inch can help determine if it’s time for watering. The ideal soil moisture level for agave plants should be about 50-75% when measured with a meter or when there is no visible moisture on your finger after feeling the soil.
To continue providing optimal conditions for your indoor agave plant, it is important to ensure they receive adequate light exposure. Providing the right amount of light will promote healthy growth and prevent issues such as stretching towards light sources or scorching from excessive sunlight.
Providing The Right Amount Of Light
When growing agave indoors, the type of lighting used is an important factor. Fluorescent lighting is the most common type, but some plants may require different types of lighting such as metal-halide or high-pressure sodium lighting. The timing of lighting is also important, and plants should receive the recommended amount of light for their particular species. Additionally, the intensity of lighting should be appropriate for the plant’s needs, as too much or too little light can be detrimental to the health of the agave. Finally, it is essential to make sure that the distance between the lighting and the agave is appropriate, as this will affect the amount of light the plant receives.
Types Of Lighting
Are you struggling to grow your agave plant indoors? One of the most important factors in growing healthy and strong agave plants is providing them with the right amount of light. When it comes to indoor cultivation, there are two main sources of light that you can use: natural light and grow lights.
Natural light sources include windows, skylights, and doors. While these sources provide a good amount of light, they may not be enough for your agave plant if they are not facing the right direction or if they are blocked by trees or buildings. It is important to position your agave plant near a window that receives direct sunlight for at least six hours a day. If natural light sources are not sufficient, you can supplement them with grow lights.
Grow lights are artificial lighting systems that mimic the sun’s rays. They come in different types such as LED, fluorescent, and high-intensity discharge (HID). When choosing grow lights for your agave plant, consider their wattage, color spectrum, and coverage area. A 400-watt HID system is suitable for most indoor gardens while LED lights are more energy-efficient and have a longer lifespan. The color spectrum also plays a role in the growth of your agave plant – blue and red spectrums promote vegetative growth while orange and yellow spectrums promote flowering.
In conclusion, providing the right amount of light is crucial for growing healthy and strong agave plants indoors. Natural light sources such as windows should be used whenever possible but may need to be supplemented with grow lights if insufficient. When choosing grow lights, consider their wattage, color spectrum, and coverage area to ensure optimal growth for your agave plant.
Lighting Timing
Providing the right amount of light is a significant aspect of growing healthy and strong agave plants indoors. Along with lighting intensity and color spectrum, lighting timing is another crucial factor in determining the growth and development of your agave plant. The timing of light exposure plays a vital role in its vegetative growth, flowering, and overall health.
The ideal duration for lighting your agave plant indoors depends on various factors such as the type of plant, its stage of growth, and the light intensity. Typically, an indoor agave plant requires 12-16 hours of light per day during its vegetative phase. During this phase, blue spectrums are more suitable as they promote stem and leaf growth. On the other hand, red spectrums are ideal for flowering as they help to produce more flowers during the blooming period.
It is essential to maintain a consistent lighting schedule for your indoor agave plant to avoid any stress or shock caused by sudden changes in routine. It is advisable to use a timer to ensure that your agave plant receives adequate lighting at regular intervals throughout the day. By providing your indoor agave plants with optimal lighting timing along with intensity and color spectrum requirements, you can ensure their healthy growth and development.
Lighting Intensity
Providing the right amount of light is one of the most critical aspects of growing healthy and strong agave plants indoors. While lighting timing plays a vital role in its vegetative growth, flowering, and overall health, adjusting light intensity can also affect your plant’s development. As an indoor agave growing expert, I recommend adjusting the light intensity according to the plant’s needs.
Light intensity refers to the brightness or strength of light emitted by a lamp or bulb. The ideal light intensity for your indoor agave plant depends on various factors such as its stage of growth and the type of plant. During its vegetative phase, agave plants require a higher light intensity ranging from 3000-5000 lumens per square foot to promote stem and leaf growth. In contrast, during their blooming period, they require lower light intensity ranging from 1500-2500 lumens per square foot to produce more flowers.
To provide optimal lighting for your indoor agave plants, it is essential to adjust the light duration along with light intensity. Typically, during their vegetative phase, they require 12-16 hours of light per day while requiring 8-10 hours of darkness for their blooming period. By maintaining consistent lighting schedules and providing adequate lighting at regular intervals throughout the day using timers or other automated systems, you can ensure healthy growth and development for your indoor agave plants.
In conclusion, adjusting the lighting intensity based on your plant’s needs while maintaining consistent lighting schedules is crucial for successful indoor agave cultivation. With proper care and attention given to their lighting requirements along with other essential factors such as water and soil management, you can enjoy healthy and thriving indoor agave plants that add beauty and tranquility to your living space.
Temperature And Humidity Considerations
To successfully grow agave indoors, it is important to consider the temperature and humidity levels of your environment. The ideal temperature range for agave plants is between 60-85°F (15-30°C). It is important to avoid extreme temperatures that are too high or too low as they can stress the plant and cause damage.
Managing humidity levels is also crucial for indoor agave growth. Agave plants thrive in dry environments with low humidity. High humidity can increase the risk of fungal infections and rotting of the plant’s roots. To maintain appropriate humidity levels, ensure proper ventilation in your growing space and avoid overwatering your agave plant.
To emphasize the importance of managing humidity levels, refer to this table:
| Humidity Level | Effect on Agave Plants |
|---|---|
| Low (less than 50%) | Thrives and grows well |
| Moderate (50-70%) | Can survive but may be at risk of fungal infections |
| High (above 70%) | At risk of root rot and other diseases |
By monitoring the temperature and humidity levels in your indoor growing environment, you can create a suitable environment for your agave plant to thrive. Remember to keep temperatures within the ideal range of 60-85°F (15-30°C) while maintaining low humidity levels to prevent any potential issues from arising. In the next section, we will discuss fertilizing techniques for your indoor agave plant to promote healthy growth.
Fertilizing Your Agave Plant
Agave plants require a well-balanced fertilizer to grow healthy and strong. There are different types of agave fertilizers available in the market, including liquid and granular forms. The type of fertilizer you choose will depend on your preference and the availability of the product in your local nursery.
When to fertilize your agave plant is also an important factor to consider. Generally, it’s best to fertilize your agave during their growing season, which is from spring to summer. This is when they need the most nutrients to support their growth. However, too much fertilizer can also be harmful to your plant, so it’s important not to overdo it.
To ensure that your agave plant gets enough nutrients, it’s recommended that you use a slow-release fertilizer. This type of fertilizer releases nutrients gradually over time, providing a steady stream of nourishment for your plant. Additionally, using an organic fertilizer can be beneficial as it provides essential micronutrients that synthetic fertilizers may not have.
When it comes to caring for indoor agave plants, fertilizing them is just one aspect of their overall care routine. Next up, we’ll discuss another important step in maintaining healthy agaves – repotting them into larger containers when needed.
Repotting Your Agave Plant
As your agave plant grows, you may need to repot it to ensure its continued health and vitality. Repotting techniques for agave plants are relatively straightforward but require some care and attention. It is important to choose the right pot size for your agave plant, as this will impact its growth and overall health.
When selecting a new pot for your agave plant, consider the size of its root system and the amount of space it needs to grow. A pot that is too small can restrict the growth of your plant, while a pot that is too large can lead to overwatering and other problems. Look for a pot that provides enough room for your agave’s roots to spread out, but not so much that it becomes waterlogged or prone to disease.
To repot your agave plant, carefully remove it from its current container and inspect its roots. If they appear crowded or tangled, gently loosen them before placing the plant in its new pot with fresh soil. Water thoroughly after repotting and avoid fertilizing for several weeks while the plant adjusts to its new environment. With proper care and attention, your repotted agave plant should continue to thrive in its new home.
Transition: Now that you know how to properly repot your indoor agave plant, it’s time to consider pruning and propagating techniques that will help keep it looking healthy and vibrant.
Pruning And Propagating Agave
After repotting your agave plant, it’s time to focus on pruning and propagating. Pruning techniques will keep your indoor agave looking healthy and beautiful while propagation methods can help you grow more plants for yourself or others. By implementing these practices, you’ll be able to ensure the longevity of your agave plant.
Pruning is an essential part of maintaining the health and appearance of your indoor agave plant. It involves removing dead, damaged, or diseased leaves to encourage new growth. To begin pruning, use sharp shears to cut off any dead or brown leaves at their base. Be careful not to damage the healthy foliage as this can lead to further issues down the line.
Propagation methods are used to create new plants from existing ones. The most common way to propagate an agave plant is through offsets or “pups.” These small plants grow from the base of the parent plant and can be removed once they are a few inches tall. Cut them away from the parent plant with a sharp knife and replant them in their own pot with fresh soil mix. With proper care, these pups will grow into beautiful adult plants just like their parent.
As you continue caring for your indoor agave plant, it’s important to also be mindful of common pests and diseases that may affect its health. In the next section, we’ll discuss how to identify and deal with these issues so that your agave can continue thriving in its new home.
Dealing With Common Pests And Diseases
Indoor agave growing can be a fulfilling and rewarding experience. However, it is not without challenges. Pests and diseases are among the most common problems indoor agave growers face. These problems can quickly escalate and leave your plants looking stunted, discolored, or even dead.
Identifying symptoms of pests and diseases is crucial in preventing further damage to your plants. Some signs of infestation include distorted leaves, sticky residue on leaves or soil, webbing on the plant’s surface, and holes in leaves. In contrast, some common signs of diseases include yellowing leaves, black spots on leaves or stems, wilting foliage or flowers, and stunted growth. As an indoor agave grower, you must pay close attention to any changes in your plant’s appearance to catch these issues early.
Prevention measures are essential for avoiding pest and disease infestations in your indoor agave plants. One way to prevent pests from invading your space is to keep your indoor garden clean by regularly removing dead leaves and other debris from the soil surface. You may also use organic methods such as spraying neem oil or insecticidal soap on the affected areas to get rid of insects without harming the plant’s health. For diseases prevention, ensure that you avoid overwatering the plant by letting the soil dry out between watering sessions.
Understanding how to identify symptoms of pests and diseases and taking prevention measures is essential for maintaining healthy indoor agave plants. However, if you do notice any issues with your plants despite taking preventative measures, it is important not to panic. With timely intervention using appropriate treatments such as natural insecticides or fungicides products, you can quickly restore your plant’s health back to normalcy.
As an indoor agave grower taking all necessary steps in preventing pests and disease attacks will always be helpful but it isn’t enough; tip on overwintering agave indoors will help ensure that your plants thrive during the winter season.
Tips For Overwintering Agave Indoors
Overwintering Agave Indoors: Tips for Indoor Care
As an indoor agave growing expert, it is important to understand that agaves require specific overwintering techniques to survive indoors. During the winter months, agaves become dormant and their growth slows down considerably. To help your agave thrive during this time, it is important to provide them with the proper care they need.
One of the most important factors in caring for your indoor agave during the winter months is ensuring that they receive enough sunlight. Since natural light can be scarce during this time of year, it may be necessary to supplement with artificial lighting. Additionally, you should be careful not to overwater your agave as their needs will decrease significantly during dormancy.
Another important consideration when overwintering your indoor agave is temperature regulation. Agaves are native to hot climates and prefer temperatures between 60-85°F (15-29°C). During winter months, it may be necessary to use a space heater or other heating source if the temperature drops too low. However, it is important not to place your agave directly in front of a heat source as this can cause damage.
In summary, providing proper overwintering care for your indoor agave requires attention to detail and careful consideration of their specific needs. By ensuring that they receive adequate sunlight and maintaining appropriate temperatures and watering schedules, you can help your agave weather the winter months successfully. In the next section, we will explore some common issues that arise when growing indoor agaves and how best to troubleshoot them.
Troubleshooting Common Issues
Identifying symptoms of common issues when growing agave indoors is essential to maintaining a healthy plant. One issue that often arises is root rot, indicated by brown, mushy roots and yellowing leaves. This occurs when the soil is too wet or doesn’t have proper drainage. Another issue is over-fertilization, which can cause burnt tips on the leaves and stunted growth. Finally, lack of sunlight can result in stretched out, thin leaves.
Effective solutions for these issues include adjusting watering habits, ensuring proper drainage in the soil, and reducing fertilizer application. To fix root rot, allow the soil to dry out completely before watering again and consider repotting in a well-draining mix. For over-fertilization, flush the soil with water to remove excess nutrients and switch to a lighter feeding schedule. To combat lack of sunlight, move the plant closer to a window or invest in grow lights.
By identifying and addressing common issues early on, you can ensure your indoor agave thrives and produces beautiful foliage. In our next section, we will discuss how to enjoy the fruits of your labor by propagating agave pups for future growth or harvesting the leaves for various uses.
Enjoying The Fruits Of Your Labor
Harvesting agave is a process that requires careful attention and planning. The first step in harvesting your indoor agave is to determine when it is ready for harvest. This can be done by checking the leaves of the plant for signs of yellowing or browning, which are indications that the plant is mature enough to be harvested.
Once you have determined that your agave is ready for harvest, it is important to use proper harvesting techniques. This involves cutting the leaves close to the base of the plant using a sharp knife or pair of scissors. It is important to avoid damaging the plant’s roots during the harvesting process in order to ensure that it continues to grow and produce more leaves.
After harvesting your agave, there are many recipe ideas for how to use this versatile plant. One popular use of agave is as a sweetener in place of sugar or honey. Agave syrup can be used in baking, cooking, or as a topping for pancakes or waffles. Additionally, agave nectar can be used as a substitute for honey or maple syrup in salad dressings or marinades.
Incorporating fresh ingredients like agave into your meals can be a satisfying way to enjoy the fruits of your labor while also serving others with delicious dishes. Experiment with different recipe ideas and don’t be afraid to get creative in the kitchen with your indoor-grown agave!
Frequently Asked Questions
Can Agave Plants Grow In Low-Light Conditions Indoors?
Indoor lighting plays an essential role in determining the growth and development of agave plants. Since these plants require a lot of sunlight, it’s crucial to provide them with adequate light levels to thrive indoors. However, some agave varieties have adapted to low-light conditions, making them suitable for indoor growing. The Agave victoriae-reginae, commonly known as the Queen Victoria Agave, is one such variety that can withstand low-light conditions. Although they may not grow as fast or large as those exposed to brighter light, they still maintain their unique shape and form. As an indoor agave growing expert, I recommend choosing agave varieties that are known to tolerate low-light conditions if you’re planning on growing them indoors. This way, you can still enjoy the beauty and benefits of these magnificent plants without compromising their quality and growth potential.
How Often Should I Water My Agave Plant?
Watering frequency is crucial when it comes to growing agave plants indoors. Overwatering can lead to root rot, while under watering can cause the plant to dry out completely. To find the perfect balance, it’s important to monitor soil moisture regularly. As a general rule of thumb, agave plants should be watered every 2-4 weeks during their active growth period and every 6-8 weeks during their dormant period. However, this may vary depending on factors such as humidity levels and temperature. It’s also important to ensure that the soil is well-draining and that excess water is able to escape easily from the pot. By finding the right watering frequency and maintaining proper soil moisture levels, your indoor agave plant will thrive for years to come.
What Is The Lifespan Of An Indoor Agave Plant?
The lifespan of an indoor agave plant can vary depending on the species, care and environmental conditions. Generally, these plants can live up to 10-25 years indoors with proper care. Agave propagation techniques such as offsets or “pups” can be used to grow new plants from a mature one. It is important to note that while agave plants have long lifespans, they typically only bloom once in their lifetime, which can happen after several years of growth. Proper watering, lighting, and soil conditions are crucial for maintaining the health and longevity of your indoor agave plant.
How Do I Know When It’s Time To Repot My Agave Plant?
Determining when it’s time to repot your indoor agave plant depends on various factors, including the signs of overcrowding and choosing the right soil. Signs indicating that your agave may be outgrowing its current pot include roots that have grown through the drainage holes, a plant that appears top-heavy or unstable, or a plant that requires frequent watering due to rapid soil dryness. When repotting your agave, it’s essential to choose a well-draining soil mix with added perlite or coarse sand to prevent waterlogged roots. It’s also crucial to select a pot that provides ample space for growth without being too large, as this can lead to excess soil moisture and root rot. Overall, regular monitoring of your indoor agave’s growth and taking necessary steps towards proper care will help ensure its longevity and healthy development.
Can I Use Tap Water To Water My Agave Plant Or Do I Need To Use Filtered Water?
Just as a chef selects the finest ingredients to create a masterpiece, an indoor agave grower must carefully consider the water they use. While tap water may seem like a convenient option, it can contain minerals and chemicals that can harm your plant’s growth over time. Instead, opt for filtered or distilled water to ensure your agave receives only the purest hydration possible. Additionally, using a fertilizer formulated specifically for succulents can help provide the necessary nutrients for healthy growth. For those looking to start from scratch, growing agave from seeds is also an option with patience and attention to detail. Remember that every aspect of indoor agave growing requires care and consideration, but the end result is a beautiful addition to any home or space.
Conclusion
Agave plants are a great addition to any indoor garden, but they require some care and attention. Firstly, ensure that you place your agave plant in an area with plenty of sunlight as they thrive in bright environments. However, if this is not possible, low-light conditions may be suitable for some species.
When it comes to watering your agave plant, it is essential to avoid overwatering as this can lead to root rot. Instead, water it once every two weeks or when the soil feels dry. The lifespan of an indoor agave plant can vary depending on the species and the level of care provided.
To determine whether it’s time to repot your agave plant, check the roots for overcrowding or if the plant has outgrown its current pot. As for watering with tap water or filtered water; using tap water should be fine as long as there are no added chemicals like fluoride.
In conclusion, growing indoor agave plants can be a rewarding experience with proper care and attention. Remember to place them in bright areas or low-light conditions, water them once every two weeks or when the soil feels dry, check for signs of overcrowding before repotting, and use tap water without added chemicals. With these tips and tricks at hand, you too can enjoy beautiful and healthy agave plants indoors. As an expert on indoor agave growing strategies, I highly recommend these steps for successful cultivation.
Image Credits
- “Homemade Agave Sweetened Marshmallow Topped Cupcake” by clevercupcakes (featured)


