Ironing is a task that many people find tedious and time-consuming, yet it is an essential part of maintaining a polished appearance. Whether it’s for work or special occasions, well-pressed clothes can make all the difference in how one is perceived. However, ironing does not have to be a daunting task if one follows the proper steps and techniques.
In this article, we will explore four simple steps to effectively iron clothes. From selecting the correct temperature to choosing the right ironing board, we will cover everything you need to know to achieve perfectly pressed clothing every time. By following these steps, you will not only save time but also gain confidence in your ability to present yourself professionally and impeccably dressed. So let’s dive into the world of ironing and learn how to transform wrinkled clothing into smooth and pristine garments.
Preparing Your Ironing Space
Are you tired of spending countless hours ironing your clothes? Do you want to maximize your efficiency and create a comfortable space for this daunting task? Well, look no further! As a professional ironing expert, I have the perfect solution for you.
The first step in preparing your ironing space is to clear away any clutter. This will not only help you stay focused but also improve your posture. Make sure that the ironing board is at a comfortable height and that you have enough room to move around it. Additionally, ensure that there are no sharp objects or hazards nearby.
Next, adjust the lighting in the room. Having sufficient light can make all the difference when it comes to achieving crisp creases and wrinkle-free clothing. You don’t need anything fancy; just make sure there is enough light so that you can see what you’re doing without straining your eyes.
Now that you’ve maximized efficiency and created a comfortable space, it’s time to sort your clothes by fabric type. This will prevent any damage or burns from occurring during the ironing process. Remember, different fabrics require different temperatures and techniques; taking this extra step will save you time and money in the long run.
Sorting Your Clothes By Fabric Type
Fabric care is an essential aspect of laundry organization. Sorting your clothes by fabric type is a crucial step in ensuring that they remain in good condition for a long time. Before ironing, it’s important to understand the different types of fabrics and how to handle them properly.
Start by separating the clothes according to their fabric type. This will help you avoid damaging delicate fabrics such as silk, chiffon, or lace during ironing. You can sort your clothes into three categories: delicate, medium, and heavy fabrics. Delicate fabrics include silk and chiffon, medium fabrics include cotton and wool blends, while heavy fabrics include denim and corduroy.
Once you’ve sorted your clothes into different categories based on their fabric type, it’s time to start ironing. However, before you begin ironing any garment, read the care label first. The care label contains all the necessary information about how to maintain the garment properly. It includes details such as washing instructions, drying instructions, and ironing temperature requirements. By reading the care label before ironing, you’ll be able to take proper precautions and avoid damaging your clothes.
By sorting your clothes by fabric type before ironing them, you’ll be able to maintain their quality for longer periods of time. Remember that every fabric has unique properties that require specific handling techniques during laundry organization. So take extra care when handling delicate or sensitive materials. In the next section, we’ll discuss how to read the care label correctly so that you can ensure that each garment receives proper treatment during the laundry process.
Reading The Care Label
After sorting your clothes by fabric type, the next crucial step in ironing is to read and understand the care label. This label provides all the necessary information on how to take care of your garment, including ironing instructions. Before starting, make sure you have a clear understanding of the symbols indicated on the label. These symbols represent various ironing settings such as temperature and steam, which are essential for achieving a polished look.
To ensure that you achieve optimal results when ironing, choosing the right ironing board is imperative. It should be stable and sturdy enough to hold your clothes without wobbling. An adjustable height feature is also necessary since it allows you to set it at a comfortable level depending on your height. Additionally, ensure that the cover is made of heat-resistant material to avoid scorch marks on your clothes.
| Understanding Symbols | Choosing The Right Ironing Board |
|---|---|
| The symbol for low temperature | A stable and sturdy board |
| The symbol for high temperature | An adjustable height feature |
| The symbol for no steam | Heat-resistant cover material |
Now that you have understood the importance of reading the care label and choosing the right ironing board, it’s time to move onto setting up your iron temperature correctly. This step requires careful attention as different fabrics require varying heat levels. Setting too high temperatures can damage delicate fabrics while setting too low temperatures may not remove wrinkles effectively. Therefore, understanding your fabrics’ needs is essential for achieving professional-looking results in your garments.
Setting The Iron Temperature
1.When ironing clothes, it is important to consider the type of iron used as well as the type of fabric being ironed. 2.Different types of irons have different temperature settings, and the temperature must be adjusted according to the fabric being ironed. 3.Cotton fabrics generally require the highest temperature setting, while delicate fabrics such as silk or rayon require the lowest setting. 4.Linen and wool fabrics require medium heat settings, while synthetic fabrics should also be ironed on a low to medium heat setting. 5.Iron temperature settings should also be adjusted depending on the thickness of the fabric and the desired effect of the ironing. 6.It is important to always read the instructions on the clothing label to ensure the correct temperature setting is used.
Iron Type
Ironing clothes is an essential household chore that requires careful attention to detail. One crucial factor to consider when ironing is the type of iron you are using. Different types of irons have varying features and capabilities that can affect the outcome of your ironing task. Knowing the pros and cons of each type can help you select the right one for your needs.
The most common types of irons are steam, dry, and cordless irons. Steam irons use water to produce steam, which helps to remove wrinkles from clothes effectively. Dry irons, on the other hand, do not emit steam and are best suited for fabrics that require low heat settings. Cordless irons are convenient for traveling as they don’t require a power outlet, but they may not be as powerful as their corded counterparts.
When selecting an iron type, consider its features carefully. Steam irons provide better results than dry irons but are often heavier and more expensive. Cordless irons may be more convenient but may not have enough power to handle tough wrinkles. Ultimately, the choice will depend on your specific needs and preferences.
In conclusion, choosing the right type of iron is crucial in achieving a neat and crisp look for your clothes. Be mindful of each type’s pros and cons before making a purchase decision. Always read product reviews and compare features to ensure that you get the best possible value for your money.
Fabric Type
As an expert in the field of ironing, it is essential to understand that differentiating between fabrics is crucial when choosing the right ironing tools. The temperature setting of your iron plays a critical role in ensuring that you achieve a crisp and neat look for your clothes without damaging the fabric. Each fabric type has its own unique characteristics, which require specific heat settings to avoid scorching or burning.
Cotton and linen fabrics require higher temperatures than synthetic materials such as polyester or nylon. Wool and silk also need to be treated with care and require lower heat settings, as they are more delicate fabrics. It is imperative to read the labels on each garment before ironing to ensure that you are using the correct setting, preventing any damage or shrinkage.
Choosing the right temperature setting for your iron ensures that you achieve professional results while extending the life of your clothing items. As an experienced and knowledgeable ironing expert, I strongly recommend investing in an iron with adjustable temperature controls to suit all fabric types. Remember always to take extra care when dealing with delicate fabrics such as silk or wool by using a lower heat setting and avoiding excessive pressure while ironing.
Heat Setting
As a professional ironing expert, it is essential to understand the significance of adjusting settings on your iron. Properly setting the temperature ensures that you achieve satisfactory results without damaging or shrinking your clothes. One of the most common mistakes people make when ironing is using a high heat setting on all fabrics, which can lead to scorching or burning.
To prevent any damage, ensure that you read the labels on your clothing items before ironing them. Labels provide critical information about the fabric type and recommended heat settings for optimal results. As mentioned earlier, cotton and linen require higher temperatures than synthetic materials such as polyester or nylon, while wool and silk need lower heat settings due to their delicate nature.
In conclusion, adjusting temperature settings when ironing is crucial in achieving professional results while protecting your clothes from damage. Take extra care when dealing with delicate fabrics by using a lower heat setting and avoiding excessive pressure while ironing. Remember to always read the labels on your clothing items and invest in an iron with adjustable temperature controls to suit all fabric types.
Filling The Iron With Water
When it comes to ironing clothes, filling your iron with water is an essential step. However, many individuals find themselves struggling with this task, leading to frustration and even damage to their clothing. To properly fill your iron with water, there are a few key tips you should keep in mind.
Firstly, always ensure that you have turned off and unplugged your iron before filling it with water. This is crucial for both safety reasons and preventing any potential damage to the iron. Once the iron has cooled down sufficiently, locate the water reservoir and remove any caps or stoppers. Fill the reservoir with clean tap water, being careful not to overfill it as this could cause water leakage from the iron.
To prevent any potential leaks from your iron, it’s important to take a few extra precautions. When filling the water reservoir, avoid using distilled or softened water as these types of water contain minerals that can clog up the steam vents and cause damage to your iron over time. Additionally, make sure that you don’t tilt or shake the iron too much when filling it with water – this could cause water to leak out of the vents and potentially ruin your clothing.
With these tips in mind, you can now confidently fill your iron with water without fear of damaging either yourself or your clothes. In the next section, we will discuss how to effectively iron specific garment areas for a polished look every time.
Ironing Specific Garment Areas
As an expert in ironing, it is essential to have a keen sense of attention to detail. Ironing collars and cuffs require a particular focus as they are the areas that stand out on shirts and blouses. Collars are often made of thicker material than the rest of the shirt, so they need extra heat to flatten them out. To begin, lay the collar flat on the ironing board and apply steam directly onto it. Then, run the iron over it in a back-and-forth motion until it’s crisp and smooth.
Cuffs, on the other hand, can be quite tricky to iron due to their small size. Start by unbuttoning them before laying them flat on the ironing board. Apply some pressure with your fingers while running the hot iron over them. Be careful not to burn yourself or leave any creases behind. Once you’re done with one cuff, move onto the other side and repeat.
Ironing collars and cuffs can make all the difference in how polished you look when wearing a shirt or blouse. By taking your time and paying attention to detail, you’ll achieve a professional-looking finish that will make you stand out from the crowd. In our next section, we’ll explore how to tackle ironing shirts and blouses efficiently without causing damage or wrinkles.
Ironing Shirts And Blouses
Ironing shirts and blouses may seem like a daunting task, but with the right techniques, it can be a quick and easy process. The first step is to ensure that your iron is at the appropriate temperature for the fabric you are ironing. Different fabrics require different temperatures, so it’s important to know which setting to use. Generally, cotton and linen require high heat settings, while silk and synthetic fabrics require lower heat settings.
When ironing shirts or blouses, start with the collar and cuffs first. Lay them flat on the ironing board and press each section carefully. Move onto the sleeves by laying them flat on the board and ironing from top to bottom. Next, move onto the front of the shirt or blouse, starting from one side of the placket and working your way across. Be sure to avoid pressing any buttons as they can break or crack under high pressure.
Types of fabrics suitable for ironing include natural fibers such as cotton, linen, wool or silk as well as synthetic blends like polyester or nylon. However, some fabrics like leather or suede should not be ironed because they can melt or become damaged easily. Tips for avoiding ironing mistakes include using distilled water instead of tap water in your steam iron to prevent mineral buildup that can clog steam holes; always test a small inconspicuous area before applying an iron to any new fabric; never leave an iron unattended while it’s hot; and always store your iron out of reach of children.
Now that you’ve mastered the art of ironing shirts and blouses let’s move onto trousers and pants. These garments require a slightly different approach than shirts do because they have more seams which can become wrinkled during washing or drying cycles. To ensure a smooth finish when pressing trousers or pants start by laying them flat on an ironing board inside out then press along each seam before moving onto other areas like pockets or waistbands.
Ironing Trousers And Pants
According to a recent survey, trousers and pants are the most commonly ironed clothing items by people around the world. Therefore, it is crucial to know how to iron these garments properly without damaging them. Before starting, ensure that your iron is set at the appropriate temperature for the fabric of your pants.
Types of fabrics suitable for ironing pants vary from cotton to linen, wool, or silk. Cotton and linen are relatively easy to iron as they do not require high heat settings. However, wool and silk pants should be treated with care as they can easily scorch or shrink under high heat. Always read the label on your trousers before ironing them to avoid any mishaps.
Tips for avoiding ironing creases on trousers include hanging them immediately after washing and drying them in a way that minimizes wrinkles. To do this, shake out each garment before laying it flat on a surface or hanging it up. Additionally, you can use a fabric softener during the wash cycle to reduce wrinkles further. By following these simple steps and taking extra precautions when necessary, you can maintain perfectly pressed pants without much effort.
Moving on to skirts and dresses in our next section, we will discuss some essential tips that will help you achieve a polished look without damaging delicate fabrics such as chiffon or silk. Remember always to check the label before ironing any garment!
Ironing Skirts And Dresses
Now that you have mastered ironing trousers and pants, it’s time to move on to skirts and dresses. The process for ironing these garments is similar but there are a few differences to keep in mind. Choosing appropriate fabrics is important as some materials require a lower heat setting to avoid damage. It’s always best to check the care label before starting.
When it comes to ironing skirts and dresses, start with the bodice or top portion of the garment first. Lay the fabric flat on the ironing board and smooth out any wrinkles. Avoiding common mistakes such as leaving the iron in one spot for too long, which can cause scorch marks or even burn holes in delicate fabrics. Move the iron in a circular motion over the fabric, applying gentle pressure until all wrinkles are removed.
Next, move onto the skirt or dress bottom portion. Again, check the care label for appropriate heat settings and use a pressing cloth if necessary. Remember to always work from top to bottom and use a light touch when dealing with delicate fabrics such as silk or chiffon. With these tips in mind, you’ll be able to successfully iron your skirts and dresses without any mishaps.
As we move into our next section about ironing sweaters and knits, it’s important to note that this requires a slightly different approach than other garments. These materials are often more delicate so it’s important to use a lower heat setting or steam function on your iron. By paying attention to care labels and using proper techniques, you can ensure that your sweaters and knits look their best every time you wear them.
Ironing Sweaters And Knits
- Prior to ironing a sweater, it is important to read the care label and determine the appropriate temperature setting for the iron.
- Heat setting the fabric is a crucial step, as it helps to set the fibers and shape of the sweater.
- To iron sweaters, it is recommended to use a low to medium heat setting and press the iron against the garment, rather than dragging it.
- It is also important to use a press cloth or damp towel between the iron and fabric when ironing sweaters to protect the garment.
- When ironing sweaters, it is important to move the iron in slow, even strokes in order to prevent the fabric from stretching or scorching.
- To finish, steam the sweater to add luster and softness to the fabric.
Preparing The Sweater
To achieve a crisp and polished look for your wool sweaters, it is important to properly prepare them for ironing. How to prep a sweater for ironing can be a tricky task, but by following these simple tips, you can ensure that your sweaters remain in great condition. Firstly, check the care label on your sweater to determine whether it can be ironed or not. Some wool blends may not be suitable for ironing and may require steaming instead.
Next, lay your sweater flat on an ironing board and gently stretch it to its original shape. Avoid pulling or tugging at the fabric as this may cause damage. It is essential to use a pressing cloth when ironing wool sweaters as direct heat from the iron can scorch the fabric. Place the pressing cloth over the sweater and press gently with a warm iron until all wrinkles are removed.
Finally, hang your sweater on a hanger or fold it neatly and store it in a drawer or closet. Do not hang your sweater while it is still damp as this may cause stretching or misshaping of the garment. By following these tips for ironing wool sweaters and preparing them beforehand, you can keep your garments looking great for years to come!
Heat Setting The Fabric
When ironing sweaters and knits, it is crucial to consider the proper heat setting for the fabric. Different fabrics react differently to heat, and wool sweaters are no exception. Using the wrong iron setting can damage or shrink your sweater beyond repair. It is essential to understand the effect of heat on different fabrics before you start ironing.
Most irons have different settings for various fabrics, including wool. When ironing a wool sweater, set your iron to its lowest temperature setting to avoid damaging the fabric. Irons with steam functions can also help remove wrinkles while avoiding scorching the garment. Always test a small section of the sweater first before proceeding with the rest of the garment. This will ensure that you have chosen the right temperature and avoid any mishaps during the process.
The effect of heat on different fabrics cannot be overstated in achieving an excellent result when ironing sweaters and knits. Heat can cause some fabrics to shrink, stretch or burn if not handled correctly. By using appropriate iron settings for wool sweaters and testing a small section first, you can achieve a crisp and polished look without damaging your garments. With these tips in mind, you can enjoy wearing your favorite wool sweaters while keeping them in great condition for years to come.
Ironing The Sweater
Ironing sweaters and knits is a task that requires careful attention to detail. While ironing can make your garments look polished and crisp, it can also damage the fabric if not done correctly. Therefore, it is essential to understand the various types of fabrics you are dealing with before ironing them. Some fabrics are more delicate than others and require special care during ironing.
When it comes to wool sweaters, there are some tips you should keep in mind while ironing. Wool sweaters are known for their warmth and softness, but they can also be challenging to maintain. To avoid damaging your wool sweater when ironing, always set the iron to its lowest temperature setting. Irons with steam functions can also help remove wrinkles without scorching the garment.
However, some types of sweaters should never be ironed under any circumstances. Sweaters made from synthetic materials like polyester or nylon can melt under high heat and ruin the garment permanently. Sweaters made from delicate fabrics like silk or cashmere should also be avoided as they require special care during cleaning and maintenance. By following these tips for ironing wool sweaters while avoiding other types of materials, you can ensure that your favorite wool sweater stays in great condition for years to come.
Ironing Delicate Fabrics
Ironing delicate fabrics such as silk, chiffon, and lace can be a daunting task for even the most experienced ironers. However, with some tips and techniques, it is possible to achieve wrinkle-free results without causing damage to the fabric.
Tips for ironing silk, chiffon, and lace include using a low heat setting on the iron and placing a pressing cloth or towel over the fabric to protect it from direct heat. It is also important to use a gentle touch when ironing and avoid stretching or pulling the fabric. For particularly delicate fabrics such as lace, it may be best to skip ironing altogether and opt for steaming instead.
To prevent ironing damage on delicate fabrics, it is essential to read and follow the care instructions on the garment label. Some fabrics may require dry cleaning or hand washing instead of machine washing. It is also important to avoid using too much pressure when ironing and never leave the iron in one place for too long.
Incorporating these tips into your ironing routine can help you achieve professional-looking results without damaging your delicate fabrics. In the next section, we will explore how to incorporate steam into your ironing process for even better results.
Ironing With Steam
Ironing with steam is a popular and effective method for removing wrinkles from clothes. Using a steamer for ironing involves using hot steam to relax the fibers of the fabric, making it easier to smooth out any creases or folds. One of the benefits of using steam for ironing is that it is gentle on delicate fabrics such as silk or lace, which can be easily damaged by traditional ironing methods.
Another benefit of using a steamer for ironing is that it can help to kill bacteria and freshen up clothes without the use of harsh chemicals. The high temperature of the steam works to sanitize clothes, making them ideal for individuals with allergies or sensitive skin. Additionally, steam also helps to remove unpleasant odors from clothes, leaving them smelling fresh and clean.
Overall, using a steamer for ironing can make the process much quicker and easier than traditional ironing methods. It also provides additional benefits such as being gentle on delicate fabrics and helping to sanitize clothes. In the next section, we will discuss how to properly use an ironing board when ironing your clothes.
Using An Ironing Board
- To ensure the best results when ironing clothes, it is necessary to properly prepare the ironing board.
- The ideal ironing board should be stable and level, and covered with a clean, padded surface.
- Clothes should be positioned on the ironing board with the right side of the fabric facing up to ensure proper pressing.
- It is important to take the time to properly arrange the items on the ironing board to make sure that each area is accessible to the iron.
Preparing The Ironing Board
To achieve optimal ironing results, it is important to properly prepare the ironing board. The first step is to adjust the height of the board. This will ensure that you are comfortable and able to reach all areas of the garment without straining your back or arms. To adjust the height of your ironing board, simply locate the lever underneath the board and adjust it until it is at a comfortable height for you.
Next, consider the type of cover on your ironing board. The cover can play a significant role in achieving a smooth finish on your garments. There are several options available, including cotton, silicone, and Teflon covers. Cotton covers are a popular choice as they provide a smooth surface for ironing and are easy to replace when worn out. Silicone and Teflon covers offer additional benefits such as heat resistance and non-stick properties.
Finally, ensure that your ironing board is clean and free from any debris or loose threads that could snag or damage your clothes. Use a damp cloth to wipe down the surface before each use, and take care not to store items on or near the board that could potentially fall onto your clothing while ironing. By following these simple steps for preparing your ironing board, you will be able to achieve professional-looking results every time you press your clothes.
Positioning Clothes On An Ironing Board
When it comes to ironing clothes, properly positioning them on the ironing board is just as important as choosing the right cover and adjusting the height. The first step is to ensure that the garment is spread out evenly on the board, without any wrinkles or creases. This will help to prevent any unwanted creases or wrinkles from appearing during the ironing process.
To achieve optimal results, it is also important to consider the type of cover on your ironing board. A cotton cover is a popular choice as it provides a smooth surface for ironing and is easy to replace when worn out. On the other hand, silicone and Teflon covers offer heat resistance and non-stick properties which make them ideal for certain fabrics. Choosing the right cover can make all the difference in achieving a smooth and professional finish.
Finally, adjusting the height of your ironing board can also help with proper positioning of clothes. By setting it at a comfortable level, you will be able to reach all areas of the garment without straining your back or arms. This makes it easier to position clothes correctly and ensure that they are pressed evenly throughout. With these tips in mind, you can be confident in achieving perfect results every time you use your ironing board.
Storing Your Iron
Safely storing your iron is an essential part of ironing. Proper storage ensures that your iron lasts for a long time and stays in good condition. You don’t want to leave it lying around where someone could accidentally knock it over or have it fall off the ironing board. Therefore, one must take precautions and store the iron in a safe place.
Tips for maintaining your iron include cleaning it regularly, using distilled water, and storing it properly. To clean your iron, unplug it first then use a damp cloth to wipe away any residue or buildup on the soleplate. Distilled water prevents mineral buildup that can clog up the steam vents and damage the internal components of your iron. Choosing the right iron for your needs is also important as not all irons are created equal. Consider factors such as weight, size, type of soleplate, and steam holes when making your selection.
To store your iron correctly, always let it cool down before putting it away. Wrap the cord loosely around the base of the iron but avoid wrapping too tightly as this can cause damage to the cord over time. Keep your stored iron in a dry place where moisture cannot build up and cause rusting or other damage. By following these simple tips for maintaining and storing your iron correctly, you can ensure that you will get many years of use out of your investment.
Transitioning to troubleshooting common ironing problems section: Now that you know how to maintain and store your iron properly let’s move on to troubleshooting common problems that may arise during the ironing process.
Troubleshooting Common Ironing Problems
Now that you know how to store your iron, it’s important to address some common mistakes that people make when ironing. These mistakes can lead to damage on your clothes and make the process of ironing even more frustrating. By taking some preventative measures, you can avoid these issues and achieve a perfectly pressed outfit.
One common mistake is using the wrong temperature setting. Every fabric has its own ideal temperature for ironing, so it’s important to read the care label before starting. Using too high of a heat can burn or melt delicate fabrics, while using too low of a heat may not effectively remove wrinkles. Additionally, be sure to let your iron heat up fully before starting to use it.
Another mistake is not properly preparing the garment before ironing. Be sure to check for any stains or dirt on the fabric and address them before ironing, as heat can set in stains permanently. Also, ensure that the garment is completely dry before starting to iron, as moist fabrics can cause steam damage or water spotting.
Preventing damage during ironing requires attention to detail and proper technique. By avoiding these common mistakes and taking preventative measures, you can ensure that your clothes look their best after every press. Happy ironing!
Conclusion
Ironing clothes is an essential task that can help maintain the quality and longevity of your garments. As a professional ironing expert, I recommend following a few simple steps to ensure your clothes are wrinkle-free and looking their best.
Firstly, preparing your ironing space is crucial. Ensure that you have enough room to work and that the ironing board is stable. Secondly, sorting clothes by fabric type can prevent damage or scorch marks on delicate fabrics. Thirdly, reading care labels to determine the appropriate iron temperature can help prevent shrinkage or damage to the fabric. Lastly, using an iron with steam functionality and filling it with water can make the job easier and more effective.
For example, a client brought in a dress made from silk for ironing. By reading the care label, I determined that it required a low heat setting with no steam. Had I not checked the label and used high heat or steam, there could have been irreversible damage to the dress.
In conclusion, following these four simple steps will guarantee successful ironing results. By taking care of your clothes in this way, you can prolong their lifespan and look good doing it too!
Image Credits
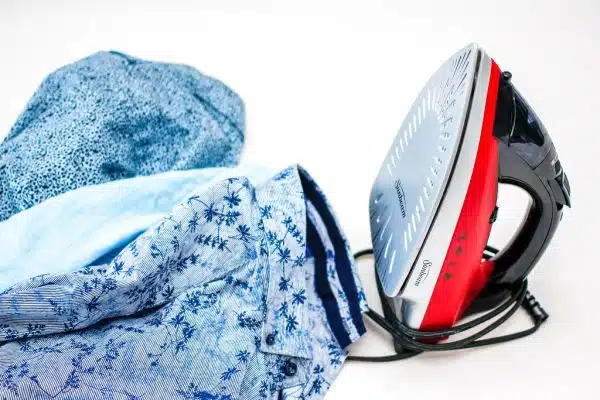
- “Iron With Clothes” by wuestenigel (featured)









![How To Wash And Care For White Clothes 25 The only genuine borax soap cleanses hygienically saves the clothes and hands. 20 Mule-Team brand Boraxo white laundry soap [front]](https://green-life.blog/wp-content/uploads/2023/05/YDXLLCovnOjq-150x150.jpg.webp)
