The Taylor juniper, also known as Juniperus virginiana ‘Taylor,’ is a popular evergreen tree that belongs to the cypress family. This tree is native to North America and has been widely cultivated for ornamental purposes in landscapes and gardens due to its attractive foliage, tidy habit, and low maintenance requirements. In this article, we will discuss the essential tips on how to grow and care for Taylor juniper, including its preferred growing conditions, planting techniques, pruning methods, pest management strategies, and more.
Growing a healthy and vibrant Taylor juniper requires careful attention to its natural growth habits and environmental needs. As a horticulturist or plant expert, it’s important to understand the specific requirements of this species to ensure optimal growth and health. Whether you’re a novice gardener or an experienced landscaper looking for new ideas for ornamental trees, the following information will provide practical insights into cultivating and maintaining Taylor junipers successfully. With proper care and attention, your Taylor juniper can thrive in any landscape or garden setting while providing beauty and enjoyment for years to come.
Understanding Juniperus Virginiana ‘Taylor’
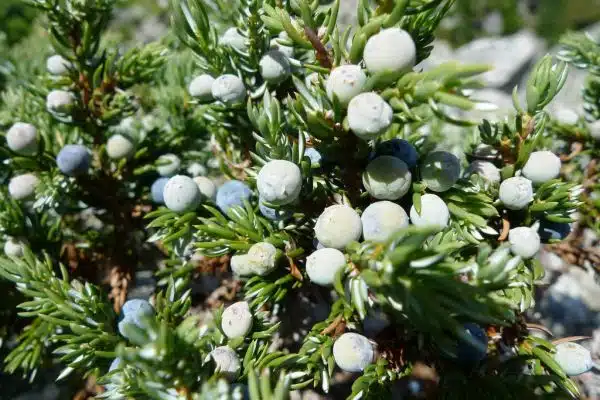
Juniperus virginiana ‘Taylor’ is a slow-growing evergreen shrub with a dense, pyramidal form. It can reach a height of 10-15 feet and a spread of 5-6 feet at maturity. This cultivar is known for its blue-green foliage that turns bronze in the winter, making it an excellent choice for adding color to your landscape year-round.
When it comes to pruning Juniperus virginiana ‘Taylor’, it’s important to avoid cutting into old wood as this can result in dead branches. Instead, focus on removing any crossing or rubbing branches, as well as any dead or diseased wood. Prune in late winter or early spring before new growth appears.
The growth rate of Juniperus virginiana ‘Taylor’ is relatively slow, making it an ideal choice for smaller gardens or landscapes where space is limited. This cultivar prefers full sun to partial shade and well-draining soil. In the next section, we will discuss how to choose the right location for your Taylor Juniper based on these preferences.
Choosing The Right Location For Your Taylor Juniper
When growing and caring for Taylor Juniper, the amount of sunlight it receives is an important factor to consider. A spot with full sun exposure is ideal for optimal growth. When selecting a location for your Taylor Juniper, it is important to ensure that the soil is well-draining and aerated. Poorly draining soils can lead to root rot, so it is important to check that the soil is not too wet or waterlogged. Additionally, the soil should contain a mixture of organic materials, such as compost, to ensure that the juniper has enough nutrients. It is also important to ensure that the chosen location has proper drainage as stagnant water can lead to root rot. Finally, it is important to ensure that the chosen location is able to provide the Taylor Juniper with the necessary sunlight and soil requirements to ensure optimal growth and health.
Sunlight
Sunlight is an essential factor when it comes to choosing the right location for your Taylor Juniper. This evergreen shrub requires full sun exposure to ensure optimal growth and development. As a horticulturalist, I highly recommend planting your Taylor Juniper in a location that receives at least 6-8 hours of direct sunlight daily. However, it is worth noting that this plant can tolerate some shade, but its growth may be stunted if it does not receive enough sun exposure.
When looking for the perfect spot to plant your Taylor Juniper, it is important to consider the amount of shade tolerance required by the plant. While these shrubs can thrive under partial shade, they require well-draining soil and consistent moisture levels to prevent root rot. Therefore, it is best to avoid planting them in areas with excessive shade or where water tends to accumulate. It is also important to note that even in areas with partial shade, the plant should still receive at least four hours of direct sunlight each day.
In conclusion, selecting an appropriate location for your Taylor Juniper requires careful consideration of its sun exposure needs and shade tolerance level. Remember, this evergreen shrub requires full sun exposure for optimal growth, but can tolerate some shade if necessary. Be sure to choose a well-draining site with moderate moisture levels and avoid areas with excessive shade or water accumulation. With proper care and attention to its sunlight needs, your Taylor Juniper will thrive and bring beauty and color to your garden year-round.
Soil
Choosing the right location for your Taylor Juniper involves more than just considering its sunlight requirements and shade tolerance. The soil type and quality also play a crucial role in ensuring the plant’s growth and development. As a horticulturalist, I highly recommend planting your Taylor Juniper in well-draining soil to prevent water accumulation and root rot. The best types of soil for this shrub are loam, sandy loam, or clay loam, which provide a balance of drainage and moisture retention.
To determine if your soil is suitable for planting a Taylor Juniper, it is essential to perform a soil test. This test will help you identify any nutrient deficiencies or pH imbalances that may affect the plant’s growth. You can purchase a DIY soil testing kit from your local garden center or hire a professional to conduct an analysis. Once you have identified any issues with your soil, you can take steps to amend it using organic matter or fertilizers.
In conclusion, choosing the right location for your Taylor Juniper requires careful consideration of both its sunlight needs and soil quality. To ensure optimal growth and development, plant this shrub in well-draining soil such as loam or sandy loam, while avoiding areas with excessive water accumulation or poor drainage. Additionally, perform a soil test to identify any nutrient deficiencies or pH imbalances that may require amending before planting. By following these guidelines, you can create an ideal environment for your Taylor Juniper to thrive in your garden.
Drainage
When it comes to planting a Taylor Juniper, choosing the right location is crucial for its overall health and growth. Aside from considering sunlight exposure and soil quality, one must also take into account the importance of proper drainage. Adequate drainage plays a significant role in preventing water accumulation around the roots, which can lead to root rot and other issues.
The importance of soil drainage cannot be overstated when planting a Taylor Juniper. This shrub requires well-draining soil that allows excess water to flow away from the roots while retaining enough moisture for optimal growth. Poor drainage can cause waterlogging, which can suffocate the roots and prevent them from absorbing nutrients properly. To ensure proper drainage, consider planting your Taylor Juniper on raised beds or slopes where water flows away naturally.
Proper watering techniques are also essential in maintaining good drainage for your Taylor Juniper. Instead of giving it frequent shallow watering, it’s best to give it deep watering occasionally so that it saturates the soil thoroughly. This will encourage deep root growth and prevent water from accumulating at the surface level. Additionally, mulching around the base of your plant can help retain moisture in the soil while regulating its temperature. By implementing these strategies, you can ensure that your Taylor Juniper thrives in an environment with adequate drainage and optimal growing conditions.
Preparing The Soil For Planting
As the saying goes, “a good beginning makes a good ending.” This is especially true when it comes to growing and caring for Taylor Juniper. Preparing the soil is a crucial step in providing your plant with the optimal growing conditions. Here are four important points to keep in mind when preparing the soil for planting:
Soil type: Taylor Juniper thrives in well-draining soil that is slightly acidic with a pH range of 5.0-6.5. Before planting, make sure to test your soil’s pH level and adjust accordingly.
Nutrient requirements: Like all plants, Taylor Juniper needs essential nutrients to grow and develop properly. Incorporating organic matter, such as compost or aged manure, into your soil can help improve its nutrient content.
Soil preparation: Clear the planting area of any weeds, rocks or debris before tilling the soil to loosen it up for better drainage and root penetration. Consider adding sand or perlite to improve drainage if necessary.
Fertilization: Once planted, fertilize your Taylor Juniper annually in early spring using a balanced fertilizer with equal parts nitrogen (N), phosphorus (P) and potassium (K).
By following these guidelines for soil preparation, you’ll be setting your Taylor Juniper up for success right from the start. Next up, we’ll explore planting techniques that will ensure your plant continues to thrive year after year!
Planting Techniques For Taylor Juniper
When it comes to planting Taylor Juniper trees, there are a few techniques that can help ensure their success. Firstly, it is important to consider the spacing requirements for this tree. Taylor Junipers typically require at least 6 feet of space between them and other plants or structures, as they can grow up to 15 feet tall and 8 feet wide. It is also important to choose a location with well-draining soil and adequate sunlight.
Once you have selected the ideal location for your Taylor Juniper tree, it is time to plant it. The optimal planting depth for this tree is level with or slightly above the surrounding soil. It is important not to plant the tree too deep, as this can lead to root rot and other issues down the line. Additionally, make sure to water the tree thoroughly after planting to help settle the soil and establish good root growth.
Proper planting techniques are crucial when it comes to ensuring the long-term health and beauty of your Taylor Juniper tree. By following spacing requirements and planting at the correct depth, you can help give your new tree the best possible start in life. In the next section we will discuss how to properly water and fertilize your Taylor Juniper for optimal growth and longevity.
Watering And Fertilizing Your Tree
After successfully planting your Taylor Juniper, the next crucial step is to ensure that it grows healthily. This means providing it with adequate water and nutrients. Let’s take a closer look at how to water and fertilize your tree.
Watering frequency is one of the most critical factors in growing healthy Taylor Junipers. These trees require regular watering during their first year after planting. After that, you can reduce the frequency to once a week or when the soil becomes dry. However, be careful not to overwater as this can lead to root rot and other diseases.
Using organic fertilizers is an excellent way to provide your Taylor Juniper with proper nutrition. Organic fertilizers release nutrients slowly, which helps prevent nutrient burn and ensures that your tree receives consistent nourishment throughout the growing season. Typically, you should apply fertilizer once every six months. Be sure to follow the manufacturer’s instructions carefully regarding application rates and timing.
As we’ve seen, watering and fertilizing are essential for ensuring the healthy growth of your Taylor Juniper tree. By following these simple guidelines on watering frequency and using organic fertilizers regularly, you’ll be well on your way to growing a beautiful and robust tree for years to come. In the next section, we’ll explore how pruning can help maintain its shape and size while also promoting its health.
Pruning Your Taylor Juniper
Proper pruning is essential for the healthy growth of your Taylor Juniper tree. Pruning is a horticultural practice that involves removing certain parts of the plant to promote new growth and maintain its desired shape. The timing and frequency of pruning can have a significant impact on the health and appearance of your tree.
Tools needed for pruning include a pair of sharp, clean pruning shears, loppers, and a hand saw. Before you begin pruning, make sure your tools are well-maintained and sanitized to avoid spreading diseases or pests. A regular pruning schedule is also important to prevent overgrowth, remove dead or diseased branches, and maintain the overall structure of your tree.
To ensure optimal results, prune your Taylor Juniper during the dormant season when it’s not actively growing. This is usually in late winter or early spring before new growth begins. Avoid heavy pruning during the summer months as this can cause stress to the tree and leave it vulnerable to pests and disease.
Shaping your tree for improved aesthetics is another crucial aspect of maintaining your Taylor Juniper’s health. In the next section, we will discuss techniques for shaping your tree while promoting growth and maintaining its natural beauty.
Shaping Your Tree For Improved Aesthetics
After pruning your Taylor Juniper, it is important to shape the tree for improved aesthetics. One way to do this is through creative pruning techniques that involve shaping the tree into a specific design. Topiary designs are popular choices for shaping Taylor Junipers, as they add an artistic element to your garden or landscape.
To create a topiary design, start by selecting a shape or form that you want to achieve. Common shapes include spirals, cones, and balls. Begin pruning the tree using hand-held shears or electric clippers, carefully sculpting the branches and foliage to match your desired shape. Remember to step back occasionally and assess your progress from different angles to ensure you are achieving the desired result.
When shaping your Taylor Juniper, it is important to consider both form and function. While aesthetic appeal is important, you also want to ensure the tree maintains its health and vitality. Avoid over-pruning or removing too much foliage, as this can weaken the tree and make it more susceptible to disease and pests. Regular maintenance such as watering and fertilizing can also help keep your Taylor Juniper healthy and thriving for years to come.
As beautiful as they are, trees are not immune to disease and pest problems. In the next section, we will discuss prevention and management techniques for common diseases that may affect your Taylor Juniper. By following these guidelines, you can maintain a healthy and vibrant tree that enhances the beauty of your garden or landscape for years to come.
Disease Prevention And Management
As with most plants, preventing disease is easier than managing it after it has taken hold. Fortunately, there are several preventative measures you can take to minimize the risk of your Taylor Juniper becoming diseased. Firstly, ensure that your plant receives enough water and sunlight. A healthy plant is less likely to fall prey to diseases than a stressed one. Additionally, avoid overcrowding by planting your junipers at appropriate intervals. This will promote good air circulation and help keep fungal diseases at bay.
Despite taking preventative measures, it’s still possible for your Taylor Juniper to become infected with a disease. To effectively manage any potential problems, it’s important to know how to identify symptoms of various ailments. Common diseases affecting junipers include tip blight and cedar apple rust. Tip blight presents as brown needles that eventually fall off the plant while cedar apple rust causes orange spots on the foliage which later turn brown.
Identifying symptoms of diseases is crucial in managing them before they get out of hand. Insect control strategies are also vital for maintaining a healthy Taylor Juniper garden. The next section will explore some effective ways to prevent insect infestations and manage them if they do occur.
Insect Control Strategies
Insect Control Strategies:
When it comes to insect control for Taylor Juniper, there are a variety of methods available. Organic methods involve the use of natural substances such as neem oil or insecticidal soap. Neem oil is extracted from the seeds of the neem tree and has been used for centuries as a natural pesticide. It works by disrupting the insect’s hormonal balance and preventing them from feeding and reproducing. Insecticidal soap, on the other hand, is made from potassium salts of fatty acids and works by dissolving the outer protective layer of insects, causing them to dehydrate and die.
Chemical treatments are another option for controlling insects on your Taylor Juniper. These treatments involve using synthetic pesticides that kill insects on contact or when they ingest them. However, these treatments can be harmful to non-target organisms such as bees and butterflies if not applied correctly, so caution must be taken when using them.
Overall, both organic methods and chemical treatments can be effective in controlling insects on your Taylor Juniper. However, it is important to consider the potential impact on other organisms in your garden before choosing a method. Always follow label directions carefully when using any pesticide, and consider consulting with a professional horticulturist or plant expert if you have any concerns.
Transition:
Now that we’ve covered some strategies for insect control on your Taylor Juniper, let’s move onto another important aspect of caring for these plants: mulching.
Mulching Your Taylor Juniper
To ensure the health and longevity of your Taylor Juniper, it is essential to take proper care of it. One way to do this is by mulching. Mulch is a layer of organic or inorganic material applied to the soil surface around plants. It provides numerous benefits, including moisture retention, weed suppression, and temperature regulation.
The benefits of mulching are extensive. First and foremost, it helps retain soil moisture, which is critical for the growth and development of your Taylor Juniper. Additionally, mulch helps suppress weeds that compete with your plant for nutrients and water. Mulch also protects the roots from extreme temperatures by regulating soil temperature.
When selecting a mulching material for your Taylor Juniper, there are several options available. Organic materials such as shredded leaves or bark break down over time, adding nutrients to the soil as they decompose. Inorganic materials like stone or gravel offer long-lasting protection while also providing a decorative element to your landscape design. Still, some gardeners prefer synthetic materials like landscape fabric or plastic sheeting because they do not break down over time.
Incorporating mulching into your Taylor Juniper’s care routine can significantly benefit its overall health and growth. By retaining moisture, suppressing weeds, and regulating temperature, you can help ensure that your plant thrives in its environment. In the next section, we will discuss winter protection tips to keep your Taylor Juniper healthy throughout the colder months.
Winter Protection Tips
Despite being a hardy plant, Taylor Juniper requires proper winter protection to survive extreme weather conditions. While temperature and moisture are two critical factors that affect the growth of this plant, wind protection is equally important during the winter season. Adequate wind protection can help prevent the leaves from drying out, which can ultimately lead to leaf drop.
Winter watering is another essential aspect of caring for Taylor Juniper. Proper watering helps to keep the roots hydrated and alive during cold temperatures. However, overwatering can lead to root rot, so it’s crucial to monitor the soil moisture level carefully. During the winter season, water only when the soil is dry to touch.
To ensure that your Taylor Juniper survives harsh winters successfully, it’s advisable to wrap them with burlap or other breathable materials. This will help protect them from strong winds and excessive snow accumulation. Make sure not to wrap them too tightly as this may cause damage to their branches.
With proper winter protection techniques in place, you can enjoy healthy and vibrant Taylor Juniper plants all year round. In addition to winter care tips, propagating juniperus virginiana ‘taylor’ is an easy way to expand your collection of these beautiful plants. Read on for more information on propagation techniques for juniperus virginiana ‘taylor.’
Propagation Techniques For Juniperus Virginiana ‘Taylor’
After taking precautions to protect your Taylor Juniper during the winter months, it’s time to start thinking about propagation techniques. One effective method is using rooting hormone on cuttings from the parent plant. Take cuttings in the fall or early spring when the plant is actively growing. Strip off any lower leaves and dip the cut end into rooting hormone before planting in well-draining soil.
Another technique for propagating your Taylor Juniper is layering. This involves bending a low-hanging branch to the ground and covering it with soil until roots form. Once roots have developed, the new plant can be severed from the parent and transplanted elsewhere in your garden.
When transplanting your Taylor Juniper, choose a spot with well-draining soil and full sun exposure. Dig a hole slightly larger than the root ball and place the plant at the same depth as it was previously planted. Backfill with soil, water thoroughly, and add a layer of mulch around the base of the plant to retain moisture. With proper care, your newly transplanted Taylor Juniper will thrive in its new location.
Transplanting Your Taylor Juniper
Transplanting your Taylor Juniper requires some careful planning and attention to detail to ensure its successful growth. One of the main transplanting challenges is root disturbance, which can cause stress to the plant and affect its health. To minimize this, it is important to dig up as much of the root ball as possible and handle it with care when transplanting.
The best time to transplant your Taylor Juniper is in early spring or fall when the temperatures are cooler, and the soil is moist. This will give your plant enough time to establish itself before the hot summer or cold winter months arrive. It is also important to choose a new location that matches its growing conditions, including soil type, moisture level, and sun exposure.
When preparing for transplanting, make sure you have all necessary tools on hand such as a shovel and water source nearby. Begin by digging a hole twice the size of the root ball and loosening up any compacted soil at the bottom of the hole. Gently place your Taylor Juniper in the hole and backfill with soil, making sure there are no air pockets around the roots. Water thoroughly after planting.
Transition: Now that you know how to properly transplant your Taylor Juniper, it’s important to avoid common mistakes that could hinder its growth.
Common Mistakes To Avoid
Although Taylor junipers are relatively easy to care for, there are a few common mistakes that gardeners often make. Overwatering is one of the most significant problems that can lead to root rot and other diseases. It’s important to remember that Taylor junipers prefer well-drained soil and only need watering during dry periods. To avoid overwatering, make sure the soil has dried out between watering sessions.
Another common mistake is incorrect pruning techniques. Taylor junipers don’t require much pruning, but it’s important to do it correctly when necessary. Pruning should be done in early spring before new growth appears, and only about 1/3 of the plant should be trimmed at once. Avoid cutting back into old wood as this can damage the tree’s health and appearance.
By avoiding these common mistakes, you’ll be able to maintain a healthy and beautiful Taylor juniper in your garden for years to come. In the next section, we’ll explore how you can enjoy the beauty of your Taylor juniper through proper planting techniques and maintenance practices.
Enjoying The Beauty Of Your Taylor Juniper
A Taylor Juniper is truly a sight to behold. The beauty of this plant lies in its evergreen foliage and the distinctive blue-green hue that it exudes. It has a distinctive conical shape that makes it stand out, especially when planted in groups. This plant can add an alluring visual appeal to any landscape.
Decorating tips for your Taylor Juniper include using it as a centerpiece in your garden or planting them along fences or property borders to create natural privacy barriers. Another way to enhance the beauty of this plant is by incorporating it into your outdoor lighting designs. The light shining on the leaves can create beautiful shadows and highlight the texture of the foliage.
Photography ideas for your Taylor Juniper include capturing its unique shape and color, pairing it with other plants to create contrast, or taking close-up shots of its needles. With proper care and maintenance, your Taylor Juniper will continue to thrive, providing you with endless opportunities for capturing its beauty through photography.
Your Taylor Juniper can be a source of inspiration and joy for years to come if you take good care of it. Keep in mind that this plant needs minimal attention once established, but occasional pruning may be necessary to maintain its shape and size. With these simple tips, you can enjoy the beauty of your Taylor Juniper while also adding value to your outdoor space without breaking a sweat!
Conclusion
Juniperus virginiana ‘Taylor’ is a beautiful evergreen tree that can add texture and interest to any landscape. As a horticulturalist, it is important to understand the growth habit and care requirements of this species. Choosing the right location with well-draining soil and full sun exposure is crucial for optimal growth. Proper planting techniques, watering, and fertilizing are necessary for healthy development.
Propagation techniques such as stem cuttings or layering can be successful in producing new trees. Transplanting should be done carefully, ensuring that the root system remains intact. Common mistakes such as overwatering or incorrect pruning can damage the tree’s health.
One interesting statistic is that Juniperus virginiana ‘Taylor’ has been shown to have allelopathic effects on other plant species. This means that it releases chemicals into the soil that inhibit the growth of nearby plants, which may be useful for weed control in certain situations.
In conclusion, growing and caring for Juniperus virginiana ‘Taylor’ requires attention to detail and proper maintenance techniques. With its unique characteristics and potential benefits, this tree can make a valuable addition to any landscape.
Image Credits
- “Joffre Lakes weekend.. Mount Taylor trail.. juniper..” by iwona_kellie (featured)

