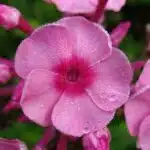
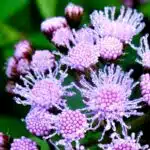
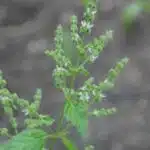
Heliotropes are a popular garden plant that is prized for their beautiful fragrance and vibrant color. These plants are native to Peru and were first introduced to Europe in the 18th century. Heliotropes belong to the borage family and are known for their clusters of small, fragrant flowers that bloom in shades of purple, blue, white, and pink.
Growing and caring for heliotropes can be a rewarding experience for any gardener. In order to ensure healthy growth and abundant blooms, it is important to understand the proper techniques for planting, watering, fertilizing, and pruning these delicate plants. Whether you are an experienced gardener or just starting out, this article will provide you with all the information you need to successfully grow and care for your own heliotrope garden.
Understanding Heliotropes: An Overview
Heliotropes are a charming and fragrant addition to any garden. With its clusters of small, delicate flowers that resemble tiny faces turned towards the sun, these plants are aptly named after the Greek words “helios” meaning sun and “tropos” meaning turning. Not only do they add beauty to your garden, but heliotropes also offer a range of benefits including their use in essential oils for medicinal purposes.
Speaking of essential oils, heliotrope oil is known for its calming and soothing properties that can help alleviate stress and anxiety. It has also been used as a sedative and muscle relaxant. The oil is extracted from the plant’s leaves through steam distillation, yielding a sweet aroma that has made it popular in the perfume industry.
Apart from their practical uses, heliotropes have symbolic meanings too. In Victorian times, they were considered an emblem of devoted love as well as prosperity and good luck. They were given as gifts to express gratitude or appreciation for someone dear to you. Today, they continue to be associated with affection and devotion making them a perfect choice for romantic gardens or as a thoughtful present for loved ones.
To ensure that your heliotrope garden flourishes, it’s important to provide them with optimal growing conditions such as proper soil moisture and sunlight exposure. In the next section, we will discuss how to choose the right location for your heliotrope plants so that you can enjoy their beauty year-round.
Choosing The Right Location For Your Heliotrope Garden
Heliotropes require full sun exposure to thrive, so it is important to choose a location with at least 6 to 8 hours of direct sunlight per day. The ideal soil type for heliotropes is well-drained, fertile soil with a pH of 6.0 to 7.5. Proper watering is critical for heliotropes, as the soil should be moist, but not soggy; the plant should not be allowed to dry out. During summer months, heliotrope gardens should be watered at least once a week, and more often if necessary.
Sun Exposure
Sun exposure is a crucial factor to consider when growing heliotropes. These plants are known for their love of sunlight, but too much exposure can be detrimental to their health. As such, it is essential to provide them with adequate sun protection, especially during the hottest parts of the day.
When choosing the right location for your heliotrope garden, consider the optimal timing for sun exposure. Early morning and late afternoon are ideal times as they provide enough sunlight without exposing the plant to extreme heat. Additionally, it is important to avoid planting your heliotropes in areas where they will receive direct sunlight all day long.
To ensure that your heliotropes thrive, monitor their sun exposure regularly and adjust accordingly. If you notice signs of sun damage such as wilting or yellowing leaves, move them to a more shaded area or provide additional sun protection such as using shade cloth or umbrellas. By taking these simple measures, you will help your heliotropes grow healthy and beautiful all season long.
Soil Type
When it comes to choosing the right location for your heliotrope garden, soil type is another crucial factor to consider. These plants thrive in well-draining soil with a pH level of 6.0-7.5, making it essential to test the soil before planting. If the pH levels are too low or high, adding lime or sulfur can help adjust the acidity levels and create a more suitable environment for your heliotropes.
In addition to pH levels, proper drainage is also critical for heliotrope growth. Poorly drained soil can cause root rot and other fungal diseases that can ultimately lead to plant death. To ensure adequate drainage, consider adding organic matter such as compost or sand to improve soil texture and increase water permeability.
When choosing a location for your heliotrope garden, look for areas with well-draining soil and avoid areas prone to standing water or heavy clay soils. By providing favorable growing conditions such as optimal pH levels and proper drainage solutions, you will help your heliotropes grow strong and healthy throughout their lifecycle.
Soil Preparation And Planting Techniques
After selecting the ideal location for your heliotrope garden, it’s time to focus on soil preparation and planting techniques. Heliotropes thrive in well-draining soil that is rich in organic matter. To achieve this, start by removing any weeds or debris from the planting area. Next, loosen up the soil to a depth of at least 12 inches using a tiller or garden fork.
Composting benefits heliotropes greatly as it enriches the soil with nutrients necessary for their growth. Incorporating compost into the soil before planting will ensure that your heliotropes have access to these vital nutrients. Additionally, raised bed options are an excellent choice for growing heliotropes as they provide adequate drainage and can be filled with nutrient-rich soil.
When it comes to planting techniques, heliotropes should be spaced 12-18 inches apart and planted at a depth of 1/4 inch. Ensure that the plants receive ample sunlight throughout the day and water them regularly to maintain moisture levels in the soil.
Next up: watering your heliotropes – tips and tricks!
Watering Your Heliotropes: Tips And Tricks
Water is an essential element that your heliotropes need to thrive. These flowers need adequate watering to ensure their survival, especially during the hot and dry summer months. Heliotropes prefer moist soil, but overwatering can suffocate the roots and cause rotting. Therefore, it is crucial to keep a balance between hydration and drainage.
The frequency of watering depends on various factors such as temperature, humidity, and soil moisture. During the growing season, heliotropes require consistent moisture levels in their soil. A general rule of thumb is to water them once or twice a week depending on the weather conditions. However, if you live in a particularly dry area or have sandy soil, you may need to increase the frequency of watering.
To monitor your heliotropes’ soil moisture levels, insert your finger about one inch deep into the ground. If it feels dry, then it’s time to water your plants. Avoid wetting the foliage as this encourages fungal growth and can lead to disease development. Instead, water directly at the base of your heliotropes using a watering can or hose with a gentle flow rate. By following these tips and tricks for watering your heliotropes correctly, you are sure to have healthy flourishing plants in no time!
Transition: Now that you know how to properly hydrate your heliotropes let’s move onto fertilizing them: dos and don’ts for healthy growth!
Fertilizing Your Heliotropes: Dos And Don’ts
When it comes to fertilizing your heliotropes, it’s important to consider the type of fertilizer you want to use. Organic and synthetic fertilizers are both options, but each has its own set of advantages and disadvantages. Organic fertilizers come from natural sources such as compost, manure, or bone meal. They release their nutrients slowly over time and improve soil health. On the other hand, synthetic fertilizers are manufactured in a lab and provide an immediate nutrient boost. However, they can also cause chemical imbalances in the soil if used incorrectly.
The frequency of fertilizing is another important factor to keep in mind. Heliotropes generally benefit from regular fertilization during their growing season (spring through fall). For organic fertilizers, this means applying every four to six weeks, while synthetic fertilizers can be applied every two to three weeks. It’s important not to over-fertilize your plants as this can burn the roots and cause damage. Always follow package instructions and apply according to the recommended amount.
In order to keep your heliotropes healthy and thriving, it’s vital that you provide them with proper care and attention. Fertilizing is just one piece of the puzzle, but it can make a significant difference in promoting plant growth and flower production. By choosing the right type of fertilizer and applying it at the appropriate frequency, you’ll be able to enjoy beautiful blooms all season long. In the next section, we’ll discuss pruning your heliotropes: when and how to do it for optimal results.
Pruning Your Heliotropes: When And How
Pruning is an essential aspect of maintaining the health and beauty of your heliotropes. It is akin to giving a haircut to your plants, which removes the dead and diseased parts, helps maintain their shape, and encourages new growth. Just like how a skilled barber can bring out the best in your hair, strategic pruning can help your heliotrope thrive.
Summer pruning and winter pruning are two types of pruning that you should perform on your heliotropes. Summer pruning involves removing the tips of the branches to promote bushier growth, while winter pruning entails cutting back up to one-third of the plant’s height to prevent it from becoming too leggy. By adjusting the timing and extent of pruning, you can keep your heliotropes looking their best throughout the year.
To accomplish effective pruning, you need appropriate tools such as clean and sharp garden shears or pruners. Ensure that these tools are cleaned before use to avoid transmitting any diseases from other plants. Also, wearing gloves and protective clothing will help you stay safe while handling sharp objects near delicate plants like heliotropes. With these safety tips in mind, you’re ready to give your heliotropes a professional-looking trim.
Now that you’ve learned about when and how to prune your heliotropes let’s delve into dealing with common pests and diseases that may afflict them. By taking a proactive approach towards plant care, you can minimize the risk of problems arising so that you can enjoy healthy blooms all season long.
Dealing With Common Pests And Diseases
After pruning your heliotropes, it is important to take preventative measures against common pests and diseases. While heliotropes are generally hardy plants, they can still be susceptible to a variety of issues such as whiteflies, spider mites, and powdery mildew. One effective preventative measure is to regularly inspect your plants for any signs of infestation or disease.
If you do notice any problems with your heliotropes, there are several organic remedies you can use to combat them. For example, neem oil is a natural insecticide that can be used to control whiteflies and spider mites. Additionally, a solution of baking soda and water can help prevent powdery mildew from spreading. It is important to research the specific issue affecting your heliotrope in order to determine the most effective organic remedy.
By taking these preventative measures and using organic remedies when necessary, you can ensure that your heliotropes remain healthy and vibrant. In the next section, we will discuss the benefits of propagating your heliotropes and various methods for doing so.
| Pest/Disease | Symptoms | Prevention |
|---|---|---|
| Whiteflies | Tiny white insects on leaves | Regular inspection |
| Spider Mites | Webbing on leaves | Neem oil spray |
| Powdery Mildew | White powder on leaves | Baking soda solution |
Propagating Your Heliotropes: Methods And Benefits
Heliotropes are beautiful plants that add a touch of elegance to any garden. If you want to propagate your heliotropes, there are two main methods that you can use: air layering and root division.
Air layering is a propagation method that involves cutting into the stem of the plant at a point where it is still green and healthy. You then wrap this portion of the stem in damp sphagnum moss and secure it with plastic wrap. Over time, roots will begin to grow from this section of the stem, which can then be planted in soil to form a new plant.
Root division, on the other hand, involves digging up an established heliotrope plant and carefully dividing its roots into smaller sections. Each section should have several stems and leaves, as well as some healthy roots. These sections can then be replanted in soil to create new plants.
Propagating your heliotropes has many benefits, including being able to produce more plants for your garden or sharing them with others. Additionally, propagating your own plants allows you to control the quality of the new plants by selecting only the healthiest specimens for propagation.
Numeric List:
Here are four reasons why you should propagate your own heliotropes:
- It’s an easy way to get more plants for free.
- You can control the quality of your new plants.
- You can share your love of gardening with others by giving them propagated plants as gifts.
- Propagating your own plants is a great way to learn more about horticulture and gardening techniques.
With these benefits in mind, let’s now move on to discussing whether planting heliotropes in containers or directly in the ground is best for these lovely flowers.
Containers Vs. Ground Planting: Pros And Cons
Like many plants, heliotropes can be grown in containers or in the ground. Each method has its pros and cons, and choosing which option to go with depends on the gardener’s personal preferences, space availability, and overall growing goals. Growing heliotropes in containers provides a level of flexibility that ground planting cannot match. Containers are perfect for gardeners who don’t have much outdoor space or for those who want to move their plants around to take advantage of changing sunlight conditions throughout the day.
However, container limitations can also hinder plant growth if not taken into consideration. Heliotropes grown in containers will require more frequent watering than those planted in the ground since water tends to evaporate more quickly from soil in pots. Container-grown heliotropes may also outgrow their pots quickly and require regular repotting to provide adequate root space for healthy growth.
On the other hand, planting heliotropes directly into the ground provides them with a permanent home where they can thrive without any size restrictions. Ground planting allows roots to spread out widely and deeply into nutrient-rich soil, resulting in healthier and more robust plants. While ground planting may limit movement options once established, it is an excellent choice for gardeners who have plenty of outdoor space and want to create a long-lasting flower bed that will continue to produce beautiful blooms year after year.
| Pros of Container Planting | Cons of Container Planting |
|---|---|
| Perfect for small spaces | Frequent watering needed |
| Portable plants | Regular repotting required |
| Easier access for pest control | Limited root space |
In summary, both container and ground planting options have their benefits when it comes to growing heliotropes. Gardeners should weigh up the pros and cons before deciding which method is right for them based on their individual needs. Ultimately, whether you choose container or ground planting, both methods offer unique advantages that can result in beautiful and healthy heliotropes. In the next section, we will discuss companion plants for heliotropes, which can improve their growth and overall appearance.
Companion Plants For Heliotropes
When it comes to companion planting with heliotropes, it’s important to consider the best colors and planting combinations. Heliotropes pair well with other sun-loving plants, such as marigolds, petunias, and zinnias. These colorful flowers will complement each other nicely in any garden bed or container.
Maintenance techniques for companion plants vary depending on the specific species chosen. However, a general tip is to prune regularly to prevent overcrowding and promote healthy growth. Deadheading spent blooms will also encourage more flowers to bloom throughout the season.
Incorporating heliotropes into landscaping and design can add a beautiful touch to any space. Consider using them as a border plant or in containers for an eye-catching display. Additionally, heliotropes work well in cottage-style gardens alongside other fragrant plants like lavender and rosemary. With their sweet vanilla scent and stunning purple blooms, heliotropes are sure to be a standout feature in any garden design.
Using Heliotropes In Landscaping And Design
- Heliotropes can be planted in a sunny area with well-draining soil and require regular watering to maintain a healthy growth.
- When planting heliotropes, be mindful of the mature size of the plant and the desired effect in the landscape design.
- For a stunning arrangement, combine heliotropes with other flowers in complementary colors to create a beautiful display.
- When creating a design, consider the texture and color of the heliotropes to draw attention to particular features and to create a bold statement.
- Heliotropes can be used to create a visual transition from one area of the landscape to another, providing a harmonious flow.
- Incorporating heliotropes into a design can provide a sense of depth and can bring warmth to any outdoor space.
Planting Heliotropes
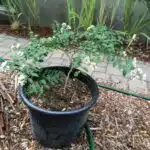
When it comes to planting heliotropes, there are a few key factors to consider. First and foremost is the type of gardening you plan to do – container gardening or in-ground planting. If you opt for container gardening, choose a pot that is at least 12 inches deep and wide, as these plants have deep roots. Ensure the container has adequate drainage holes to prevent waterlogging.
Next, before planting your heliotropes, it’s important to test your soil. Heliotropes prefer well-draining soil with a pH level between 6.0 and 7.5. Test your soil using a kit available at garden centers or contact your local cooperative extension office for assistance. If the soil pH is too low, add lime; if the pH is too high, add sulfur.
Once you’ve selected your container or planting spot and tested your soil, it’s time to plant! Dig a hole that is twice as wide as the root ball of your heliotrope plant and gently loosen the roots before placing it in the hole. Backfill with soil and press firmly around the base of the plant to remove any air pockets. Water thoroughly after planting and keep an eye on moisture levels during the growing season. With proper care, heliotropes will thrive in your garden or containers!
Creating Arrangements
In addition to their delightful fragrance and attractive appearance, heliotropes are versatile plants that can be used in various landscaping and design projects. One way to showcase the beauty of these flowers is by creating arrangements that highlight their unique features. Arrangement ideas for heliotropes can range from simple bouquets to elaborate centerpieces. When creating an arrangement, consider the color combinations of your heliotropes and other flowers or foliage you plan to include.
One popular arrangement idea for heliotropes is a bouquet of mixed pastel colors. Pairing light pink, lavender, and white heliotropes with other soft-hued flowers like roses or snapdragons can create a delicate and romantic display. Another option is to use contrasting colors like deep purple heliotropes with bright yellow sunflowers or orange marigolds for a bold and eye-catching arrangement.
When designing an arrangement with heliotropes, it’s important to keep in mind the size and shape of the container you plan to use. A tall vase may work well for longer-stemmed varieties, while a shallow bowl could be more suitable for shorter stems. Additionally, incorporating greenery like ferns or ivy can add texture and depth to your arrangement.
Overall, using heliotropes in arrangements can provide endless possibilities for expressing creativity and enhancing any space with their charming presence. Whether you’re creating a bouquet for a special occasion or sprucing up your home decor, these lovely flowers are sure to delight anyone who encounters them.
Enhancing Design
When it comes to using heliotropes in landscaping and design, there are many ways to enhance their beauty and create stunning displays. One approach is to focus on color schemes, which can help bring out the unique characteristics of these flowers. For example, combining pastel hues like light pink and lavender with other soft-colored blooms such as roses or snapdragons can produce an elegant and romantic effect.
Another way to enhance the design of heliotrope arrangements is through creative arrangements that incorporate different shapes and sizes of containers. Tall vases might be suitable for longer-stemmed varieties, while shallow bowls could work well for shorter stems. Additionally, incorporating foliage such as ferns or ivy can add texture and depth to your display.
Overall, there are many ways to use heliotropes in landscaping and design by making use of color schemes and creative arrangements. These lovely flowers are versatile plants that can be used in various projects, adding a charming presence wherever they are placed. Whether you’re creating a centerpiece for a special occasion or simply sprucing up your home decor, heliotropes are sure to delight anyone who encounters them.
Overwintering Your Heliotropes: What You Need To Know
Heliotropes are tender perennials that typically grow as annuals in most regions. As the colder months approach, it is important to consider how to protect your heliotropes from harsh winter weather. Overwintering techniques will help ensure that your plants survive and thrive for years to come.
One of the most important aspects of overwintering your heliotropes is providing adequate winter protection. This can include wrapping the plant with burlap or a similar material, covering it with a frost blanket, or moving it to a protected area such as a garage or greenhouse. It is also important to keep the soil moist but not waterlogged during the winter months.
Another key factor in successfully overwintering your heliotropes is choosing the right location for planting. Look for an area that offers protection from strong winds and receives plenty of sunlight throughout the day. This will help promote healthy growth and prepare them for winter weather conditions.
Tips for Overwintering Your Heliotropes
- Apply a layer of mulch around the base of each plant to help insulate the roots.
- Water plants deeply before the first hard freeze.
- Prune back any dead or damaged branches before winter sets in.
- Consider using a cold frame or hoop house if you live in an area with particularly harsh winters.
Incorporating these overwintering techniques will go a long way towards ensuring that your heliotropes survive through the colder months and bloom again next year. With proper care and attention, these beautiful plants can continue to provide enjoyment and beauty in your garden for years to come.
As we move into spring, there are additional steps you can take to extend your heliotrope’s blooming season. By adjusting watering schedules, fertilization routines, and other factors, you can promote healthy growth and encourage longer blooming periods.
Tips For Extending The Blooming Season
One way to extend the blooming season of heliotropes is by deadheading. Deadheading refers to removing spent flowers from the plant regularly. This process encourages new growth and helps the plant conserve energy that would otherwise be spent on producing seeds. Deadheading also improves the overall appearance of the plant, making it look more attractive.
In addition to deadheading, there are several winter care techniques that can help extend the blooming season of heliotropes. As temperatures drop in colder months, it’s important to protect your plants from frost damage by covering them with a blanket or tarp. You can also add mulch around the base of your plants to help insulate their roots from freezing temperatures. Additionally, you should reduce watering during winter months as plants require less water in cooler weather.
By practicing these techniques, you can expect your heliotrope plants to bloom for an extended period of time. It’s important to note that while these practices may not guarantee continuous blooms throughout the year, they certainly increase your chances of prolonging their flowering period. In our next section, we will discuss how you can harvest and use heliotrope flowers for maximum benefit.
Harvesting And Using Heliotrope Flowers
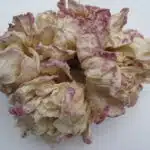
To truly make the most of heliotropes, gardeners must be able to harvest and utilize their gorgeous blooms. One way to do this is by using them in DIY projects or creating unique flower arrangements with heliotropes as the centerpiece. The small size of these flowers means that they can easily be incorporated into wreaths, garlands, or even pressed into frames for a timeless piece of decor.
When harvesting heliotrope flowers, it’s important to choose blooms that are fully open but not yet wilting. These will have the strongest fragrance and longest vase life. To use them in arrangements, simply cut the stem at an angle and place them in a vase with fresh water. Heliotropes pair well with other fragrant flowers like lavender or roses for a stunning display.
For those looking for more creative ways to use heliotrope flowers, there are endless possibilities. They can be dried and added to potpourri blends, infused into oils or vinegars for culinary uses, or even used in homemade soap recipes. With their sweet vanilla-like scent and soft purple hue, heliotrope flowers are a versatile addition to any DIY project or home decor idea.
As gardeners experiment with different ways to incorporate heliotrope blooms into their lives, they may run into common issues such as pests or disease. In the next section, we will explore some troubleshooting tips for keeping these plants healthy and thriving year-round.
Troubleshooting Common Heliotrope Issues
It is a common misconception that heliotropes are easy to grow and maintain. However, even the most experienced gardeners may encounter problems when caring for these plants. One of the most common issues with heliotropes is yellowing leaves. This can be caused by a variety of factors, including overwatering or underwatering, nutrient deficiencies, or pests. To diagnose the problem, carefully examine the leaves and check the soil moisture levels. It may also be necessary to conduct a soil test to determine if any nutrients are lacking.
Once the issue has been identified, it is important to take action quickly to revive wilted plants. If overwatering is the problem, reduce watering frequency and allow the soil to dry out slightly before watering again. For nutrient deficiencies, apply a balanced fertilizer according to package instructions. Pests can be treated with insecticidal soap or neem oil. In some cases, it may be necessary to prune affected leaves or entire stems.
Preventing future problems with heliotropes requires proper care and attention. Ensure that they are planted in well-draining soil and receive adequate sunlight throughout the day. Water consistently but avoid overwatering, as this can lead to root rot and other issues. Regularly fertilize with a balanced fertilizer and monitor for any signs of pests or disease.
In summary, yellowing leaves and wilting are common issues that gardeners may encounter when growing heliotropes. Diagnosing these problems involves careful examination of the plant and its environment, followed by appropriate action such as adjusting watering frequency or applying fertilizer or pest control measures as needed. With proper care and attention, heliotropes can thrive in your garden for years to come.
Conclusion
Heliotropes are beautiful and fragrant plants that can add a delightful touch to any garden. They require a bit of care and attention, but the effort is well worth it for their stunning blooms. When choosing a location for your heliotrope garden, make sure to select an area with plenty of sunlight and well-draining soil.
To prepare the soil for planting, mix in compost or other organic matter to improve drainage and fertility. When planting the heliotrope, make sure to space them at least 12 inches apart to allow room for growth. Watering should be done regularly, but avoid overwatering as this can lead to root rot.
Fertilizing should also be done carefully, using a balanced fertilizer every two weeks during the growing season. Heliotropes are sensitive to cold weather, so it’s important to take steps to protect them during the winter months. To extend the blooming season, deadhead spent flowers regularly.
While heliotropes are generally easy to care for, they can sometimes suffer from common issues such as powdery mildew or spider mites. If you encounter these problems, treat them promptly with appropriate measures such as fungicides or insecticides.
One potential objection to growing heliotropes might be concerns about their potential toxicity to pets or children. While heliotropes are indeed toxic if ingested in large quantities, they are generally not harmful if handled carefully and kept out of reach of pets and children. With proper care and attention, these lovely plants can bring beauty and fragrance to your garden year after year.
Image Credits
- “Box Heliotrope with Heliograph attachment” by signal mirror (featured)

