Nail polish is a popular cosmetic that enhances the beauty of nails. However, it can be a nightmare when it gets on walls, floors, or furniture. Accidents happen, and there is no need to panic when you spill nail polish on your walls. Removing nail polish from walls without removing paint seems like an impossible task, but it’s not. With the right tools and techniques, you can easily get rid of the stains without damaging your painted surfaces.
As a home improvement expert, I understand how frustrating it can be to deal with stubborn stains on your walls. That’s why I have written this article to help you learn how to remove nail polish from walls without ruining your paint job. We will explore some tried-and-tested methods that are safe and effective for eliminating nail polish spills from different types of painted walls. By following these tips and tricks, you will be able to restore the look of your walls to their original condition in no time.
Understanding The Different Types Of Paint
When it comes to removing nail polish from walls, it’s important to understand the different types of paint used on your walls. The two most common types of paint are latex and oil-based paints. Latex paint is water-based and dries quickly, making it easier to clean up with soap and water. Oil-based paints, on the other hand, take longer to dry and require solvents for cleanup.
Choosing the right paint finish is also essential when considering how to remove nail polish from painted walls. Paint finishes range from flat or matte to glossy or high gloss. Flat or matte finishes are more forgiving when it comes to hiding imperfections in a wall, but they are also more delicate and can be easily damaged by cleaning agents. Glossy finishes, on the other hand, are more durable but require special care during cleaning.
If you’re dealing with scratches on your painted walls as well as nail polish stains, it’s important to know how to repair them before attempting any cleaning methods. Minor scratches can be easily fixed by using touch-up paint that matches the color of your wall. For deeper scratches that have removed layers of paint, sanding down the affected area and applying an appropriate primer before painting over it may be necessary.
With a basic understanding of the different types of paint used on your walls and how to repair any existing damage, you can move onto preparing your tools and materials for removing nail polish stains without damaging your painted walls further.
Preparing Your Tools And Materials
To begin, it is best to gather all of the necessary materials such as a sponge, cloth, bucket, water, mild detergent, rubber gloves, vinegar, baking soda, paint scraper, nail polish remover, cotton balls, paper towels, plastic tarp, window cleaner and a razor blade.
It is important to note that some materials, such as the paint scraper, razor blade and nail polish remover, must be used with caution and with the appropriate safety gear.
A mild detergent and warm water mixture in a bucket is a preferred solution for general areas, while vinegar and baking soda are useful for specific stained areas.
Finally, for extra protection, a plastic tarp and window cleaner should be used to protect the surrounding area from any further damage.
Sponge
When it comes to removing nail polish from walls, many homeowners are hesitant to use traditional cleaning methods for fear of damaging the paint. Fortunately, using a sponge for cleaning is a safe and effective way to remove nail polish without harming the surface underneath. The benefits of sponge cleaning extend far beyond just this particular task.
Sponge cleaning is an ideal method for removing nail polish from painted walls because it is gentle yet efficient. The porous material of a sponge allows it to absorb the nail polish without spreading it around or leaving behind residue. This technique also works well on other surfaces such as countertops, floors, and furniture. In addition, sponges can be used with a variety of cleaning solutions depending on the specific type of stain or dirt being tackled.
To effectively clean with a sponge, it’s important to know which type of sponge to use on different surfaces. A soft cellulose sponge is perfect for painted walls and delicate surfaces like glass or mirrors. For tougher jobs such as scrubbing grime off tile or grout, a more abrasive sponge made of steel wool or nylon may be necessary. No matter which type you choose, be sure to wet the sponge thoroughly before use and rinse it frequently while cleaning to prevent any build-up from accumulating.
Using sponges for cleaning provides numerous benefits including gentle yet effective removal of stains and dirt without damage to underlying surfaces. With proper techniques and knowledge about which type of sponge works best on various materials, homeowners can confidently tackle any cleaning task that comes their way!
Cloth
Now that we have discussed the benefits of using sponges for cleaning, it’s important to prepare your tools and materials properly before starting any cleaning project. One essential tool that should be in every homeowner’s cleaning kit is a good quality cloth. Cloths are versatile and can be used for a variety of tasks, from dusting furniture to wiping down surfaces.
When it comes to removing stains, choosing the right fabric is crucial. Microfiber cloths are an excellent choice for general cleaning and wiping down surfaces because they are absorbent and can hold onto dirt and grime effectively. Cotton cloths, on the other hand, are perfect for polishing and shining surfaces as they don’t leave behind streaks or lint.
It’s important to note that not all fabrics are created equal when it comes to cleaning. Avoid using rough or abrasive fabrics like burlap or wool as they can scratch delicate surfaces like glass or wood. Instead, opt for soft cloths made from microfiber or cotton to ensure gentle yet effective cleaning. By selecting the appropriate cloth for each task, homeowners can achieve optimal results while protecting their belongings from damage.
Testing Your Cleaning Solution
After you have prepared your tools and materials, the next step is to test the cleaning solution. Testing effectiveness and determining safety are critical in ensuring that you do not cause any damage to the walls. Before applying any cleaning solution to the wall, it is essential to test it on a small, inconspicuous area of the wall first.
To test the effectiveness of your cleaning solution, apply a small amount to an area with nail polish stains. Allow it to sit for a few minutes and then wipe it off with a clean cloth. If the stain comes off easily without damaging the paint, then your solution is effective. However, if the paint starts to come off along with the nail polish, stop using that solution immediately.
When testing for safety, check if the cleaning solution has any harsh chemicals that may cause skin irritation or respiratory problems. Always wear gloves and protective gear when handling these solutions. If you experience any discomfort while using them, discontinue use immediately. With these precautions in mind, using rubbing alcohol can be an effective way to remove nail polish from walls without removing paint.
Using Rubbing Alcohol
Rubbing alcohol is another effective solution to remove nail polish from walls without damaging the paint. It can be used on various types of surfaces, including painted walls, tiles, and laminates. The alcohol works by dissolving the polish and breaking down its chemical bonds, making it easier to wipe off.
Before using rubbing alcohol, it is important to take some safety precautions. Firstly, wear gloves to protect your hands from the harsh chemicals. Secondly, ensure that the room is well-ventilated because rubbing alcohol has a strong odor that can cause dizziness or headaches if inhaled for extended periods. Lastly, avoid using rubbing alcohol on surfaces that are sensitive to harsh chemicals like leather or silk.
Alternative solutions to using rubbing alcohol include using non-acetone nail polish remover or white vinegar. However, these solutions may not be as effective as rubbing alcohol and may require more effort to remove stubborn stains. Therefore, rubbing alcohol remains one of the most efficient ways to remove nail polish stains from walls while preserving the paint.
Transition: Now that you have learned how to use rubbing alcohol effectively; let’s move onto another method of removing nail polish from walls – applying hairspray.
Applying Hairspray
Hairspray is a common household item that can be used to remove nail polish from walls without damaging the paint. The alcohol content in hairspray helps break down the nail polish, making it easier to wipe off. To use this method, begin by spraying the affected area with hairspray and let it sit for a few minutes. Then, use a clean cloth or sponge to wipe away the nail polish.
While using hairspray is an effective way to remove nail polish from walls, there are alternative methods that can also be used. For example, rubbing alcohol or vinegar can also be used as a solvent to dissolve the nail polish. However, it is important to note that these methods may have potential risks such as discoloration or damage to the paint on your walls.
It is recommended to test any alternative method on a small and inconspicuous area of your wall before attempting to remove the nail polish stain. This will allow you to determine if there are any negative effects before applying it to a larger area. If you are unsure about which method to use or need further assistance, consult with a professional home improvement expert for guidance.
Applying Toothpaste
- To remove nail polish from walls without removing paint, one can use toothpaste as an effective method.
- It is important to exercise caution when using toothpaste to remove nail polish, as it may contain abrasive ingredients that could damage the paint on the walls.
- Before applying toothpaste, it is important to test the toothpaste on an inconspicuous area of the wall to ensure that it won’t damage the paint.
- When applying the toothpaste, it is important to use a soft cloth to gently rub the toothpaste on the affected area.
- The toothpaste should be allowed to sit on the wall for a few minutes so that it can work its way into the nail polish.
- After the nail polish has been removed, the wall should be wiped down with a damp cloth to remove any residue from the toothpaste.
Using Toothpaste
When it comes to nail polish accidents, one of the biggest concerns is how to remove the polish from walls without causing damage. While there are many toothpaste alternatives available on the market, toothpaste itself can be a great solution for this problem. Toothpaste contains mild abrasives that are gentle enough to remove nail polish without damaging the paint on your walls.
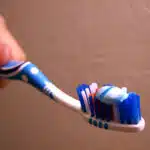
To use toothpaste as a nail polish remover, simply apply a small amount directly onto the nail polish stain. Use a soft-bristled brush or toothbrush to gently scrub the area in circular motions. Be sure to avoid pressing too hard, as this could cause damage to the paint on your walls. Once you have removed all of the nail polish, wipe away any excess toothpaste with a damp cloth.
Preventing nail polish accidents is always the best course of action, but when accidents do happen, using toothpaste can be an effective way to remove nail polish from walls without damaging the paint. By following these simple steps and using gentle pressure when scrubbing the affected area, you can restore your walls back to their original state in no time at all. So go ahead and rest easy knowing that you have an effective solution for removing nail polish stains from your walls!
Safety Precautions
As we have discussed earlier, toothpaste can be a great solution for removing nail polish stains from walls. However, it is essential to take some safety precautions while applying toothpaste to avoid any accidents or damage. First and foremost, make sure to wear appropriate safety gear like gloves and goggles to protect your skin and eyes from any irritation caused by the toothpaste.
One of the common mistakes people make while using toothpaste as a nail polish remover is using too much pressure while scrubbing. Applying excessive force could cause scratches or damage to the paint on your walls. So, it’s crucial to use a soft-bristled brush or toothbrush and apply gentle pressure while scrubbing. Moreover, avoid rubbing the affected area back and forth as it could spread the nail polish stain further.
In conclusion, using toothpaste as a nail polish remover can be an effective solution for removing stains from walls. However, one must take necessary safety precautions while applying it to avoid any accidents or damage. By following the above tips and techniques carefully, you can successfully remove the nail polish stains without causing any harm to your wall’s paint or finish.
Clean Up Process
Now that we have discussed the safety precautions to take when applying toothpaste as a nail polish remover, let’s move on to the clean-up process. One of the primary concerns while removing nail polish stains from walls is preventing smudging. After applying toothpaste and scrubbing gently, you need to wipe away the stained area with a damp cloth or sponge. It is essential to use a clean and damp cloth to avoid spreading the stain further.
Quick clean-up tips can come in handy when removing nail polish stains using toothpaste. If you notice any residual stain on your wall, dip a cotton swab in rubbing alcohol and gently rub it over the affected area. This will help remove any leftover residue without damaging your wall’s paint or finish. Additionally, always test a small hidden area of your wall before cleaning the entire stain to ensure that there are no adverse reactions.
In conclusion, cleaning up after using toothpaste as a nail polish remover requires being careful and thorough. Use clean and damp cloths or sponges to prevent smudging and consider quick clean-up tips like using rubbing alcohol if needed. With these simple steps, you can successfully remove nail polish stains from your walls without causing any damage or harm.
Using Baking Soda And Water
Have you ever had nail polish accidentally smeared onto your walls? It can be frustrating to see a bright red or neon green stain staring back at you, especially if it’s on a light-colored wall. But don’t worry, there are ways to remove the nail polish without damaging the paint. One effective method is by using baking soda and water.
To start, mix equal parts of baking soda and water in a small bowl. You want to create a paste-like consistency that’s easy to spread onto the affected area. Apply the baking soda paste onto the nail polish stain and let it sit for about 10-15 minutes. The baking soda will work its magic by breaking down the nail polish molecules, making it easier to wipe away.
If you’re looking for some additional cleaning power, here are three baking soda alternatives that you can try:
- Toothpaste: Not only does toothpaste clean teeth, but it can also remove tough stains like nail polish from walls.
- Rubbing alcohol: Soak a cotton ball or cloth with rubbing alcohol and gently dab it onto the stain until it starts to lift.
- Window cleaner: Spray window cleaner directly onto the stain and let it sit for a few minutes before wiping away with a clean cloth.
Overall, using baking soda and water is one of the best cleaning techniques for removing nail polish from walls without damaging paint. However, if you don’t have any baking soda on hand or prefer not to use it, there are other effective alternatives available that can get rid of those pesky stains just as well. Next up, we’ll explore how vinegar and water can also be used as an effective solution for removing nail polish stains from walls.
Using Vinegar And Water
Vinegar is an effective household cleaning agent that can help remove nail polish stains from walls without removing paint. It is a natural solution that can work wonders on stubborn stains. To use vinegar for this purpose, mix equal parts of white vinegar and water in a spray bottle. Spray the solution directly onto the stain and let it sit for a few minutes.
After a few minutes, use a clean cloth or sponge to wipe away the stain gently. If the stain does not come off immediately, repeat the process until it disappears completely. You may also add a small amount of dish soap to the solution to make it more effective in removing tough stains. However, be cautious when using vinegar as it may cause damage to certain surfaces such as marble or granite.
Vinegar alternatives such as rubbing alcohol and hydrogen peroxide can also be used to remove nail polish stains from walls without damaging paint. Rubbing alcohol should be applied directly onto the stain with a cloth and wiped away gently. Hydrogen peroxide should be mixed with water in equal proportions before being used to treat the stain. Always wear gloves when handling hydrogen peroxide and test it on an inconspicuous area first before treating the affected area. Vinegar safety precautions include wearing gloves when handling vinegar, avoiding contact with eyes and skin, and keeping it out of reach of children and pets.
Transition: While vinegar is an effective cleaning agent for removing nail polish stains, sometimes stronger options are necessary. One such option is using magic erasers, which provide deeper cleaning power while still being gentle on painted surfaces.
Using Magic Erasers
Using vinegar and water to remove nail polish from walls is a great option, but it may not always work for stubborn stains. In such cases, Magic Erasers can be an excellent alternative. These erasers are made of melamine foam and are known for their superior cleaning power. They can remove even the toughest stains without damaging the paint on your walls.
Benefits of Magic Erasers:
- They are effective at removing all kinds of stains, including nail polish.
- They do not require any additional cleaning solutions or chemicals.
- They are safe to use on most surfaces, including painted walls.
- They are affordable and readily available in most stores.
- They can be reused until they wear out completely.
While Magic Erasers are a great option for removing nail polish from walls, there are some alternatives you can consider as well. Rubbing alcohol or acetone can also be effective at removing stubborn stains from walls. However, it is important to be cautious when using these substances as they can damage the paint on your walls if used incorrectly.
In summary, Magic Erasers offer several benefits when it comes to removing nail polish from walls. Alternatives such as rubbing alcohol or acetone may also work, but they should be used with care to avoid damaging your walls. With these options at your disposal, you can easily remove any unsightly nail polish stains from your walls and restore them to their original condition.
Using Acetone
Metaphorically speaking, removing nail polish stains from walls is like trying to clean a canvas without damaging the artwork. You need to be careful not to remove the paint while ensuring that the stain disappears completely. One effective solution for removing nail polish stains from walls is using acetone. However, you must exercise caution when using this chemical on painted surfaces as it can cause discoloration.
Acetone is an organic compound that dissolves nail polish and other substances like glue or paint. When applied to a stained wall, acetone can break down the nail polish’s molecules, allowing them to be wiped away easily. To use acetone, apply a small amount onto a white cloth and gently rub the stain until it disappears. Be sure not to scrub too hard as this can damage the painted surface.
While acetone is an effective solution for removing nail polish stains from walls, there are alternative solutions you can try if you’re hesitant about using chemicals. For example, mixing baking soda with water to form a paste and applying it to the stain can help lift it off the surface without damaging your walls. Another option is using vinegar and warm water to create a cleaning solution that’s gentle enough for painted surfaces yet strong enough to remove stubborn stains.
TABLE:
| Solution | How-to |
|---|---|
| Acetone | Apply onto white cloth and gently rub stain |
| Baking Soda Paste | Mix baking soda with water and apply onto stain |
| Vinegar & Warm Water Solution | Mix vinegar with warm water and apply onto stain |
In conclusion, acetone is an effective solution for removing nail polish stains from walls but should only be used with caution on painted surfaces. If you prefer alternative solutions, try making a baking soda paste or vinegar/warm water solution instead. Regardless of which method you choose, remember not to scrub too hard as this can damage your walls’ paint job. Next up: Using WD-40 to remove nail polish stains from walls.
Using Wd-40
Using acetone may be a popular method for removing nail polish from walls, but it can also be harsh and cause damage to the paint. If you’re looking for cleaning alternatives that won’t damage your walls, consider using WD-40. This versatile product is not only great for lubricating household items but also works wonders as a cleaning solution.
To use WD-40 to remove nail polish from walls, simply spray it directly onto the affected area and let it sit for a few minutes. Then, gently wipe with a clean cloth or sponge until the nail polish comes off. It’s important to note that while WD-40 is generally safe to use on painted surfaces, it’s always best to test a small, inconspicuous area first to ensure there is no adverse reaction.
As with any cleaning product, safety precautions should always be taken when using WD-40. Be sure to work in a well-ventilated area and keep the product away from open flames or heat sources. It’s also important to wear gloves and eye protection when using WD-40, as it can irritate the skin and eyes. By following these safety guidelines and using this effective cleaning alternative, you can easily remove nail polish from your walls without damaging the paint.
Next up in our list of cleaning alternatives is paint thinner. While this method requires a bit more caution than others due to its potency, it can be an effective way to remove stubborn nail polish stains without harming your walls’ paint job.
Using Paint Thinner
Did you know that according to a survey conducted by the American Cleaning Institute, 49% of people accidentally spill nail polish on surfaces other than their nails? If you’re one of those people who has unintentionally gotten nail polish on your walls, don’t fret. There are several ways to remove it without removing the paint.
One method is using paint thinner. It’s important to note that paint thinner is a strong chemical and should be handled with care. Before using it, make sure the room is well-ventilated and wear gloves and protective eyewear. Apply a small amount of paint thinner to a cloth and gently rub the affected area. Be careful not to rub too hard as this can damage the paint. Once the nail polish is removed, wipe the wall with warm water and soap to remove any residue left by the paint thinner.
While using paint thinner can be effective, it’s not always necessary and there are alternatives available. One alternative is using rubbing alcohol or acetone, which are less harsh chemicals than paint thinner. Another option is using a magic eraser or baking soda paste, which can be made by mixing baking soda with water until it forms a paste-like consistency. These options may take longer or require more effort but are safer for both you and your walls.
Precautions when using paint thinner include avoiding contact with skin or eyes and keeping it away from heat sources as it is flammable. It’s also important to dispose of used rags properly as they can ignite if left in an enclosed space. If you have any concerns about using paint thinner on your walls, consult with a professional before attempting to remove the nail polish.
In conclusion, while using paint thinner can effectively remove nail polish from walls without damaging the paint, there are alternative methods available that may be safer for both you and your home. Remember to take precautions when handling chemicals like paint thinner and consider trying gentler methods such as rubbing alcohol or baking soda before turning to harsher chemicals. In the next section, we will explore another option for removing nail polish from walls: using sandpaper.
Using Sandpaper
- Sandpaper is a versatile tool that can be used to remove nail polish from walls without causing damage to the paint.
- Different types of sandpaper are available, each with their own characteristics and suitability for different tasks.
- When sanding, it is important to use an appropriate grit size and to move the sandpaper in the same direction to ensure the best results.
- Additionally, the amount of pressure applied to the sandpaper should be adjusted depending on the type of surface being sanded.
Sandpaper Types
Different grits of sandpaper serve different purposes when it comes to home improvement projects. Knowing which grit to use can help you achieve the desired result without causing damage to the surface you are working on. The most common types of sandpaper grits include coarse, medium, fine and extra fine.
Coarse grit sandpaper is typically used for heavy-duty jobs such as removing paint or rust from metal surfaces. Medium-grit sandpaper is ideal for smoothing out rough edges and preparing surfaces for painting or staining. Fine-grit sandpaper is commonly used for finishing touches on woodwork and other delicate surfaces while extra fine-grit sandpaper is perfect for polishing metals or achieving a smooth finish on painted surfaces.
When using sandpaper, it’s important to choose the right grit for the job at hand. Using a grit that is too coarse can cause damage to your surface, while using a grit that is too fine may not effectively remove the material you’re trying to get rid of. By understanding the uses of different grits of sandpaper, you’ll be able to tackle any home improvement project with confidence and achieve professional-grade results.
Sanding Techniques
Now that we have discussed the different sandpaper grit sizes, it’s important to understand the proper sanding techniques for various surfaces. When it comes to textured walls, sanding can be a challenge as the surface is not completely flat. To achieve a smooth finish on textured walls, it’s best to use a sanding block or sponge instead of traditional sandpaper sheets. This allows for better control and prevents over-sanding in certain areas.
When using a sanding block or sponge on textured walls, it’s important to move in circular motions and apply even pressure. Start with a coarse grit sanding sponge or block and work your way up to finer grits until you achieve the desired level of smoothness. Be sure to wipe down the wall with a damp cloth after each pass to remove any dust or debris.
Another important technique when sanding is to avoid applying too much pressure on the surface which can cause damage. Instead, use light pressure and let the sandpaper do the work. It’s also important to keep the sandpaper clean by periodically tapping it against a hard surface or using a cleaning tool designed for this purpose. By following these techniques, you’ll be able to achieve professional-grade results on any surface you are working on without causing damage or leaving behind unsightly marks.
Reapplying Paint
Once the nail polish has been removed from the wall, it is important to reapply paint to cover the affected area. The first step is to ensure that you have the correct paint color for your wall. Color matching can be done by taking a small sample of the existing paint or using a color swatch to match the shade as closely as possible. It is important to note that paint colors can fade over time, so it may be necessary to repaint an entire section of the wall in order to achieve a consistent look.
If you are not confident in your ability to reapply paint yourself, it may be best to hire professionals. Professional painters have experience with color matching and can ensure that the new coat of paint blends seamlessly with the existing one. They also have access to high-quality paints and tools that may not be available to homeowners.
Reapplying paint after removing nail polish from walls is an essential step in restoring the appearance of your home. Whether you choose to do it yourself or hire professionals, it is important to take care when handling paints and tools. In the next section, we will discuss how you can prevent future accidents while doing home repairs.
Preventing Future Accidents
Prevention strategies are essential for keeping your home free from unwanted stains and spills. One of the most effective strategies is to keep your nail polish in a designated area away from walls or other surfaces that can be easily stained. This could be a small table or tray specifically designed for storing nail polish and accessories.
Another helpful strategy is to use protective coverings on surfaces that are at risk of being stained, such as carpets, upholstery, and furniture. This can include placing a plastic sheet or drop cloth over these items before painting your nails. Additionally, it’s important to clean up any spills or stains immediately to prevent them from setting in and becoming harder to remove later on.
When it comes to parenting hacks for preventing accidents involving nail polish, one useful tip is to involve your children in the process. Teach them how to apply nail polish properly and encourage them to do so in an area that has been designated for this purpose. You can also incentivize good behavior by rewarding your children for taking care of their surroundings and cleaning up any messes they make.
By implementing these prevention strategies and parenting hacks, you can minimize the risk of accidents happening in your home involving nail polish. Not only will this help keep your walls free from stains, but it will also create a safer environment for you and your family. Remember, prevention is always better than cure!
Conclusion
When it comes to removing nail polish from walls, it’s important to use the right cleaning solution for your specific type of paint. Before you begin, gather all the necessary tools and materials, such as rubbing alcohol, hairspray, paint thinner, and sandpaper. It’s also important to test your cleaning solution on a small, inconspicuous area before applying it to the entire stain.
For latex or acrylic paint, rubbing alcohol is an effective solution. Simply soak a cotton ball in rubbing alcohol and gently rub the stain until it disappears. For oil-based paint, hairspray can work wonders. Spray a small amount onto the stain and let it sit for a few minutes before wiping away with a clean cloth.
If those options don’t work, try using paint thinner or sandpaper. However, be cautious when using these solutions as they can damage your wall if used improperly. If necessary, reapply paint once the stain has been removed.
To prevent future accidents, make sure to keep nail polish away from walls and other surfaces that could be easily stained. And if a spill does happen, act quickly to prevent it from setting in.
In conclusion, removing nail polish from walls without damaging the paint requires careful consideration of the type of paint used and appropriate cleaning solutions. By following these tips and taking preventative measures in the future, you’ll be able to keep your walls looking their best for years to come.
Image Credits
- “Nail polish jewelry” by Romina Campos (featured)


